


Troubleshooting pull out shower handle – Troubleshooting pull-out shower handle is a common plumbing issue, but don’t fret! This comprehensive guide will walk you through identifying the problem, gathering information, troubleshooting methods, prevention, and even advanced scenarios. From simple fixes to complex repairs, we’ll cover it all, ensuring you can confidently tackle your shower handle woes.
This guide will cover everything from identifying different types of pull-out shower handles to diagnosing common problems like a handle that won’t move, feels loose, or leaks. We’ll also provide a step-by-step disassembly and reassembly process, along with essential safety precautions.
Identifying the Problem: Troubleshooting Pull Out Shower Handle

Troubleshooting pull-out shower handles often involves understanding the specific issue. Identifying the problem is the first crucial step in any repair process. This involves carefully observing the symptoms and considering the different types of handles, each with its unique mechanism. A thorough understanding of these factors helps pinpoint the root cause and guides the repair process effectively.Common problems with pull-out shower handles stem from various factors, including mechanical wear, faulty connections, or damaged components.
A systematic approach to identifying the problem will streamline the repair process.
Common Issues with Pull-Out Shower Handles
Pull-out shower handles can exhibit various symptoms, each pointing to a specific problem. Careful observation of these symptoms is key to accurate diagnosis.
- Handle Won’t Move: The handle might not extend or retract, or the spray wand might not rotate. This could be due to jammed components, a malfunctioning motor, or a kinked hose. A stuck or frozen mechanism due to mineral deposits or lack of lubrication can also lead to this issue.
- Handle Feels Loose: A loose handle could indicate worn-out parts, such as a cracked or deteriorated handle assembly, or loose connections within the handle mechanism. This could be due to improper installation or damage to the handle itself.
- Handle Leaks: Water leaking from the handle or spray wand could be caused by a damaged seal, a loose connection, or a worn-out gasket. Mineral deposits in the pipes or connections can also contribute to leaks.
- Spray Wand Issues: The spray wand might not spray water properly, the pressure might be weak, or the spray pattern might be erratic. This could stem from a blockage in the wand, a kinked hose, or a faulty spray nozzle.
Types of Pull-Out Shower Handles
Understanding the different types of pull-out shower handles is crucial for accurate troubleshooting.
- Single-Lever Handles: These handles control both water temperature and flow using a single lever. They are generally simpler to operate but may have limited customization options. Their single-lever mechanism is simpler to maintain and troubleshoot. However, adjustments might be limited, and the design can be less robust for high-volume usage.
- Dual-Lever Handles: These handles offer separate levers for temperature and flow, allowing for greater precision in controlling the water. They can be more complex to maintain and troubleshoot due to the two separate components. Troubleshooting involves potentially different parts, increasing complexity.
- Multi-Function Handles: These handles often incorporate multiple settings, such as different spray patterns or massage functions. They offer extensive customization, but their intricate mechanisms can be more prone to malfunction and more complex to maintain and troubleshoot. Issues can range from simple hose kinks to more intricate problems involving multiple spray components.
Potential Causes of Problems
Identifying the underlying cause of a problem is essential for effective troubleshooting.
- Worn-Out Parts: Over time, parts like seals, gaskets, and hoses can wear out, leading to leaks, reduced water pressure, or difficulty in operation. This is particularly true for handles with a complex design.
- Faulty Connections: Loose connections or damaged fittings can result in leaks, malfunctioning components, or a complete loss of function. Regular maintenance, including checking connections for tightness, can prevent this issue.
- Damaged Components: Physical damage to the handle mechanism, such as cracks, fractures, or broken parts, can lead to a variety of problems, from leaks to complete failure. This can range from impact damage to gradual deterioration.
Troubleshooting Table
The following table compares different types of pull-out shower handles, highlighting their advantages and disadvantages in troubleshooting.
| Feature | Single-Lever | Dual-Lever | Multi-Function |
|---|---|---|---|
| Mechanism | Simpler, single-lever control | Separate levers for temperature and flow | Multiple settings, potentially complex |
| Maintenance | Easier to maintain | Potentially more complex | Most complex, requiring specialized tools |
| Troubleshooting | Usually less complex | More intricate diagnostics | Requires in-depth knowledge |
Gathering Information
Troubleshooting a pull-out shower handle often requires a systematic approach. Understanding the problem’s origins, the handle’s specific design, and any prior repairs is crucial to finding the right solution. This phase focuses on gathering pertinent information to accurately diagnose the issue.
Inspection Checklist for Pull-Out Shower Handles
This checklist provides a structured approach to inspecting a pull-out shower handle, ensuring that no critical component is overlooked. A thorough inspection can reveal the root cause of the problem, preventing unnecessary replacements and ensuring a lasting solution.
- Visually inspect the handle for any obvious damage, such as cracks, broken pieces, or loose connections.
- Examine the shower arm and hose for kinks, clogs, or leaks. Look for signs of wear and tear.
- Check the connections between the handle, arm, and hose for tightness and stability. Ensure no components are loose or damaged.
- Assess the spray nozzle for obstructions or blockages. A clogged nozzle will restrict water flow.
- Verify the water pressure at the showerhead. Low pressure might indicate a problem with the plumbing system, rather than the handle itself.
- Notice the water flow pattern and strength when operating the pull-out handle.
Collecting Information about the Issue
Gathering information about the issue is critical to accurate diagnosis. This involves more than just noticing the problem; it requires methodical steps to understand the specifics. This includes visual assessments and historical details.
- Thoroughly document the issue, including when it started, how frequently it occurs, and any specific conditions that trigger the problem.
- Conduct a visual inspection of all components, paying close attention to any signs of wear, damage, or unusual movement. Detailed notes on any observations are vital.
- Identify the make and model of the pull-out shower handle. This information is critical for obtaining correct replacement parts or consulting manufacturer guidelines.
- Inquire about previous repairs or modifications that might have been made to the shower handle. This could offer valuable clues about the cause of the problem.
- Note any unusual noises or sensations while operating the handle. Strange noises or vibrations might point to loose parts or faulty mechanisms.
Tools and Materials for Troubleshooting
A well-equipped toolkit is essential for effectively troubleshooting pull-out shower handles. Having the right tools ensures efficient repairs and minimizes the risk of further damage.
- Screwdrivers (Phillips and flathead): For disassembling components.
- Adjustable wrench: To loosen and tighten connections.
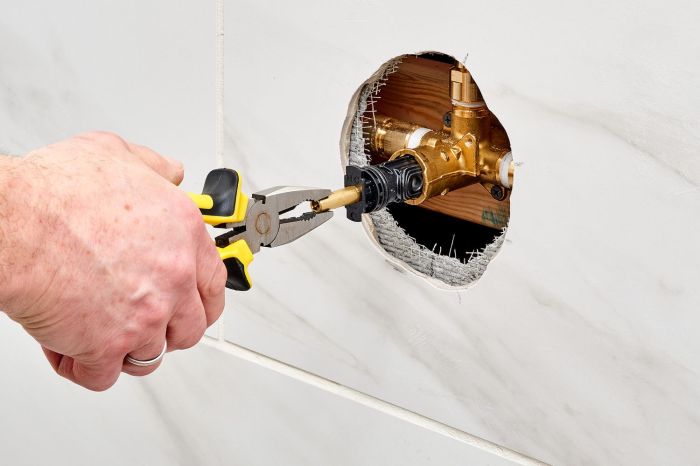
- Pliers: For gripping and manipulating parts.
- Silicone sealant (if necessary): To ensure watertight connections.
- Plumbing tape (if needed): To prevent leaks in threaded connections.
- Gloves: To protect hands from water and debris.
- Cleaning supplies (e.g., a brush): To clean components and remove clogs.
Types of Connections and Typical Issues
Different pull-out shower handles use various connection types. Understanding these differences and their common problems can help pinpoint the source of the issue.
| Connection Type | Typical Issues |
|---|---|
| Threaded Connections | Loose threads, stripped threads, damaged sealing washers, or corroded parts. |
| Quick-connect Fittings | Loose connections, damaged or worn-out clips, or misaligned components. |
| Compression Fittings | Leaking connections due to improper tightening, damaged seals, or improper installation. |
Troubleshooting Methods
Fixing a malfunctioning pull-out shower handle often involves a combination of careful diagnosis and practical repairs. Understanding the potential issues and employing the right troubleshooting steps is crucial for a successful repair. This section details common problems, repair methods, and DIY procedures, emphasizing safety precautions and cost-effectiveness.Effective troubleshooting requires a systematic approach, starting with a thorough inspection of the affected components.
Trying to fix that stubborn pull-out shower handle? Sometimes, the simplest solutions are best. Before you dive into replacing parts, consider whether your bathroom might be clinging to some questionable 90s decor trends to avoid, like avocado green tile or those super-bold geometric patterns. 90s decor trends to avoid can sometimes hide a simple fix for your pull-out shower handle.
Once you’ve ruled out dated design elements, you’ll be well on your way to a smooth, functioning shower again.
By understanding the function of each part, identifying the source of the problem becomes easier. This will guide you through the process of disassembling, inspecting, and reassembling the shower handle.
Common Troubleshooting Steps
Identifying the specific issue is paramount to effective repair. Symptoms such as a stiff handle, weak spray, or complete malfunctioning point to a range of potential problems, from loose connections to broken parts. Careful examination is vital for accurate diagnosis.
Repair Methods and Effectiveness
Several repair methods can be used, each with varying degrees of effectiveness and complexity. A loose connection can often be tightened with a wrench or pliers, a straightforward fix. If a lever is broken, replacement might be necessary, which could involve sourcing a new lever or handle. The best method depends on the specific problem and the tools available.
DIY Repair Procedures and Safety Precautions, Troubleshooting pull out shower handle
Before starting any repair, ensure the water supply is turned off to prevent water damage and electric shock hazards. Always work in a well-lit area. Use appropriate tools, such as screwdrivers, wrenches, and pliers, for safe and effective repair.
Trying to fix that stubborn pull-out shower handle? Sometimes, the issue isn’t just a simple fix. It might be a sign that you need to upgrade your water system entirely! This is where learning about alternative methods like hydroponic gardening can help. Think about how water delivery and control systems work in a what is hydroponic gardening setup, and how those principles can be applied to the shower head plumbing! It’s a whole new level of water control.
Fixing that shower handle just got a little more interesting, right?
Cost-Effectiveness and Time Commitment
DIY repairs often prove to be more cost-effective than hiring a professional. The time commitment depends on the complexity of the problem. Simple repairs, such as tightening a loose connection, can be completed in minutes, while replacing a broken component may take several hours. Consider the cost of parts and labor before making a decision.
Figuring out why your pull-out shower head isn’t working? Sometimes, a simple fix involves repurposing common household items, like old rubber bands or even a bit of duct tape. Checking out some ideas for common household items you should always repurpose might just lead you to a quick and easy solution. A little creativity can go a long way in fixing that frustrating pull-out shower handle problem!
Disassembling a Pull-Out Shower Handle
This step-by-step procedure demonstrates how to safely disassemble a pull-out shower handle:
- Turn off the water supply to the shower.
- Disconnect the water supply lines.
- Remove any visible fasteners, such as screws or nuts, that secure the handle assembly.
- Carefully separate the handle components, paying attention to the position and function of each part.
Identifying and Replacing Worn-Out Components
Inspect all components for wear and tear. Check for signs of damage or deterioration, such as frayed seals, loose springs, or cracked plastic parts. Replace worn-out components with new parts.
Reassembling the Handle
Follow the reverse order of disassembly to reassemble the handle. Ensure all connections are secure and all components are correctly positioned. Reconnect the water supply lines and turn the water back on.
Potential Issues with Components
This table Artikels potential issues with various components of a pull-out shower handle:
| Component | Potential Issue | Troubleshooting Steps |
|---|---|---|
| Arm | Bent, broken, or loose | Inspect for damage, straighten if bent, replace if broken. |
| Hose | Kinks, tears, or leaks | Inspect for damage, replace if necessary. |
| Spray Head | Clogged, loose nozzle, or damaged spray pattern | Clean or replace spray head nozzle, adjust spray head if loose. |
Prevention and Maintenance
Keeping your pull-out shower handle in top condition is key to avoiding future problems. Regular maintenance and understanding the nuances of water pressure are crucial for longevity. By following these preventative steps, you can significantly extend the life of your shower system and minimize costly repairs.Proper maintenance, beyond the initial troubleshooting, is essential to preventing future issues. This includes understanding the critical role of water pressure and recognizing potential causes of premature failure.
Regular Maintenance Tasks
Regular cleaning and inspection are vital for a long-lasting shower handle. Accumulated mineral deposits and debris can hinder smooth operation and lead to premature wear. Regular maintenance is not just about avoiding problems, but about ensuring a comfortable and efficient showering experience.
- Cleaning the handle: Use a soft cloth and mild soap or a shower head cleaner to remove soap scum, mineral deposits, and any debris from the handle mechanism. Avoid harsh chemicals that could damage the components.
- Inspecting the spray wand: Periodically inspect the pull-out wand for clogs or blockages. Dislodge any clogs with a small brush or plumbing snake. This simple task prevents water flow problems and extends the wand’s life.
- Checking the connections: Inspect all connections for any signs of leaks or loose components. Tighten any loose connections to prevent water damage and maintain optimal function. Addressing these connections proactively prevents water damage and structural failures.
Water Pressure Adjustment
Maintaining proper water pressure is crucial for both performance and longevity of the pull-out shower handle. Incorrect pressure can strain components, leading to leaks or premature failure. Adjusting the pressure is not about increasing water volume, but rather optimizing the flow for the handle’s design.
- Identifying the pressure valve: Locate the pressure-regulating valve. This is often a small dial or knob near the water supply lines.
- Adjusting the water pressure: Gradually adjust the water pressure valve until the spray pattern is consistent and powerful, but not overly forceful. Too high pressure can cause the spray nozzle to be too forceful and cause damage to the mechanism. Too low pressure will affect the spray and make it less comfortable.
- Monitoring the performance: After adjusting the pressure, thoroughly test the pull-out shower handle to ensure consistent water flow. A sudden change in the pressure can cause damage to the handle, so monitor the system to avoid this.
Common Causes of Premature Failure
Several factors can contribute to premature failure in pull-out shower handles. Understanding these causes helps implement preventative measures to maximize the life of the shower handle.
- High water pressure: Excessive water pressure can quickly wear down seals, gaskets, and other components. Proper pressure adjustment is key.
- Mineral buildup: Mineral deposits from hard water can accumulate within the handle mechanism and restrict water flow, eventually leading to failure. Regular cleaning is vital to avoid this buildup.
- Inadequate maintenance: Lack of regular maintenance, such as cleaning and inspection, can lead to the accumulation of debris and damage components, ultimately reducing the life of the handle.
Preventive Maintenance Checklist
Regular inspections can help identify potential issues before they become major problems. Early detection and timely repairs will save money and frustration. The checklist provides a structured approach to proactively maintain your shower handle.
- Visually inspect the handle for any signs of damage, such as cracks, leaks, or loose connections.
- Check the spray wand for blockages or clogs. Remove them.
- Verify the water pressure is within the recommended range.
- Ensure all connections are tight and secure.
- Examine the handle mechanism for any unusual noises or vibrations.
Advanced Troubleshooting

Troubleshooting complex pull-out shower handle issues often involves diagnosing problems beyond the handle itself. This section delves into advanced techniques for addressing issues with the shower arm, hose, electrical components (if applicable), and unusual scenarios. Understanding these procedures can save significant time and expense when dealing with more intricate problems.Advanced troubleshooting requires a methodical approach, starting with a thorough inspection of all components.
It’s crucial to understand the specific mechanics of your shower system to pinpoint the source of the problem. This includes identifying the type of shower arm assembly, the material of the shower hose, and the presence of any electrical or electronic components.
Troubleshooting Shower Arm Issues
Shower arm issues can manifest in various ways, from a loose connection to a completely broken arm. Proper diagnosis requires careful inspection and methodical testing. To ensure accuracy, always turn off the water supply before starting any repairs.
- Loose Connections: A loose connection between the shower arm and the water supply can lead to leaks and reduced water pressure. Tighten the connections using appropriate tools, ensuring the nuts and fittings are securely fastened. Inspect for any corrosion or damaged threads. If the problem persists, consider replacing the damaged fittings.
- Broken Shower Arm: A broken shower arm often requires replacement. Consult the manufacturer’s instructions or a plumbing professional to determine the correct replacement arm for your system. Ensure the replacement arm is compatible with your shower system.
- Shower Arm Assembly Replacement: Replacing a complete shower arm assembly is a relatively straightforward procedure. Turn off the water supply, disconnect the existing shower arm, and connect the new assembly according to the manufacturer’s instructions. Use Teflon tape on threads to prevent leaks.
Dealing with Leaking Pull-Out Shower Heads
Leaking pull-out shower heads can be frustrating, but often the cause is simple. Here are common reasons and solutions:
- Loose Connections: A loose connection between the shower head and the hose is a common culprit. Tighten the connections and inspect for damage. Replacing damaged fittings may be necessary.
- Damaged Hose: A damaged hose, often evident by cracks or tears, can lead to leaks. If the hose is damaged, it should be replaced. Never attempt to repair a damaged hose. Replacing it is crucial for safety and preventing further leaks.
- O-Ring Issues: A worn or damaged O-ring (or similar seal) within the shower head can cause leaks. Replace the O-ring or the entire shower head if necessary.
Replacing or Repairing the Shower Hose
A faulty shower hose can lead to water leaks and potentially cause damage. Replacing or repairing the hose depends on the type of hose and the extent of damage.
- Inspecting the Hose: Examine the hose for cracks, tears, or other signs of damage. Assess the extent of the damage to determine if repair is possible or if replacement is necessary. Inspect the hose connection points for any signs of damage or corrosion.
- Repairing the Hose (if possible): If the hose has a small tear or crack, you may be able to repair it with a suitable patch or sealant. Consult a plumbing professional for proper methods. However, extensive damage typically necessitates replacement.
- Replacing the Hose: Replacing the hose involves disconnecting the old hose, ensuring the water supply is turned off, and attaching the new hose to the shower arm and the water supply. Use Teflon tape on threads to ensure a watertight connection. Follow the manufacturer’s instructions for the correct replacement process.
Dealing with Pull-Out Shower Head Clogs
Clogs in the pull-out shower head can restrict water flow. Common causes and solutions are Artikeld below.
- Removing Obstructions: Disassemble the shower head to identify and remove any debris, such as hair, soap scum, or other foreign objects. Use a small brush or a plumbing snake to dislodge any clogs in the shower head.
- Cleaning the Shower Head: Clean the shower head thoroughly to remove mineral deposits or buildup. Use a mild cleaning solution or a mixture of vinegar and water.
- Professional Cleaning: If the clog persists, contact a plumbing professional for a thorough cleaning or a potential replacement.
Wrap-Up
In conclusion, troubleshooting a pull-out shower handle can be tackled effectively with a methodical approach. By understanding the various types of handles, common problems, and troubleshooting steps, you can confidently address issues ranging from loose connections to more complex scenarios. This guide provides a comprehensive resource to equip you with the knowledge and skills needed to repair your pull-out shower handle yourself, saving you time and money.