


Seeds to not start can be a frustrating experience for any gardener. This comprehensive guide delves into the common reasons why seeds fail to germinate, from environmental factors and storage conditions to potential seed-related issues. We’ll explore troubleshooting techniques, optimal starting conditions, various methods, and crucial steps to prevent future failures. Get ready to uncover the secrets to successful seed germination!
Understanding the intricacies of seed germination is key to achieving a bountiful harvest. This guide will walk you through the process of identifying the root causes of germination problems, troubleshooting techniques, and optimizing your seed starting environment. From selecting high-quality seeds to proper storage, you’ll learn the best practices to ensure your seeds take root and thrive.
Identifying Reasons for Non-Germination
A frustrating experience for any gardener or seed enthusiast is witnessing seeds fail to sprout. Understanding the reasons behind non-germination is crucial for optimizing seed viability and maximizing your planting success. Often, a seemingly straightforward process can be affected by a multitude of factors, from environmental conditions to inherent seed quality. This exploration delves into the multifaceted reasons behind this common problem.
Environmental Factors Inhibiting Germination
Environmental conditions play a significant role in a seed’s ability to germinate. Temperature fluctuations, moisture levels, and light exposure all influence the metabolic processes necessary for the seed to break dormancy and initiate growth. For instance, seeds of certain species require specific temperature ranges to germinate effectively. Excessive heat or cold can damage the embryo, preventing it from developing into a seedling.
Likewise, inadequate moisture can lead to dehydration and inhibit the vital biochemical reactions required for germination. Insufficient or excessive water can also create unfavorable conditions for seed development.
- Temperature Extremes: Seeds have optimal temperature ranges for germination. Temperatures that are too high or too low can hinder the biochemical processes within the seed, preventing it from breaking dormancy. For example, many cool-season crops require temperatures below 70°F to germinate successfully. Conversely, some warm-season crops need temperatures above 70°F.
- Moisture Levels: Adequate moisture is essential for seed germination. The seed absorbs water, which triggers metabolic activity and initiates the germination process. Excessive moisture, however, can lead to fungal growth or rotting, inhibiting the germination process.
- Light Exposure: Some seeds require light to germinate, while others are light-insensitive. Exposing light-sensitive seeds to light can prevent or delay germination. For example, some species of wildflowers require light for the germination process to commence.
Storage Conditions Affecting Seed Viability
Proper storage conditions are critical to maintaining seed viability. Seeds stored improperly can experience a decline in their ability to germinate over time. Factors such as humidity, temperature, and oxygen levels all influence seed longevity. Seeds exposed to high humidity or fluctuating temperatures are more susceptible to mold and fungal infections, reducing their chances of sprouting.
- Humidity: High humidity can lead to fungal growth and damage to the seed coat, reducing its viability. Properly sealed storage containers and appropriate humidity levels are vital.
- Temperature: Fluctuating temperatures can cause the seed’s internal structure to degrade, reducing its ability to germinate. Consistent storage temperatures within the recommended range are essential.
- Oxygen Levels: Oxygen levels within the storage environment can influence seed longevity. Low oxygen levels can encourage anaerobic respiration, which can damage the seed’s structure and lead to reduced germination rates.
Seed-Related Issues Affecting Germination
Seed quality itself can be a significant factor in germination failure. Damaged embryos, fungal infections, and physical injuries can all prevent seeds from sprouting. Examining the seed’s physical condition and checking for any visible signs of damage can provide valuable insights.
- Damaged Embryos: Embryos that have been damaged during the seed development process, from mechanical stress or pest damage, cannot initiate the germination process. Visual inspection for any abnormalities is essential.
- Fungal Infections: Seeds can become infected with fungi during storage or after sowing. These infections can damage the seed’s internal tissues and prevent germination. Identifying these infections and implementing appropriate measures is crucial.
- Physical Injuries: Mechanical damage to the seed coat or the embryo can impede the germination process. Any visible cracks or punctures on the seed coat can indicate potential problems.
Seed Type and Germination Susceptibility
Different seed types exhibit varying degrees of susceptibility to germination failure. Factors like seed coat thickness, dormancy periods, and inherent genetic makeup can all influence their germination rates. This table compares and contrasts different seed types and their susceptibility to germination failure.
| Seed Type | Seed Coat Thickness | Dormancy Period | Susceptibility to Germination Failure |
|---|---|---|---|
| Legumes | Medium | Variable | Moderate |
| Grasses | Thin | Short | Low |
| Woody Plants | Thick | Long | High |
Troubleshooting Seed Starting Problems
Getting seeds to germinate can be frustrating, but understanding potential issues and implementing effective troubleshooting methods can significantly improve your success rate. From ensuring seed viability to identifying and treating diseases, this guide will equip you with the tools to overcome common seed starting obstacles. Proper seed preparation and careful monitoring of environmental factors are crucial for successful germination.
Assessing Seed Viability Before Planting
Determining if seeds are truly viable before planting saves time and resources. Several methods can help determine seed viability. Testing for seed viability involves checking if a seed is alive and capable of germinating. This is important to avoid wasting time and resources on seeds that are not capable of germinating.
- Seed Testing by Scarification: Some seeds have hard seed coats that prevent water and oxygen from reaching the embryo. Scarification involves physically breaking or softening the seed coat to allow for better water absorption and germination. This is often necessary for seeds with a hard, woody, or impermeable outer layer.
- Seed Testing by Germination Test: A simple germination test can quickly identify viable seeds. This method involves placing seeds on a damp paper towel or in a germination medium, maintaining consistent moisture and temperature. The presence of a healthy seedling indicates viability. By placing a small amount of seeds on damp paper towel and keeping it in a humid environment, you can determine whether or not the seed is viable.
The length of time it takes for a seed to germinate can vary depending on the species.
- Seed Testing by Floating Test: Seeds that float in water may not be viable. This is because the seed may have an air pocket, which would prevent the seed from germinating. Seeds that sink to the bottom indicate a higher chance of viability.
Testing Seed Moisture Content
Maintaining appropriate seed moisture is critical for germination. Seeds that are too dry or too wet can hinder germination. Different methods can be employed to evaluate seed moisture content. These tests are crucial for ensuring seeds are at the ideal moisture level for optimal germination.
- Using a Moisture Meter: Digital moisture meters provide a precise measurement of seed moisture content. These devices are calibrated to specific types of seeds and give a numerical value of moisture level, helping determine if the seeds are too dry or too wet.
- Weighing Seeds Before and After Drying: A simple method to gauge seed moisture is to weigh a sample of seeds before and after drying them. The difference in weight indicates the amount of water lost, reflecting the initial moisture content.
- Visual Inspection: A visual inspection can provide a general indication of moisture content. Healthy seeds should have a firm texture and a uniform appearance. Seeds that are too soft or mushy may be overly moist, while seeds that are brittle or cracked may be too dry.
Identifying Signs of Fungal or Pest Damage in Seeds
Fungal or pest infestations can significantly impact seed germination. Identifying these issues early can help prevent widespread damage. Early detection is crucial for effective treatment.
- Visual Inspection: Examine seeds for discoloration, mold growth, or the presence of insect larvae or holes. Any abnormalities in appearance can suggest fungal or pest problems.
- Smell Test: A musty or unpleasant odor can indicate fungal growth. This is an important factor in identifying potential fungal problems. This technique should be used in conjunction with visual inspection to confirm the presence of mold or other fungal growth.
- Microscopic Examination: Using a microscope can help identify specific fungal or pest organisms. If there is any doubt about the cause of the issue, consulting a professional is recommended.
Procedures for Treating Seeds to Prevent or Control Diseases
Seed treatment can prevent or control diseases and pests, safeguarding your seeds and promoting healthy germination. Applying these methods before planting can prevent the spread of disease and promote healthy growth.
Ugh, those stubborn seeds just won’t sprout! I’ve tried everything, but apparently, my garden’s got a bit of a pest problem, like carpenter bees. If you’re dealing with these persistent wood-boring insects, learning how to get rid of carpenter bees effectively might just be the key to a thriving garden. Check out this helpful guide how to get rid of carpenter bees for some great tips.
Maybe once I get those bees under control, my seeds will finally start growing!
- Seed Soaking: Soaking seeds in a diluted solution of fungicide or insecticide can help prevent fungal or pest infestations. Follow the instructions carefully on the product label.
- Heat Treatment: Heat treatment can kill many pathogens that might be present in the seeds. Heat treatment is a useful technique to destroy any pathogens that may be present in the seed.
- Seed Coating: Coating seeds with a fungicide or insecticide can provide a protective barrier against disease and pests. Using a seed coating will help protect the seed from damage and promote germination.
Troubleshooting Germination Problems in Different Types of Seeds
Different seeds have varying germination requirements. This table Artikels steps for troubleshooting germination problems in common seed types.
| Seed Type | Possible Problems | Troubleshooting Steps |
|---|---|---|
| Beans | Slow germination, no germination, root rot | Ensure proper moisture, check for seed viability, use a well-draining medium, monitor temperature. |
| Lettuce | Slow germination, damping-off | Maintain consistent moisture, provide adequate light, use a sterile growing medium, monitor for fungal diseases. |
| Peppers | Slow germination, poor root development | Check for seed viability, maintain proper temperature and moisture, provide adequate light, use a well-draining medium. |
Optimizing Seed Starting Conditions

Getting seeds to sprout successfully hinges on providing the right environment. This involves more than just planting the seed; it’s about carefully controlling crucial factors like temperature, moisture, and light. Understanding these nuances can significantly improve your germination rates and ultimately lead to healthier, more robust seedlings.Different seeds have varying needs, and creating an optimal environment for each is key to success.
This guide will Artikel the ideal conditions for germination, from temperature and moisture to light and seed starting mediums. We’ll also explore how these factors interact to influence the germination process.
Ideal Temperature Ranges for Germination
Different seeds have different temperature preferences for optimal germination. Some seeds thrive in cooler temperatures, while others need warmer conditions. Knowing the ideal temperature range for each seed type is crucial for success. For example, cool-season crops like lettuce and spinach often germinate best in temperatures between 60-70°F (15-21°C). Conversely, warm-season crops like tomatoes and peppers need warmer temperatures, typically between 75-85°F (24-29°C).
Incorrect temperature can lead to delayed or failed germination.
Importance of Consistent Moisture Levels
Consistent moisture is essential for seed germination. Seeds need a certain amount of water to absorb and trigger the germination process. Too little moisture can lead to dehydration, while excessive moisture can lead to fungal growth and rot. The key is maintaining a consistently moist but not soggy environment. This can be achieved using a seed starting mix or a seed-starting tray with a water reservoir.
Role of Light in the Germination Process, Seeds to not start
Light plays a crucial role in the growth of seedlings, though not always during the germination phase. While some seeds require light to germinate, many others don’t. Knowing if a seed needs light to germinate is essential. Light can promote or hinder the growth of seedlings. For example, lettuce seeds do not require light for germination, but once they emerge, they need sufficient light for healthy growth.
Comparison of Seed Starting Mediums
Various seed starting mediums can be used, each with its own benefits and drawbacks. Soil is a common choice, but it can sometimes harbor pathogens. Seed starting mixes are often sterile and designed to provide optimal aeration and drainage, crucial for healthy seedling development. The best choice depends on the specific needs of the seed and the resources available.
For instance, seed starting mixes are often a good option for beginners as they often are pre-sterilized and contain nutrients that promote healthy growth.
Optimal Growing Conditions Table
This table summarizes the optimal growing conditions for various seed types. Note that these are general guidelines, and specific needs may vary.
| Seed Type | Ideal Temperature (°F) | Moisture Level | Light Requirements | Seed Starting Medium |
|---|---|---|---|---|
| Lettuce | 60-70 | Moist | Not required for germination | Seed starting mix |
| Tomato | 75-85 | Moist | Not required for germination | Seed starting mix |
| Pepper | 75-85 | Moist | Not required for germination | Seed starting mix |
| Spinach | 60-70 | Moist | Not required for germination | Seed starting mix |
Seed Starting Techniques and Procedures: Seeds To Not Start
Successfully starting seeds indoors often hinges on meticulous technique and precise environmental control. Proper seed starting methods, along with careful monitoring of moisture, temperature, and light, can significantly increase the germination rate and overall success of your seedlings. This section explores diverse seed starting methods and highlights key practices for optimal results.
Seed Starting Methods
Numerous methods exist for starting seeds, each with its own advantages and suitability for different plant types. Choosing the right method depends on factors like seed size, germination requirements, and the number of seeds you plan to start.
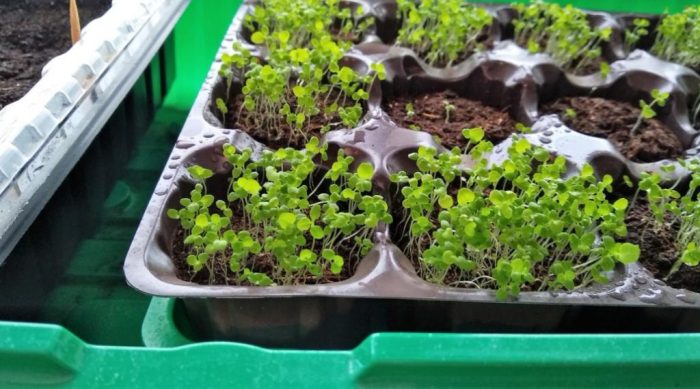
- Seed Trays: Seed trays are commonly used for starting multiple seeds at once. They provide a controlled environment and allow for easy monitoring of seedlings. These trays are typically shallow containers made of plastic or other materials, and often come in various sizes to suit different needs.
- Paper Towels: Using paper towels for seed starting is a simple and effective method for smaller quantities of seeds. The method involves placing moistened paper towels in a container and arranging seeds on top. This method works well for seeds that require minimal soil contact and a moist environment.
- Jiffy Pellets: Jiffy pellets are small, compressed peat-based pellets that expand when soaked in water, creating a miniature pot for each seed. They are ideal for delicate seeds and help to maintain consistent moisture levels. This method often simplifies transplanting since the pellet and the root system are transferred to the final growing location.
- Seed Starting Pots: Individual pots provide a dedicated space for each seed, allowing for easy handling and transplanting. These pots come in various sizes, depending on the plant and its growth requirements. Potting mix, often specifically formulated for seed starting, is crucial for proper drainage and aeration.
Steps for Successful Germination
Regardless of the method, consistent moisture, appropriate temperature, and adequate light are crucial for successful germination. Follow these general steps for all methods:
- Soak Seeds (if necessary): Some seeds benefit from soaking in water for a period before planting. This helps soften the seed coat, increasing the likelihood of germination. This process can vary greatly depending on the type of seed and its expected germination rate.
- Prepare the Medium: Ensure the chosen medium (soil, paper towels, or pellets) is moist but not waterlogged. Overwatering can lead to root rot.
- Plant Seeds: Follow the specific planting depth guidelines for each seed type to avoid improper placement.
- Maintain Moisture and Temperature: Maintain consistent moisture levels by misting or gently watering as needed. Control the temperature to match the plant’s requirements. A humid environment is often necessary for proper seed germination.
- Provide Light: Provide adequate light, either through a grow light or natural sunlight, depending on the seed type. Seedlings require sufficient light for healthy growth.
Comparing Seed Starting Containers
Different containers offer unique advantages and disadvantages for seed starting. Consider factors like the size and shape of the container, drainage, and potential for root development.
| Container Type | Advantages | Disadvantages |
|---|---|---|
| Seed Trays | Affordable, allows for multiple seeds, easy to monitor | Can be difficult to water evenly, may require more frequent watering |
| Paper Towels | Simple, ideal for delicate seeds, minimal soil required | Less space efficient, may require more attention to moisture |
| Jiffy Pellets | Pre-moistened, easy transplanting, good moisture retention | Can be more expensive, not suitable for all seed types |
| Individual Pots | Ideal for individual plant growth, easy to handle, excellent for larger seeds | Higher cost per seed, requires careful watering and monitoring |
Watering and Environment Maintenance
Maintaining the right environment is critical for successful seed germination. Consistency in moisture and temperature is key. Avoid overwatering, which can lead to root rot, and ensure proper air circulation to prevent fungal diseases.
So, those seeds just aren’t taking off? Frustrating, right? Sometimes, even the best-laid plans for a vibrant garden go awry. Fortunately, there are some surprising solutions out there, like using dish soap for window condensation, which can actually improve your seed-starting success rate! Dish soap for window condensation might seem unrelated, but it can actually address some underlying issues that are preventing your seeds from sprouting.
Regardless of the method, I’m still determined to get those seeds going!
Maintaining a consistent temperature and humidity level is essential. Use a seed starting heat mat or a humidity dome for optimal conditions.
Seed Starting Techniques for Different Plant Types
Seed starting techniques can vary based on the specific plant species. Different plant types have different germination requirements. Understanding these variations is essential for success.
Ugh, those seeds just aren’t taking off. I’ve tried everything, but they’re stubbornly refusing to germinate. Maybe I need a new approach. Speaking of new approaches, I’ve been researching the best random orbital sanders lately to prep my workshop for a major project. Tools like the best random orbital sanders might give me the smooth finish I need.
Back to the seeds, I think I need to re-evaluate my soil mix. Maybe the problem lies there.
| Plant Type | Starting Method | Specific Considerations |
|---|---|---|
| Lettuce | Seed Trays | Requires consistent moisture and cool temperatures. |
| Tomatoes | Individual Pots | Need consistent moisture and warm temperatures. |
| Peppers | Individual Pots | Warm temperatures are crucial. |
| Flowers | Seed Trays or Jiffy Pellets | Seed depth and consistent moisture levels are key. |
Preventing Common Seed Starting Mistakes
Starting seeds indoors can be a rewarding experience, but it’s easy to make mistakes that hinder germination. Understanding common pitfalls and how to avoid them is crucial for success. By carefully selecting your seeds, ensuring proper storage, and maintaining optimal conditions, you can significantly improve your germination rates and cultivate healthy seedlings.
Selecting High-Quality Seeds
Choosing seeds with a high germination rate is essential for successful seed starting. Look for seeds that are fresh, viable, and free from any damage or signs of mold. Reputable seed companies often provide germination percentages on their seed packets. Older seeds, while potentially still viable, typically have lower germination rates. It’s wise to start with seeds known for high viability to maximize your chances of success.
A good rule of thumb is to purchase seeds from reputable sources, as this often translates to higher quality.
Proper Seed Storage and Handling
Seed longevity is directly impacted by how they are stored. Proper storage conditions help prevent premature aging and maintain viability. Seeds should be stored in a cool, dry, and dark place. Ideally, this is a sealed container, like a paper envelope or a plastic bag, kept at temperatures between 32-40°F (0-4°C). Exposure to light, high temperatures, or humidity can drastically reduce viability.
Handling seeds gently is crucial to avoid damage that can reduce their ability to germinate. Avoid over-handling the seeds before planting; this could cause damage that may not be immediately apparent.
Maintaining Optimal Seed Starting Conditions
Consistent moisture and temperature are key to germination. Seeds need a moist environment for the initial stages of growth. The specific moisture needs will vary based on the seed type, but generally, you want a consistently moist medium, not soggy. Too much water can lead to rotting, while too little can prevent germination. Temperature is equally important; each species has an ideal temperature range for germination.
Maintaining consistent temperatures within that range is important for successful germination. Avoid sudden temperature fluctuations, as these can also hinder germination.
Avoiding Common Mistakes
Several common errors can significantly impact germination success. Understanding these mistakes and their underlying causes allows you to proactively avoid them. Improper watering, incorrect temperature control, and using poor-quality growing medium are among the frequent culprits. It is vital to provide adequate drainage and aeration to the growing medium to prevent waterlogging.
- Incorrect Watering: Overwatering can lead to root rot, while underwatering prevents germination. The medium should be consistently moist, not waterlogged. Use a moisture meter to monitor the soil’s moisture level and adjust watering accordingly.
- Inadequate Drainage: Poor drainage can lead to waterlogging, which causes root rot. Ensure the growing medium has adequate drainage holes and use a well-draining seed starting mix. Using a pot with drainage holes is important.
- Inconsistent Temperature: Seeds require a specific temperature range for optimal germination. Temperature fluctuations can hinder germination. Use a heating mat or other methods to maintain a consistent temperature within the ideal range for the seed species.
- Poor-Quality Growing Medium: A poorly formulated seed starting mix can hinder seed germination. A mix that provides adequate aeration and moisture retention is crucial for successful seed starting.
- Seed Depth Issues: Planting seeds too deep can prevent them from receiving sufficient light or water. Follow the seed packet instructions for proper planting depth. Too shallow a depth, and the seed may not be adequately anchored.
Illustrative Examples of Seed Starting Failures

Seed starting, while rewarding, can be frustrating when seeds fail to germinate. Understanding the reasons behind these failures is crucial for improving future success. This section will present real-world examples of seed starting problems, exploring the contributing factors and highlighting specific issues that can lead to non-germination.Many factors can influence seed germination, from environmental conditions to seed quality.
Incorrect watering, temperature fluctuations, poor drainage, and even seed-borne diseases can all prevent a seed from sprouting. By examining these examples, we can gain a deeper understanding of the critical steps needed for successful germination.
Seed Starting Failures in Different Environments
Environmental conditions play a significant role in seed germination. Consistency in temperature, moisture, and light is vital. Inconsistent conditions can lead to a lack of germination.
- Scenario 1: Sudden Temperature Fluctuations: A seed starter tray kept near a window that experienced sudden temperature drops during the night and rises during the day. The result was that seeds did not germinate. This is common when seed trays are placed in areas that are not insulated or are exposed to direct sunlight. The fluctuating temperatures create an unstable environment, preventing the seeds from establishing the necessary conditions for germination.
- Scenario 2: Inadequate Moisture: Seeds were placed in a seed starting mix that was too dry, resulting in no germination. The soil lacked the necessary moisture for the seeds to absorb and kickstart the germination process. This underscores the importance of consistent moisture levels in the seed starting mix. The mix should be moist, not soggy. Seed starting mixes should be tested for moisture regularly.
Seeds will only germinate when they are hydrated.
- Scenario 3: Excessive Moisture: Seeds were placed in a seed starting mix that was excessively wet, resulting in rot and no germination. This scenario highlights the delicate balance required in seed starting. While seeds need moisture, too much can lead to fungal diseases and root rot, preventing germination.
Seed Quality and Viability
Seed quality is another critical aspect of successful germination. Seeds that are old, damaged, or infected are less likely to germinate.
- Scenario 4: Old Seeds: A batch of seeds that were stored for an extended period past their recommended shelf life. This resulted in a significantly lower germination rate. Proper seed storage, including appropriate temperature and humidity, is crucial for maintaining seed viability.
- Scenario 5: Damaged Seeds: Seeds that were physically damaged during handling or transportation. Damaged seeds often show signs of cracks, punctures, or deformities. The damage can impede the seed’s ability to absorb water and initiate the germination process.
Visual Examples of Seed Damage
Visual inspection of seeds can reveal signs of damage or infection, helping to identify potential germination problems before planting.
- Scenario 6: Seed Rot: Seeds exhibiting signs of rot, such as discoloration (brown, black, or grey), soft texture, or an unpleasant odor. This indicates fungal or bacterial infection, which will prevent germination.
- Scenario 7: Seed Pests: Seeds with visible holes or signs of insect damage. Insect infestations can cause significant damage to seeds, reducing their viability and preventing germination. Identifying pest infestations is important for prevention and treatment.
Seed-Specific Germination Requirements
Different seeds have different requirements for germination. Understanding these requirements is key to success.
- Scenario 8: Different Seed Types: Lettuce seeds, for example, require consistent moisture and a relatively cool temperature to germinate. Conversely, some beans or peppers might need warmth and adequate light to sprout. Researching the specific needs of the seeds is critical.
Summary Table of Seed Starting Failures
| Scenario | Contributing Factors |
|---|---|
| Sudden Temperature Fluctuations | Inconsistent temperatures, insufficient insulation, direct sunlight |
| Inadequate Moisture | Dry seed starting mix |
| Excessive Moisture | Soggy seed starting mix, leading to rot |
| Old Seeds | Extended storage past recommended shelf life |
| Damaged Seeds | Physical damage during handling or transport |
| Seed Rot | Fungal or bacterial infection |
| Seed Pests | Insect damage |
| Different Seed Types | Varied requirements for moisture, temperature, and light |
Final Review
In conclusion, avoiding seed starting failures requires a thorough understanding of the factors influencing germination. By identifying the root causes of non-germination, troubleshooting problems effectively, optimizing conditions, mastering techniques, and preventing mistakes, you can significantly increase your chances of success. This guide provides a comprehensive framework to help you navigate the challenges and triumphs of seed starting, ultimately leading to a rewarding gardening experience.