


Repair a large hole in drywall – Repairing a large hole in drywall can seem daunting, but with the right approach, it’s entirely manageable. This comprehensive guide walks you through every step, from assessing the damage to achieving a flawless finish. We’ll cover everything you need to know to tackle this common home repair project.
We’ll explore different types of holes, the best patching materials, and essential safety precautions. Detailed explanations and step-by-step instructions will empower you to confidently repair any size or shape of hole in your drywall. Let’s dive in!
Assessing the Damage
Repairing a large hole in drywall requires careful assessment to ensure a proper and lasting fix. A thorough evaluation of the damage’s characteristics, including size, shape, and depth, is crucial for selecting the appropriate repair method and materials. Ignoring these details can lead to an unsightly or unstable repair. Understanding the various types of damage and how to measure them will guide you through the repair process effectively.
Types of Large Holes
Large holes in drywall can vary significantly in size, shape, and depth. A pinhole-sized defect differs drastically from a large, irregular gouge. Understanding these variations is essential to tailor the repair strategy. Circular holes from impact damage require a different approach than a jagged hole caused by a sharp object. Depth is also a key factor; a shallow hole can be patched differently than one that extends through multiple layers of drywall.
Consider the hole’s location; a hole near a corner or a doorway might require special attention to avoid compromising structural integrity.
Measuring the Hole
Accurate measurement is paramount for successful repair. Using a combination of tools ensures precision. A ruler or measuring tape is ideal for determining the hole’s length and width. For irregularly shaped holes, tracing the perimeter with a pen or marker on a piece of paper and then measuring the traced shape will provide accurate dimensions. Depth should also be measured carefully.
A depth gauge or a carefully inserted ruler or probe will help determine the hole’s penetration. By accurately measuring all dimensions, you will choose the correct materials for patching and ensure a strong, aesthetically pleasing repair.
Determining the Repair Approach
The best approach depends on the severity and location of the hole. A small, shallow hole might only require a patch, while a large, deep hole may need more extensive repair techniques. If the hole is near electrical outlets or plumbing, extra care is needed to avoid compromising safety and functionality. Consider the surrounding drywall as well.
If there are cracks or other damage, these must be addressed before patching the hole.
Inspecting the Surroundings
Thorough inspection of the surrounding drywall is critical. Examine the area for any cracks, loose or detached drywall, or other damage. These issues, if ignored, could lead to further problems down the line, such as recurring cracks or a deteriorated finish. Sometimes, the damage extends beyond the visible hole, requiring careful inspection to identify and address all potential issues.
For example, a hole near a window or door frame might reveal hidden damage to the surrounding drywall. Visual inspection, combined with gentle probing, is important.
Patching Materials
Several materials can be used for patching drywall. Drywall patching compound, available in various textures and finishes, is commonly used. Spacers and corner beads can be used for reinforcement, especially for larger holes or those in corners. For extremely deep holes, you might need to use a combination of techniques. Adding a layer of drywall tape or mesh reinforcement over the compound strengthens the patch, ensuring a durable repair.
Different types of drywall patching compounds have various drying times, so consider this when planning the repair process.
Preparing the Area
Getting ready to patch a large hole in drywall is a crucial step. Proper preparation ensures a strong, lasting repair that blends seamlessly with the surrounding wall. This involves meticulous cleaning, reinforcement, and surface preparation, all of which contribute to a professional-looking result.Thorough preparation is key to a successful drywall repair. This involves careful cleaning of the area around the hole, reinforcing the drywall to prevent future cracks, and ensuring a smooth surface for the patch to adhere to.
The more attention you pay to these steps, the better the final result will look.
Cleaning the Hole and Surrounding Area
Removing debris and loose drywall from the hole is essential for a strong repair. This ensures that the patch adheres properly and prevents future problems. The area surrounding the hole should also be cleaned to remove any dust or particles that could interfere with the patching process. This will also help the repair blend seamlessly into the surrounding drywall.
Necessary Tools and Materials
A comprehensive list of tools and materials is vital for a smooth repair process. This will help you avoid interruptions or delays while working.
- Drywall patch (matching the existing drywall): This will fill the hole and match the surrounding area for a seamless look.
- Drywall knife(s) in various sizes: Essential for cutting and shaping the patch to fit the hole perfectly.
- Utility knife: Useful for trimming and cutting materials.
- Putty knife(s): For applying and smoothing the compound.
- Drywall compound (joint compound): The material used to fill the hole and smooth the surface.
- Measuring tape: For accurate measurements of the hole and the patch.
- Pencil or marker: For marking the hole and the patch.
- Sandpaper (various grits): Used to smooth the compound after it dries.
- Primer: To prepare the surface for painting and ensure even color coverage.
- Paint (matching the existing wall color): To finish the repair.
- Safety glasses and dust mask: To protect yourself from debris and dust.
Removing Debris and Loose Drywall
Efficient removal of debris and loose drywall is crucial. Improper removal can lead to uneven patching and a visible repair. Methods include scraping, vacuuming, and using a stiff brush.
- Scraping: A stiff putty knife or drywall knife can effectively remove loose drywall and debris from the hole. Carefully scrape away any crumbling or loose material, ensuring you don’t damage the surrounding drywall.
- Vacuuming: Use a shop vacuum with a brush attachment to remove dust and small particles from the hole and surrounding area. This is particularly helpful for getting into tight spaces and removing fine debris.
- Stiff Brush: A stiff brush can be used to remove any remaining dust or debris. A wire brush can also be used, but with caution to prevent scratching the surrounding drywall.
Reinforcing the Drywall
Reinforcing the drywall around the hole prevents future cracks or damage. This is especially important for larger holes or areas under stress. Using drywall tape and additional compound can strengthen the area.
- Drywall tape: Use a fiberglass mesh tape to reinforce the area around the hole. This tape is applied before the compound, adding strength and preventing future cracking. Overlap the tape slightly and press firmly to ensure good adhesion.
Creating a Stable Surface
A stable surface is essential for a durable patch. A level surface ensures that the patch adheres properly and prevents future problems. This includes using the right amount of compound to fill the hole and ensure it is level.
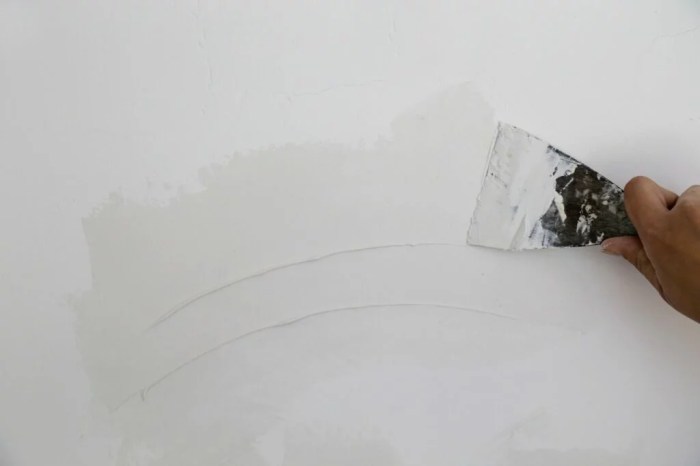
- Applying compound: Apply a thin layer of compound to the hole and smooth it out using a putty knife. Build up the compound in thin layers, allowing each layer to dry before applying the next. This method ensures the compound adheres properly to the drywall and creates a stable surface for the patch.
Patching the Hole

Fixing a large hole in drywall requires careful attention to detail, from prepping the area to the final smoothing. This stage, patching, is crucial for a professional-looking repair. Proper patching ensures the integrity of the wall, making it structurally sound and aesthetically pleasing. A well-executed patch blends seamlessly with the surrounding drywall, often indistinguishable from the original surface.A successful patch involves a combination of precise application of patching materials, skillful use of tools, and attention to proper layering and smoothing.
The key is to create a smooth, uniform surface that matches the existing drywall texture. This step-by-step guide will provide a comprehensive understanding of the patching process, from material selection to finishing techniques.
Patching Techniques
Different patching techniques cater to various hole sizes and shapes. For smaller holes, a simple application of patching material might suffice. Larger holes, however, often require a multi-layered approach. The technique chosen should consider the specific size and shape of the hole to ensure a durable and aesthetically pleasing repair.
Patching Materials Comparison
| Material | Application | Drying Time | Durability |
|---|---|---|---|
| Drywall Compound | Versatile, good for large holes, can be sanded easily | Moderate (several hours to a day, depending on thickness) | High, when properly applied and finished |
| Spackle | Ideal for smaller holes and cracks, fast drying | Fast (typically within a few hours) | Moderate, often requires multiple coats for larger holes |
| Joint Compound | Excellent for large holes, creates a smooth surface when properly layered | Moderate (several hours to a day, depending on thickness) | High, when properly applied and finished |
The table above highlights the key differences in application, drying time, and durability among various patching materials. Choosing the right material depends on the size and nature of the hole.
Applying Patching Material
| Technique | Description |
|---|---|
| Layering | Applying multiple thin coats of patching material, allowing each coat to dry completely before applying the next. This ensures a smooth, durable finish. |
| Taping | Using a joint tape to reinforce the patch, particularly at the edges. This prevents cracking and ensures a strong bond with the surrounding drywall. |
| Smoothing | Using a putty knife or other smoothing tools to level the applied patching material, ensuring a uniform surface that matches the surrounding drywall. |
Proper layering is crucial for creating a smooth, durable repair. Each layer should be thin and allowed to dry completely before the next is applied. Taping reinforces the patch, preventing cracking, and smoothing ensures a seamless blend with the existing drywall.
Using Joint Compound for Filling
Applying joint compound requires a meticulous approach. Start by filling the hole with a sufficient amount of compound, ensuring complete coverage. Then, use a putty knife to smooth the compound, working from the center outwards to avoid air bubbles and ensure a smooth surface. Allow the compound to dry completely before sanding. For larger holes, consider layering the compound, allowing each layer to dry before applying the next.
Fixing a big hole in drywall can be a real pain, but sometimes a fresh perspective is all you need. Thinking about how the mixed metals kitchen hardware trend is all the rage right now, mixed metals kitchen hardware trend might actually inspire a similar, though less flashy, approach to patching. You can use different coloured patching compounds to create a unique, albeit practical, effect to disguise the damage and make the repair almost invisible.
Ultimately, a well-executed drywall repair is about careful planning and execution.
Tools for Smoothing and Finishing
Various tools are essential for smoothing and finishing the repair. A putty knife is fundamental for applying and smoothing the compound. Sandpaper, in various grits, is used to refine the surface, gradually reducing imperfections. A sanding block provides stability while sanding, preventing accidental scratches or uneven sanding. A utility knife can be used to trim excess compound.
Proper selection of tools enhances the efficiency and quality of the repair process.
Finishing Touches

Bringing a large hole in drywall from a rough patch to a seamless, professional finish requires meticulous attention to detail. This final stage is crucial, as it transforms the repair from a visible fix to an almost invisible improvement. The steps Artikeld here will ensure a smooth, durable, and aesthetically pleasing result.The success of the drywall repair hinges on the quality of the finishing touches.
Proper sanding, priming, and multiple coats of compound are essential for achieving a flawless surface that blends seamlessly with the surrounding drywall. Selecting the right sandpaper and employing efficient techniques for applying compound are equally vital.
Sanding and Priming
Careful sanding and priming are essential steps to achieve a smooth and durable finish. Sanding levels the compound and removes any imperfections, while priming creates a better surface for the final coats. Failure to properly sand or prime can result in an uneven surface that shows through later coats of compound, ultimately affecting the overall appearance. Thorough sanding and priming ensure a smooth, even base for the final coats of drywall compound.
Applying Drywall Compound
Applying multiple coats of drywall compound is crucial for achieving a smooth surface. Applying a thin, even coat is key; thicker coats can create noticeable bumps or ridges. The compound should be applied in the direction of the wall’s seams to ensure it blends with the existing texture. Allow each coat to dry completely before applying the next, as this prevents uneven drying and subsequent cracking or chipping.
- Begin with a thin, even coat, ensuring complete coverage of the patched area. Apply the compound using a putty knife, working in a consistent direction. Using the right size and shape of putty knife for the job is crucial for an even application. Ensure to avoid leaving any visible gaps or bumps.
- Allow the initial coat to dry completely according to the manufacturer’s instructions. This typically involves waiting for several hours or overnight. Allowing insufficient drying time before applying subsequent coats can result in uneven drying, cracking, and poor adhesion.
- Apply subsequent coats in a similar manner, keeping the coats thin and even. As you apply each coat, smooth out any imperfections or ridges with a putty knife, maintaining an even surface.
Choosing the Right Sandpaper, Repair a large hole in drywall
The type of sandpaper used directly impacts the smoothness of the final finish. Different grit sandpaper serves different purposes in the sanding process. For example, coarser grit sandpaper, like 120-grit, is ideal for smoothing out initial compound coats, whereas finer grits, such as 180-grit or 220-grit, are used for achieving a finer, smoother surface. The use of varying grits ensures a gradual refinement of the patched area.
| Grit | Purpose | Description |
|---|---|---|
| 120-150 | Initial smoothing | Removes large imperfections, rough patches, and initial compound coats. |
| 180-220 | Intermediate smoothing | Removes small imperfections, creates a smoother surface, and prepares for the final sanding. |
| 280-320 | Final smoothing | Polishes the surface to a very smooth, even finish, removing any fine scratches and imperfections. |
Achieving a Flawless Finish
A flawless finish is achieved through a combination of proper compound application, meticulous sanding, and the use of appropriate tools. A putty knife is used to apply and smooth the compound, while various grades of sandpaper are used to progressively refine the patched area. Consistent application and proper technique are essential for creating a seamless and professional finish.
The final sanding should be done with the finest grit sandpaper to achieve the smoothest possible finish.
- After each compound application, use a putty knife to smooth out any irregularities and ensure a consistent surface.
- Employ the appropriate sanding grits to progressively refine the surface, starting with coarser grits and gradually moving to finer grits. Sanding in the direction of the wall’s seams minimizes the visibility of the repair. The sanding process must be gradual to avoid removing too much material and create a visible mark.
- Use a sanding block for consistent pressure and avoid sanding with excessive force, which can damage the surrounding drywall.
Troubleshooting and Common Issues: Repair A Large Hole In Drywall
Fixing a large hole in drywall can sometimes lead to unexpected problems. Knowing how to anticipate and address these issues is key to achieving a professional-looking repair. This section dives into common mistakes and how to remedy them, ensuring a flawless finish.Careful attention to detail during each step of the repair process is crucial to avoiding common pitfalls.
From improper patching techniques to overlooked environmental factors, understanding these potential obstacles will save time and frustration, ultimately leading to a successful repair.
Common Patching Mistakes
Patching errors are frequently the source of problems in drywall repairs. Recognizing these errors early on can prevent significant issues later in the process. Incorrect sizing, improper application of joint compound, and insufficient drying time are common culprits.
- Incorrect Patch Size: Using a patch that’s too small will leave noticeable gaps and potentially compromise the structural integrity of the repair. Conversely, a patch that’s too large can lead to uneven surfaces and difficult-to-sand areas. Precise measurements are essential. Ensure the patch completely covers the damaged area, allowing for overlap to accommodate sanding.
- Improper Joint Compound Application: Applying too little compound results in a weak and uneven repair. Overapplying, on the other hand, creates a thick layer that can take longer to dry and may cause unevenness after sanding. Applying thin, even coats is critical.
- Insufficient Drying Time: Rushing the drying process can lead to cracks and uneven surfaces. Following manufacturer recommendations for drying time is vital. Allowing adequate drying time prevents the compound from shrinking or cracking as it cures.
Addressing Cracks and Uneven Surfaces
Patching issues can often result in cracks or uneven surfaces. Proper techniques and materials are necessary to correct these issues.
- Cracks: Cracks in the patch can be caused by improper drying or stress on the still-wet compound. Small cracks can be filled with more joint compound, ensuring it’s well-mixed and applied in thin layers. Deep cracks may require additional support, such as reinforcing the patch with fiberglass mesh tape before applying joint compound.
- Uneven Surfaces: Uneven surfaces arise from inconsistencies in the application of joint compound. Sanding is crucial for achieving a smooth finish. Start with coarser sandpaper and gradually move to finer grits to remove imperfections. Regular checks during the sanding process are necessary to ensure the patch is level.
Repairing Improperly Dried Patches
If the patch hasn’t dried properly, the repair can be compromised. Dealing with this issue involves understanding the causes and implementing corrective measures.
- Causes: Improper drying can be due to inadequate drying time, high humidity, or insufficient ventilation. Environmental factors like excessive moisture and poor airflow can prevent proper drying.
- Solutions: If the patch is still damp, allow it more time to dry. If moisture is a problem, use a dehumidifier to reduce humidity. Ensure proper ventilation to allow air circulation around the patch. Re-applying thin layers of joint compound may be needed.
Addressing Surrounding Drywall
The surrounding drywall can also be affected by the patching process. Careful attention to the edges and seams is necessary to maintain a seamless finish.
Fixing a large hole in drywall can be a real pain, but it’s surprisingly straightforward. Before you dive into patching, though, remember to consider those often-overlooked spots for dusting, like behind picture frames or in hard-to-reach corners. Addressing these hidden areas first will make your repair job much cleaner and prevent future dust build-up, which is a critical part of the whole process.
Overlooked spots for dusting can be a significant factor in keeping the repair job clean. Then, you can focus on the drywall repair with confidence, knowing you’ve prepared the area effectively.
- Problem: Improper patching can lead to gaps or inconsistencies around the patch. Uneven sanding can expose the underlying drywall, creating an unprofessional look.
- Solution: Use a putty knife to carefully smooth the edges of the patch and surrounding areas. Apply thin coats of joint compound to fill any gaps. Sand the area thoroughly to ensure a seamless transition.
Dealing with Moisture and Humidity
Moisture and humidity are significant factors in drywall repair. Addressing these issues proactively is essential for a successful outcome.
Fixing a large hole in drywall can be a real pain, but thankfully, it’s totally manageable! To distract yourself from the tedious patching, why not check out some fantastic modern fall decorating ideas? They’re a great way to transform your space while you’re working on that hole, and once you’ve got your walls looking spick-and-span, you can really get creative with fall aesthetics.
modern fall decorating ideas And, of course, a beautifully decorated space makes the whole drywall repair project feel a little less like a chore!
- Problem: High humidity or moisture in the air can cause the joint compound to dry unevenly or crack. Moisture can also affect the underlying drywall, leading to further damage.
- Solution: Use a dehumidifier to lower humidity levels. Ensure good ventilation to circulate air around the area. If moisture is present, address the source before starting the repair.
Safety Precautions
Repairing drywall, while seemingly straightforward, can involve potential hazards. Taking appropriate safety precautions is crucial to protect yourself and your work environment. Proper ventilation, personal protective equipment (PPE), and safe tool handling are vital for a successful and injury-free repair.Understanding and implementing these safety measures will significantly reduce risks associated with dust, debris, and power tools. This section emphasizes the importance of a safe work environment and responsible material handling.
Ventilation
Adequate ventilation is paramount during drywall repair. Dust from sanding and cutting can be hazardous if inhaled. Open windows and doors, and use fans to circulate air and remove dust particles. If working in a confined space, consider using a ventilation system to effectively clear out dust. A well-ventilated space is critical to minimize the risk of respiratory issues.
Personal Protective Equipment (PPE)
Using appropriate PPE is essential for protecting yourself from various hazards. Dust masks are crucial to prevent inhaling drywall dust, which can cause respiratory problems. Wear safety glasses or goggles to shield your eyes from flying debris. Construction-grade gloves will protect your hands from cuts, scrapes, and the abrasive nature of drywall materials.
Power Tool Safety
Using power tools safely is essential for preventing accidents. Always ensure the power tools are in good working condition and have appropriate safety guards. Never operate a power tool if you are tired or under the influence of substances that impair judgment. Ensure the work area is clear of obstructions and that you have a stable footing.
Safety Procedures for Power Tools and Other Tools
Proper tool usage significantly reduces the risk of injury. When using a saw, ensure the blade is properly secured and that you maintain a firm grip. When using a sander, always wear a dust mask and ensure the work area is well-ventilated. For hand tools, ensure that they are sharp and properly maintained to prevent slipping and other potential accidents.
Material Handling and Storage
Safe handling and storage of materials are crucial. Heavy materials should be handled with proper lifting techniques to avoid strain injuries. Store materials in a designated area to prevent accidents. Securely store any potentially hazardous materials away from children and pets.
Safety Measures at Each Step
| Step of Repair | Safety Measures ||—|—|| Assessing the Damage | Wear safety glasses, use gloves for handling damaged materials || Preparing the Area | Clear the area of obstructions, secure loose items, ensure good ventilation || Patching the Hole | Wear a dust mask, eye protection, and gloves, maintain a safe distance from power tools || Finishing Touches | Use a dust mask, inspect work area for potential hazards, handle materials carefully || Troubleshooting and Common Issues | Wear appropriate PPE, consult safety guidelines for specific troubleshooting steps |
Visual Aids
Bringing your drywall repair project to life with visual aids is crucial for a successful outcome. Clear visuals help you understand the steps, the tools, and the materials involved, minimizing potential errors and maximizing efficiency. This section provides detailed descriptions of tools, materials, and techniques to aid in creating accurate images or diagrams for your drywall repair guide.Visualizing the entire process from start to finish, from assessing the damage to the final finishing touches, will allow for a comprehensive understanding and help prevent common mistakes.
This detailed approach ensures your drywall repair is not only effective but also aesthetically pleasing.
Tools and Materials
Understanding the tools and materials used in drywall repair is essential for a successful project. Different tools are needed for different tasks, and choosing the right ones will save you time and effort. Each tool has a specific function, and familiarity with these functions will greatly improve your ability to handle the repair process efficiently.
- Utility Knife: A utility knife, with a replaceable blade, is essential for cutting drywall, tape, and other materials. Its sharp blade allows for clean cuts, which are crucial for a professional-looking repair. The replaceable blade allows for easy maintenance and prevents the need to purchase a new knife frequently.
- Putty Knife: A putty knife, available in various sizes and shapes, is used for applying drywall compound, smoothing surfaces, and spreading adhesive. Different shapes and sizes of putty knives offer specialized functionalities for different tasks. The flat blade is perfect for applying compound, while the angled blade is better for smoothing the compound. The blade’s flexibility is also a critical factor in controlling the application process.
- Drywall Compound: Drywall compound, available in various types and textures, is used to fill holes and smooth out imperfections. Different types of drywall compound are suitable for different repair needs.
- Drywall Saw: A drywall saw, with a fine-toothed blade, is used for cutting through drywall and creating straight cuts. Its fine-toothed blade ensures clean cuts, essential for avoiding splintering and creating a professional finish.
- Measuring Tape: A measuring tape is used to determine the size and shape of the hole or area needing repair. Its accuracy is critical for precise measurements, avoiding mistakes during the patching process.
Drywall Compound Types
Drywall compound types vary in properties and applications. Understanding these differences will allow you to choose the right compound for your specific repair needs. Different types are suitable for different applications, ensuring a smooth, professional-looking repair.
| Type | Properties | Applications |
|---|---|---|
| All-purpose compound | Versatile, good for general patching. | Suitable for most holes and imperfections. |
| Lightweight compound | Lightweight and easy to apply. | Ideal for small repairs and for areas where weight is a concern. |
| Finishing compound | Smooth texture, used for final smoothing. | Provides a smooth finish over the patching compound. |
Patching Techniques
Different patching techniques are used for different types of holes and repairs. Applying the patching material correctly is key to a successful repair. Using the appropriate technique will result in a smooth and durable repair that blends seamlessly with the surrounding drywall.
- Applying the Compound: Apply the drywall compound in thin layers, allowing each layer to dry before applying the next. This ensures proper adhesion and prevents cracking.
- Smoothing the Compound: Use a putty knife to smooth the compound, ensuring it is level with the surrounding drywall. Smooth out any bumps or ridges to create a uniform surface.
- Filling the Hole: Fill the hole completely with the appropriate compound, ensuring the hole is completely filled to avoid any visible gaps.
Preparing the Area
Proper preparation of the area around the hole is essential for a successful repair. This step is often overlooked but significantly impacts the quality of the final result. Careful preparation will allow for a flawless repair, minimizing the chance of issues later on.
- Cleaning the Area: Thoroughly clean the area around the hole, removing any dust, debris, or loose particles. Removing these particles will ensure the compound adheres properly and prevents future issues.
- Repairing Cracks: If there are any cracks around the hole, repair them first to prevent them from spreading and causing further damage. Fixing these cracks will ensure the repair is long-lasting and looks seamless.
- Using Mesh Tape: Using mesh tape to reinforce the repair area helps to prevent cracking and ensures a strong, durable repair. The mesh tape provides extra support, which is important for maintaining the integrity of the repaired area.
Finishing the Repair
Finishing the repair involves the final steps in achieving a seamless repair. These final steps ensure a professional-looking finish, blending the repair perfectly with the surrounding drywall. A smooth, clean finish is essential for a professional-looking repair that lasts.
- Sanding: Sand the compound smooth, using progressively finer grits of sandpaper, to create a level surface. This step is critical for achieving a smooth finish, and it ensures a flawless repair.
- Applying Finishing Compound: Apply finishing compound to the sanded area to further smooth out any imperfections. Applying finishing compound will give the repair a smooth, professional-looking finish.
- Painting: Paint the repaired area to match the surrounding drywall, ensuring a uniform finish. This will blend the repair seamlessly with the surrounding drywall, ensuring a flawless look.
Conclusion
Repairing a large hole in drywall, while potentially challenging, is ultimately achievable with meticulous planning and execution. This guide provides a robust framework for understanding the process, from initial assessment to final finishing touches. Remember safety is paramount, and following the steps Artikeld here will ensure a successful repair and a professional-looking result. Now you’re ready to tackle that hole with confidence!