


Phalaenopsis leaves turning yellow signals a potential problem that needs addressing. This comprehensive guide delves into the various causes, from environmental factors to pests and diseases, offering solutions to help you save your prized phalaenopsis.
Yellowing leaves aren’t always a death sentence for your orchid. Understanding the underlying issues can lead to quick fixes and prevent further damage. We’ll explore the common culprits behind this discoloration, and equip you with actionable steps to restore your phalaenopsis to its former glory.
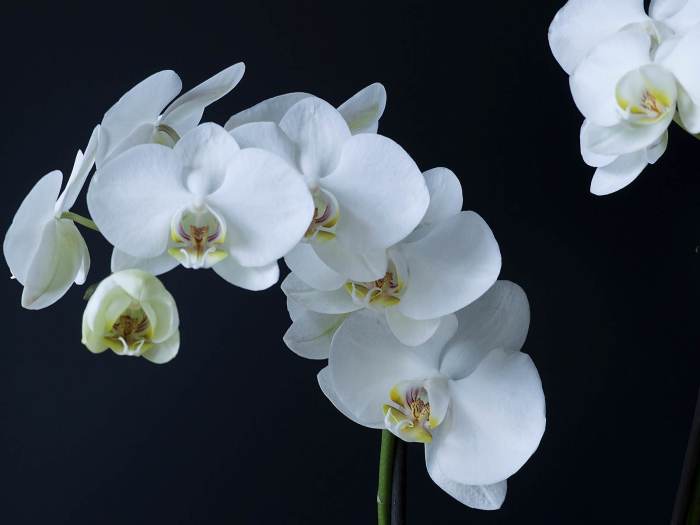
Identifying the Problem
Yellowing leaves on your Phalaenopsis orchid can be a frustrating issue, but understanding the causes can help you restore your plant to health. This often signals a problem with either environmental conditions, pests, diseases, or even nutrient imbalances. Identifying the specific pattern of yellowing is crucial for accurate diagnosis.A healthy Phalaenopsis orchid typically displays vibrant green leaves, and any deviation from this norm warrants investigation.
Understanding the nuances of yellowing can help you pinpoint the root cause, leading to effective treatment and prevention.
Causes of Yellowing Leaves
Yellowing in Phalaenopsis leaves isn’t always a sign of imminent death, but it’s a strong indicator that something is amiss. Various factors can contribute to this issue, ranging from common environmental mistakes to more subtle pest or disease problems.
Different Types of Yellowing Patterns
The pattern of yellowing can provide valuable clues about the underlying problem. Consider where the yellowing begins:
- Yellowing from the tips: This often indicates a problem with the environment, such as low humidity, or a deficiency in essential minerals like potassium or magnesium. It can also be linked to improper watering practices, such as consistently allowing the soil to dry out completely between waterings.
- Yellowing along the veins: This pattern can suggest a nutrient deficiency, particularly iron or magnesium. It’s also sometimes a symptom of over-fertilization or issues with the soil’s pH.
- Yellowing from the bottom leaves upwards: This is often a sign of overwatering, causing root rot. Waterlogged roots deprive the plant of oxygen and essential nutrients, leading to yellowing and eventual leaf drop. If you notice this pattern, immediately adjust your watering schedule.
Common Causes Table
The table below Artikels common causes of yellowing leaves in Phalaenopsis orchids, categorized by environmental factors, pests, and diseases. A combination of factors can sometimes be at play. Regular monitoring and adjusting your orchid’s care can prevent many issues.
| Cause | Symptoms | Actions |
|---|---|---|
| Nutrient Deficiency (e.g., Nitrogen, Phosphorus, Potassium) | Pale yellowing, often starting at older leaves. Leaves might also show stunted growth or discoloration, and the plant may appear generally weak. | Adjust fertilizer schedule, consider soil testing to determine the specific nutrient deficiency and use appropriate fertilizers to replenish the missing nutrients. A balanced orchid fertilizer is often recommended. |
| Overwatering | Yellowing, usually from the bottom leaves, which may become mushy or soft. Roots may appear mushy or black, indicating root rot. | Reduce watering frequency and allow the soil to dry out more between waterings. Ensure proper drainage to prevent waterlogging. |
| Underwatering | Yellowing that begins at the tips and edges of leaves, progressing inwards. Leaves might appear crispy or brittle. | Increase watering frequency, ensuring the soil is consistently moist but not waterlogged. Check the moisture level regularly. |
| Pests (e.g., Aphids, Spider Mites) | Yellowing or spotting on leaves, accompanied by visible pests. Leaves may also show signs of webbing or sticky residue. | Isolate the infected plant. Use appropriate pest control methods, such as insecticidal soap or neem oil. |
| Diseases (e.g., fungal infections) | Yellowing and browning spots on leaves, possibly accompanied by leaf rot or stem rot. The plant may also exhibit a general decline in vigor. | Isolate the infected plant and remove affected leaves. Use fungicides to treat the infection, if necessary. Improve air circulation to prevent further spread. |
Environmental Factors
Phalaenopsis orchids, with their exquisite beauty, are susceptible to environmental stressors. Understanding the interplay between light, temperature, and humidity is crucial for maintaining healthy, vibrant leaves. Incorrect environmental conditions can quickly lead to yellowing, wilting, and other detrimental effects. Properly addressing these factors is key to fostering a thriving orchid environment.
Light Intensity
Light intensity plays a significant role in phalaenopsis leaf health. Insufficient light can result in pale, yellowing leaves, while excessive light can cause leaf tips and edges to scorch and turn yellow. A balance is critical. Phalaenopsis orchids thrive in bright, indirect light. Direct sunlight, especially during the hottest parts of the day, can lead to leaf damage.
Mimicking their natural habitat, with dappled sunlight filtering through the forest canopy, provides the ideal conditions.
Temperature Fluctuations
Temperature stability is essential for the health of phalaenopsis orchids. Sudden or drastic temperature changes can stress the plant, leading to various issues, including yellowing leaves. Orchid leaves are sensitive to fluctuations, and maintaining a consistent temperature range is vital for optimal growth and leaf health.
My Phalaenopsis orchids have been sporting some yellowing leaves lately, and I’ve been racking my brain trying to figure out why. Sometimes, it’s a simple issue, like underwatering, but other times, it could be a more complex problem, like the type of water used for watering. One thing I’m considering is whether the problem might stem from the way I’m caring for my houseplants grown in water.
Houseplants grown in water can be tricky, and it’s important to ensure the water is properly changed and the plant is getting the right nutrients. I’m going to research this further to see if it could be the culprit behind my Phalaenopsis’s yellowing leaves.
Optimal Temperature Ranges
| Temperature Range | Leaf Response | Corrective Actions |
|---|---|---|
| 18-28°C (64-82°F) | Healthy growth, vibrant leaves | Maintain consistent temperature within this range. |
| Below 15°C (59°F) | Yellowing, wilting, possible chilling damage | Move plant to a warmer location; use a humidifier if necessary. |
| Above 30°C (86°F) | Yellowing, leaf drop, stress | Reduce temperature; ensure adequate ventilation and humidity. |
The table above highlights the ideal temperature range for phalaenopsis orchids and the potential effects of deviations from this range. Maintaining a consistent temperature is key to preventing yellowing and other issues. An example of a corrective action for extremely low temperatures would involve moving the plant to a warmer location, and using a humidifier to increase humidity in the surrounding environment.
Humidity
Humidity levels significantly impact phalaenopsis leaf color. Low humidity can lead to leaf edges drying and turning yellow, a condition often mistaken for other problems. Phalaenopsis orchids thrive in environments with high humidity, typically above 50%. Maintaining this level can prevent dryness and promote healthy leaf growth. Using a humidifier or placing the pot on a tray filled with water can increase humidity around the orchid.
Pests and Diseases

Yellowing phalaenopsis leaves can unfortunately stem from more than just environmental issues. Hidden threats like pests and diseases can also cause this discoloration, requiring a different approach to diagnosis and treatment. Understanding these culprits is crucial for successful orchid care.Identifying the precise cause of yellowing is essential to implement the correct solution. Sometimes, the symptoms of pests and diseases can overlap, leading to confusion.
This section will delve into the common pests and diseases that target phalaenopsis orchids, enabling you to differentiate between them and implement effective preventative and curative measures.
My Phalaenopsis orchids have been looking a bit sad lately, with some leaves turning yellow. I’ve been wondering if a vinegar solution might help, but I’m a bit confused about the difference between cleaning vinegar and white vinegar. Does anyone know if is cleaning vinegar the same as white vinegar ? I’m hoping to find the right kind of vinegar to help my orchids get back to their vibrant green selves, as yellowing leaves aren’t a good sign.
Common Pests Causing Yellowing
Phalaenopsis orchids are susceptible to various pests that can lead to yellowing leaves. Understanding the visual cues and their impact is critical for prompt intervention.
- Mealybugs: These sap-sucking insects often appear as small, white, cottony masses, primarily on the undersides of leaves and stems. Initial yellowing may manifest as small, localized spots, progressing to larger, more noticeable areas as the infestation grows. Mealybugs hinder the plant’s ability to absorb nutrients, leading to yellowing and eventual decline.
- Spider mites: These tiny arachnids are almost invisible to the naked eye. They create a fine webbing, often found on the leaves’ upper surfaces. Initial symptoms might be subtle, appearing as light yellow stippling or speckling on the leaves. As the infestation progresses, the yellowing intensifies, leading to leaf damage and potentially death of the plant. Leaf drop is also a symptom.
- Scale insects: These immobile pests often appear as small, hard bumps or patches on the stems and leaves. The initial sign is often a yellowing around the area of the infestation. As the infestation increases, it inhibits the plant’s ability to photosynthesize, leading to overall yellowing and eventual death of the affected leaf.
Diseases Affecting Phalaenopsis Leaves
Several fungal and bacterial diseases can affect phalaenopsis orchids, resulting in yellowing leaves. Early detection is paramount for effective treatment.
- Fungal Leaf Spot: This disease often presents as dark brown or black spots on the leaves, with yellowing surrounding the lesions. The spots may expand and coalesce, causing significant leaf damage. Different fungal species can cause this issue. The fungus thrives in moist environments, thus proper watering practices are crucial in prevention.
- Bacterial Blight: This disease can manifest as soft, water-soaked lesions on the leaves, stems, or flowers. The affected areas may exhibit yellowing, wilting, and eventual decay. Overwatering and improper humidity control often contribute to bacterial infections.
- Root Rot: While not directly affecting leaves in the early stages, root rot, often caused by fungi, can severely impact the plant’s ability to absorb water and nutrients. This leads to nutrient deficiencies, manifesting as yellowing leaves and eventual decline. Overwatering and poor drainage are major contributing factors.
Distinguishing Pest from Disease-Related Yellowing
Identifying the precise cause of yellowing is crucial for successful treatment. Observe the affected areas closely to differentiate between pest and disease-related yellowing.
- Pest-related yellowing often shows localized discoloration, with the yellowing progressing outward from the point of infestation. Look for pests like mealybugs, spider mites, or scale insects in the affected areas.
- Disease-related yellowing typically presents with more diffuse discoloration, spreading throughout the leaf or across the entire plant. Look for signs of fungal spots, water-soaked lesions, or decaying areas.
Prevention of Pests and Diseases
Maintaining good orchid hygiene and environmental control significantly reduces the risk of pest and disease infestations.
- Sanitation: Regularly inspect your orchids for any signs of pests or diseases. Remove and discard any affected leaves or parts promptly.
- Proper Watering: Avoid overwatering, which can create ideal conditions for fungal and bacterial growth. Ensure adequate drainage to prevent waterlogging.
- Appropriate Humidity: Control the humidity level to prevent fungal diseases from thriving. Provide proper ventilation to maintain optimal conditions.
- Pest Monitoring: Regularly check your plants for any signs of pests. Implement preventative measures, such as introducing beneficial insects, when necessary.
Nutritional Issues
Phalaenopsis orchids, with their delicate beauty, are susceptible to nutritional imbalances. These imbalances, often manifesting as yellowing leaves, can stem from insufficient nutrient levels or, conversely, from excessive amounts of certain nutrients. Understanding the specific symptoms associated with these imbalances is crucial for successful orchid care. Diagnosing the issue and implementing appropriate corrective actions is key to restoring the orchid’s health.
My Phalaenopsis orchids have had some yellowing leaves lately, and I’ve been racking my brain trying to figure out why. Sometimes, a seemingly unrelated issue like improper watering techniques can be a factor. However, I was reading up on the topic and stumbled upon the fascinating world of wire connectors. These little connectors, essential for connecting electrical wires what are wire connectors , might seem far removed from my orchid problems, but they actually got me thinking about the potential for electrical issues impacting the plant’s health.
Could a faulty electrical connection in the system somehow be affecting the phalaenopsis? I’m still investigating, but now I’m definitely going to look into that possibility as well.
Nutrient Deficiencies
Nutrient deficiencies in phalaenopsis orchids frequently lead to yellowing leaves. Identifying the specific deficiency is essential for targeted treatment. The following table Artikels common deficiencies and their associated leaf discoloration patterns:
| Nutrient | Symptoms | Corrective Actions |
|---|---|---|
| Nitrogen | Yellowing of older leaves, often progressing upwards. Leaves may appear pale or light green before turning yellow. | Increase nitrogen levels in the fertilizer. Use a fertilizer with a higher nitrogen content. Avoid overwatering, which can exacerbate nitrogen deficiency. |
| Phosphorus | Dark green or purplish discoloration of older leaves. Leaves may show stunted growth. | Use a fertilizer with a higher phosphorus content. Ensure proper watering and drainage to avoid root rot, which can hinder nutrient absorption. |
| Potassium | Yellowing or browning of leaf margins and tips, often starting from the edges. Leaves may show a scorched appearance. | Use a fertilizer with a higher potassium content. Regular watering is important, but avoid overwatering. |
| Iron | Interveinal chlorosis (yellowing between leaf veins) on younger leaves, which contrasts with healthy green veins. The leaves may appear yellow or light green. | Use an iron-chelating fertilizer or iron supplement. Ensure proper soil pH for optimal iron absorption. |
| Magnesium | Interveinal chlorosis, similar to iron deficiency, but the yellowing often starts from the middle of the leaf. | Use a fertilizer with a higher magnesium content. Adjust soil pH to ensure optimal magnesium uptake. |
Nutrient Toxicity, Phalaenopsis leaves turning yellow
Nutrient toxicity, while less common than deficiencies, can also cause yellowing and other issues in phalaenopsis. Excess nutrients can interfere with the orchid’s ability to absorb essential elements. Symptoms of nutrient toxicity often include yellowing leaves, along with other visual cues. For example, excessive nitrogen can result in lush, excessively vegetative growth at the expense of flowering.
Potassium toxicity, on the other hand, might lead to leaf margins exhibiting a scorched appearance.
Soil pH
The pH of the potting medium significantly impacts nutrient availability. Optimal pH levels for phalaenopsis orchids generally fall within a range of 5.5 to 6.5. Outside this range, essential nutrients become less accessible to the plant’s roots. Acidic soil (pH below 5.5) can hinder the absorption of certain nutrients like magnesium and iron. Alkaline soil (pH above 6.5) can negatively affect the uptake of other essential nutrients.
Therefore, regular monitoring and adjustment of the soil pH are crucial for healthy orchid growth.
Watering Practices
Phalaenopsis orchids, renowned for their exquisite blooms, are delicate plants that require careful attention to thrive. A crucial aspect of their care is maintaining the correct watering schedule. Improper watering can lead to a cascade of problems, including the dreaded yellowing of leaves. Understanding the nuances of watering techniques is paramount to ensuring the health and beauty of your Phalaenopsis.
Importance of Proper Watering Techniques
Proper watering is fundamental to maintaining the overall health of a Phalaenopsis orchid. The roots of these orchids are epiphytic, meaning they absorb moisture and nutrients from the air and surrounding environment. Maintaining the right moisture balance in the growing medium is essential for preventing root rot and other fungal diseases. Consistent, appropriate watering ensures optimal nutrient uptake and supports the plant’s natural processes.
Proper watering also helps maintain the correct humidity levels around the plant, which is crucial for its well-being.
Risks of Underwatering and Overwatering
Underwatering can cause the leaves to wilt and become dry, eventually leading to yellowing and potentially death. The plant’s ability to absorb necessary nutrients diminishes, impacting its overall health. Conversely, overwatering leads to root rot, a devastating condition that causes the roots to decay, preventing proper nutrient absorption and hindering overall plant health. Yellowing leaves can also be a symptom of overwatering, as the plant struggles to function with waterlogged roots.
Comparison of Watering Methods
| Watering Method | Leaf Response | Explanation |
|---|---|---|
| Watering from the top | Can lead to root rot if water is not properly drained. Stagnant water can create an environment conducive to fungal diseases, affecting the leaves. | Can lead to water accumulation in the leaves, potentially leading to leaf burn or fungal issues. Proper drainage is critical to prevent waterlogging. |
| Watering from the bottom (or “bottom watering”) | Generally leads to healthier roots and less risk of leaf issues, provided the roots are adequately submerged in water for an appropriate time. | Allows for thorough moisture absorption by the roots without water accumulating on the leaves, reducing the risk of fungal issues. Water is absorbed through the medium, hydrating the roots efficiently. |
| Watering with a humidifier | Can be effective in maintaining appropriate humidity, but not necessarily for hydration. | Can increase humidity levels around the plant, but does not directly water the roots. Additional watering techniques are still necessary to hydrate the roots. |
Proper Watering Techniques
Maintaining healthy Phalaenopsis leaves hinges on appropriate watering practices. Ensure the growing medium is thoroughly moist but not waterlogged. A good rule of thumb is to water when the top inch of the potting mix feels dry to the touch. Avoid overwatering by ensuring adequate drainage holes in the pot. When watering from the bottom, submerge the pot in water until the water drains out.
Allow the plant to absorb water through the medium for approximately 15-20 minutes. Always use lukewarm, filtered water to avoid shocking the plant. Consider using a watering can with a fine spray nozzle to gently moisten the roots without damaging them.
Potting and Media: Phalaenopsis Leaves Turning Yellow
Choosing the right potting mix and pot is crucial for a healthy Phalaenopsis orchid. A well-draining, airy medium allows for optimal root growth and prevents root rot, a significant contributor to yellowing leaves. Proper potting also supports the orchid’s overall well-being, promoting robust flowering.Phalaenopsis orchids are epiphytes, meaning they naturally grow on trees in their native environments. Replicating this environment in a pot involves selecting a potting medium that mimics the tree bark and air pockets found in their natural habitat.
This carefully selected medium is essential for maintaining the orchid’s delicate balance.
Ideal Potting Media
The ideal potting medium for Phalaenopsis orchids should provide excellent drainage and aeration. A well-balanced mix allows for the roots to breathe and absorb water and nutrients effectively. This is vital to prevent issues like root rot, a common cause of yellowing leaves. A common and effective mix combines bark chips of varying sizes, sphagnum moss, perlite, and charcoal.
This mixture promotes drainage and allows for optimal air circulation around the roots.
Potting Mix Composition
The composition of the potting mix significantly impacts the health of your Phalaenopsis. A good mix typically includes:
- Bark Chips: Varying sizes of bark chips provide structural support and excellent drainage. The chips should be relatively coarse, allowing for good aeration.
- Sphagnum Moss: Sphagnum moss provides moisture retention, which is essential for orchid roots. However, too much moss can retain too much water, potentially leading to root rot. A balanced ratio is crucial.
- Perlite: Perlite adds aeration and drainage, preventing waterlogging. It also helps maintain the proper moisture balance in the potting mix.
- Charcoal: Activated charcoal adds a beneficial element to the mix. It helps maintain the pH level and aids in absorbing excess moisture.
Drainage Considerations
Adequate drainage is paramount for Phalaenopsis orchid health. Poor drainage leads to waterlogged roots, which suffocate the roots and increase the risk of fungal diseases. This is a direct contributor to yellowing leaves. A pot with drainage holes is essential, and the potting mix itself should be carefully chosen for its ability to drain excess water quickly.
- Pot Selection: Choose a pot with drainage holes to prevent water from accumulating around the roots. Terracotta pots are a popular choice as they allow for some evaporation, further enhancing drainage.
- Potting Mix Drainage: Ensure the potting mix has a high drainage capacity. Avoid using mixes that retain too much water. A mix that drains quickly prevents root rot, a major cause of yellowing leaves.
- Watering Practices: Adjust your watering schedule to match the drainage properties of your chosen potting mix. Overwatering is more harmful in a poorly draining mix.
Choosing the Right Pot
The pot’s size and material should be considered when repotting your Phalaenopsis. A pot that’s too large may retain too much water, while a pot that’s too small restricts root growth. A pot size appropriate for the plant’s size and root system is important.
A well-draining potting mix, combined with proper pot selection, is key to preventing yellowing leaves and promoting overall orchid health.
Propagation and Transplanting
Propagating and transplanting phalaenopsis orchids, while often necessary for expanding your collection or rejuvenating plants, can introduce stress that manifests as yellowing leaves. Understanding the nuances of these procedures is crucial for maintaining the health and vibrancy of your orchids. Improper timing or techniques can disrupt the delicate balance of the plant, leading to various issues, including leaf discoloration.
Careful consideration of these factors will minimize the risk of yellowing and maximize the chances of successful propagation and transplanting.
Propagation Methods and Yellowing
Propagation methods, while aimed at increasing the number of orchids, can sometimes trigger stress responses. For example, division, where a mature plant is split into smaller sections, can cause temporary shock to the separated sections. This stress can be reflected in yellowing leaves as the new plants adjust to their independent existence. Similarly, cuttings, which involve taking stem segments and rooting them, can also induce a similar stress response.
The resulting yellowing is often a temporary reaction, but careful monitoring and supportive care are essential to ensure successful establishment.
Ideal Timing for Transplanting
Transplanting phalaenopsis orchids should be performed during periods of active growth. This typically coincides with the spring or summer months when the plant is actively producing new roots and leaves. These periods are favored because the plant is more capable of handling the stress of relocation, showing a lower risk of negative effects on its overall health. Avoid transplanting during periods of dormancy, which can hinder the recovery process.
Effects of Improper Transplanting on Leaf Health
Improper transplanting techniques can have a significant impact on the health of phalaenopsis leaves. A common issue is the use of inadequate potting media or containers. If the medium is too dense or retains too much water, root rot can occur, leading to yellowing or browning of leaves. Similarly, a container that is too small or too large can also stress the plant.
A container that is too small can restrict root growth, while a container that is too large can lead to an imbalance between the plant’s needs and the space available. These factors directly contribute to the yellowing of leaves as the plant struggles to adapt. Furthermore, handling the orchid during transplantation improperly can damage the roots or leaves, creating additional stress that will manifest as yellowing.
It is important to handle the plant gently and minimize disturbance to the roots.
Ending Remarks

In conclusion, understanding the causes of yellowing phalaenopsis leaves is key to maintaining a healthy orchid. From nutrient deficiencies and watering issues to environmental stressors and pests, we’ve covered a wide range of potential problems. By carefully examining your orchid and implementing the appropriate solutions, you can successfully combat this common issue and keep your phalaenopsis thriving. Remember, consistent observation and proactive care are crucial for orchid health.