


Paint your walls like a pro—it’s easier than you think! This comprehensive guide walks you through every step, from choosing the perfect paint to achieving a flawless finish. We’ll cover everything from selecting the right paint type for your walls to planning your project and maintaining your newly painted masterpiece.
Discover the secrets to transforming your space with a fresh coat of paint. Learn about color psychology, essential tools, and expert techniques to elevate your DIY project. From prepping your walls to selecting the perfect shade, this guide has you covered.
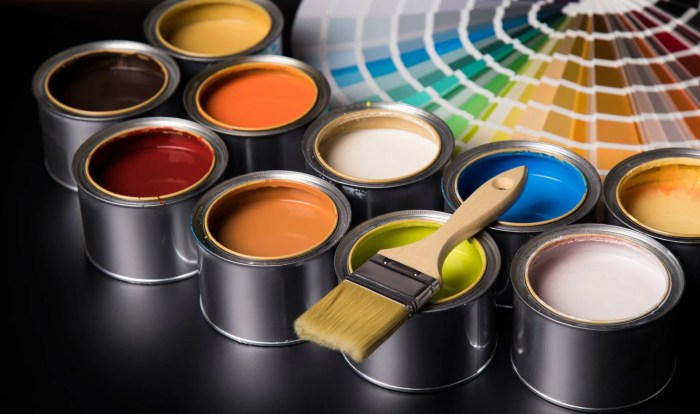
Choosing the Right Paint
Picking the perfect paint for your walls is crucial for a beautiful and long-lasting finish. It’s more than just aesthetics; the right choice ensures your walls stay protected and vibrant for years to come. Consider factors like the paint’s durability, application ease, and clean-up process, as well as the type of wall you’re painting.Understanding the different types of paint, finishes, and brands available allows you to make an informed decision.
This knowledge empowers you to select the best option for your specific needs and desired outcome.
Paint Types for Walls
Different paint types offer varying characteristics. Understanding their strengths and weaknesses is essential for a successful painting project.
| Paint Type | Wall Suitability | Pros | Cons | Finish |
|---|---|---|---|---|
| Latex (Acrylic) | Drywall, plaster, and other common wall surfaces. | Easy to apply, washable, and relatively inexpensive. Good coverage and hides imperfections well. Often low VOC (volatile organic compounds), making it more environmentally friendly. | Can be susceptible to damage from moisture or harsh chemicals. Durability may vary based on the specific formula. | Matte, satin, eggshell, semi-gloss, gloss |
| Oil-Based | Suitable for exterior walls or areas with high moisture or humidity. | Extremely durable, resists moisture and stains effectively. | Slow drying time, strong odor (VOCs), and can be more challenging to clean up. | Semi-gloss, gloss |
| Water-Based Enamel | Suitable for a wide range of wall surfaces, including plaster, drywall, and wood. | Good durability and resistance to stains and moisture. Easy clean-up. | May not be as flexible as latex, potentially requiring a slightly different approach for prep work. | Semi-gloss, gloss |
| Exterior Paint | Specifically designed for outdoor use, typically on siding, decks, or fences. | Highly resistant to the elements, including rain, sun, and temperature fluctuations. | Often more expensive than interior paint. Requires a different application method and often a different prep work. | Semi-gloss, gloss |
Wall Type Considerations
The type of wall significantly impacts the choice of paint. Different wall materials react differently to various paints.Plaster walls might require a different approach than drywall, so it’s important to understand these differences to ensure a good outcome.
Paint Finishes and Visual Impact
Paint finishes greatly affect the look and feel of a room.
- Matte: Creates a smooth, velvety appearance, ideal for hiding imperfections and providing a subtle, understated feel. It also tends to reflect less light, which can make a room feel cozier.
- Satin: Provides a balance between durability and a soft sheen. It’s easy to clean and hides minor imperfections effectively. A satin finish is a versatile option that can work well in many rooms.
- Gloss: Offers the highest level of reflectivity, which can brighten a room. It’s very durable and easy to clean, but it also highlights imperfections more than other finishes.
- Eggshell: Combines a subtle sheen with good scrubbability, providing a pleasing look and hiding some minor imperfections. It offers a good balance between a matte finish and a more noticeable sheen.
Paint Brand Comparison
Brand reputation and quality level can influence the final outcome. Comparing different brands and their offerings is an important step.
Consider factors like reputation for quality, user reviews, and the specific formulations of each brand when choosing a paint.
Different brands might offer specialized products for particular wall types or situations.
Preparing the Walls
Getting your walls ready for a fresh coat of paint is crucial for a professional-looking finish. Proper preparation prevents issues like uneven paint application, peeling, and premature deterioration of the new paint job. This stage sets the foundation for a beautiful and long-lasting painted surface. The right tools and techniques will make this crucial step go smoothly.Thorough preparation involves more than just a quick clean.
It’s a multi-step process that addresses existing imperfections, ensuring a smooth and even surface for the paint to adhere to. This includes cleaning, patching, priming, and more. Each step contributes to a flawless final product.
Transforming your walls into a masterpiece is easier than you think! Knowing how to prep your surfaces is key for a professional-looking finish, and sometimes a little vinegar magic can help. For example, using top uses for vinegar in laundry as a cleaning solution for stubborn grime or even a pre-paint wash, can really improve the longevity and appearance of your painted walls.
Then you can confidently tackle your next painting project, ready to achieve a truly professional result.
Cleaning the Walls
A clean surface is essential for good paint adhesion. Dirt, dust, loose paint, and debris can prevent the new paint from sticking properly. Remove all loose paint chips or peeling sections using a scraper or putty knife. Use a damp cloth or sponge to wipe down the entire surface, paying close attention to any greasy or dirty spots.
Use a mild detergent if needed to remove stubborn stains.
Painting your walls like a pro isn’t just about choosing the right shade; it’s about understanding the whole process. Planning your exterior paint colors is key, and tools like exterior paint colors with visualizer make it easier than ever to see how different colors will look on your home. With a bit of planning and the right resources, you can transform any room into a masterpiece, and your walls will thank you for it.
Patching Holes and Cracks
Imperfections like holes and cracks in the wall must be addressed before painting. These imperfections will be noticeable in the finished paint job and could lead to issues like paint bubbling or cracking. The patching process should repair these areas completely and seamlessly.
Patching Techniques
- Identify the Damage: Examine the walls for holes, cracks, or other imperfections. Assess the size and depth of each defect. This is crucial to choose the appropriate patching material.
- Prepare the Patching Compound: Mix patching compound according to the manufacturer’s instructions. Too little water may result in a hard, brittle patch, while too much may make it uneven. The right consistency allows for smooth application and adhesion.
- Apply the Patching Compound: Using a putty knife, apply a generous layer of patching compound over the hole or crack. Ensure the patch is flush with the surrounding wall and that it is smooth and even. A thick application will allow for sanding later to achieve a level surface.
- Sand the Patch: Once the patching compound is dry, use fine-grit sandpaper to smooth the patch until it’s level with the surrounding wall. This ensures a seamless blend and prevents the patch from standing out.
Priming the Walls
Priming is a critical step in wall preparation. It creates a uniform surface, improves paint adhesion, and helps to even out the color of the wall. Using a primer that is appropriate for the wall type (e.g., drywall, plaster) is crucial for optimal results. Primer fills minor imperfections and creates a consistent surface, leading to a better and more long-lasting paint job.
Priming Steps
- Surface Preparation: Ensure the wall is clean and dry before priming. Any remaining dirt or debris can prevent the primer from adhering properly. Remove dust and other loose particles.
- Choose the Right Primer: Select a primer appropriate for the type of wall and the paint you’ll be using. Different wall types require different types of primers. Consult a paint store professional for assistance.
- Apply the Primer: Using a brush, roller, or spray gun, apply a thin, even coat of primer. Avoid applying too much, as this can cause runs or drips. Allow the primer to dry completely according to the manufacturer’s instructions. A thicker application will lead to uneven drying and may result in the need for additional coats.
- Inspect and Repeat: Check for any areas needing additional primer application. Apply additional coats as needed, allowing each coat to dry completely before applying the next. If the primer is not properly applied, it may not adequately cover the wall and may lead to paint not adhering.
Color Selection and Design

Transforming your walls into a vibrant expression of your style starts with thoughtful color selection. Beyond aesthetics, colors evoke emotions and influence the overall ambiance of a space. Understanding color psychology and how different palettes interact with your existing decor is key to achieving a harmonious and inviting environment. Careful consideration of these factors can elevate your home from ordinary to extraordinary.Color choices profoundly impact mood and perception.
Warm colors, such as reds, oranges, and yellows, often evoke feelings of warmth, energy, and excitement. Cool colors, including blues, greens, and purples, typically create a sense of calm, serenity, and tranquility. Understanding these psychological effects allows you to tailor your color scheme to achieve a specific atmosphere in each room.
Color Psychology and Mood
Color psychology studies the impact of colors on human emotions and behaviors. Different hues trigger different responses, impacting mood, focus, and even appetite. A well-chosen color scheme can elevate a room’s atmosphere, making it feel inviting or energizing, depending on the desired effect. For example, a calming blue bedroom promotes relaxation, while a vibrant yellow kitchen encourages appetite.
Color Palettes: Trendy and Classic
Creating a cohesive color scheme involves selecting palettes that work harmoniously. Trendy palettes often incorporate bold, contrasting colors, while classic palettes focus on timeless combinations. Consider both options to discover a palette that resonates with your personal style and the desired atmosphere. A bold palette might be perfect for a contemporary living room, while a more subdued classic palette could be ideal for a serene bedroom.
Complementing Furniture and Decor
Selecting colors that complement existing furniture and decor is crucial for a cohesive look. Consider the existing furniture and decor elements before choosing wall colors. If your furniture has warm tones, complementary cool colors for the walls will create a balanced and inviting space. If your furniture has cool tones, a warm palette on the walls can enhance the contrast and create a lively atmosphere.
Effective Use of Color Swatches
Color swatches provide a tangible representation of the colors you’re considering. Using them effectively is essential for visual representation and making informed decisions. Physically holding the swatches in the space where the paint will be applied, and comparing them under different lighting conditions, helps in making the most accurate assessment. Lighting conditions significantly affect how colors appear.
Natural light, artificial light, and even the time of day can drastically alter the perception of a color.
Color Palette Comparison
| Color Palette | Potential Mood | Examples |
|---|---|---|
| Monochromatic (Shades of one color) | Calm, serene, sophisticated | Various shades of blue, or variations of gray |
| Analogous (Colors next to each other on the color wheel) | Relaxing, harmonious, balanced | Greens, blues, and teals; yellows, oranges, and reds |
| Complementary (Colors opposite each other on the color wheel) | Energetic, vibrant, attention-grabbing | Red and green; blue and orange; yellow and purple |
| Triadic (Colors evenly spaced on the color wheel) | Playful, balanced, eye-catching | Red, yellow, and blue; blue-violet, red-orange, and yellow-green |
This table provides a basic overview of color palettes and their associated moods. Adjusting the intensity and saturation of these colors can further fine-tune the atmosphere. Consider factors like the size of the room, the amount of natural light, and the style of furniture when choosing a palette.
Tools and Techniques

Transforming your walls from drab to fab requires the right tools and techniques. This section will equip you with the knowledge to confidently navigate the painting process, ensuring a professional finish. From selecting the perfect brushes to mastering masking techniques, we’ll cover everything you need to know to achieve a flawless result. Proper tool usage and maintenance will save you time and effort, leading to a more enjoyable painting experience.Effective painting hinges on the right tools.
Choosing the correct brushes, rollers, and other accessories can significantly impact the outcome. This includes understanding their appropriate use cases and how to maintain them for longevity. Knowing how to apply paint effectively, whether through rolling, brushing, or masking, is critical to achieving a smooth, professional-looking finish.
Essential Painting Tools
Understanding the various painting tools available and their specific purposes is key to a successful painting project. Different tools are designed for different tasks, and selecting the right one will greatly impact your efficiency and the final result. Here’s a look at the essential tools you’ll need:
- Paintbrushes: Essential for detail work, corners, and edges. Different brush types (e.g., angled, flat, filbert) are suited for various tasks. Choose brushes with high-quality bristles for better paint retention and a smoother finish. Proper maintenance involves cleaning brushes thoroughly with soap and water immediately after use and storing them in a vertical position to avoid bristle damage.
- Paint Rollers: Ideal for large, flat surfaces. Different nap lengths are crucial for different paint types. A longer nap roller is better for thicker paints or textured surfaces. Use a roller frame with a quality cover for efficient paint application. Clean the roller cover thoroughly and store it in a dry place.
- Paint Trays: Used to hold paint and keep the roller covered in paint. Choose a tray size appropriate for the job and the type of roller. Ensure the tray is sturdy and easy to handle to prevent spills.
- Drop Cloths/Plastic Sheeting: Protect your floors, furniture, and other surfaces from paint splatters. Choose a drop cloth material that’s large enough to cover the area you’re painting and is resistant to paint. Use plenty of drop cloths to ensure maximum coverage and protection.
- Masking Tape: Essential for creating clean lines and protecting areas you don’t want to paint. Use high-quality masking tape for accurate and consistent results. Remove masking tape carefully to avoid paint damage.
- Paint Stirring Sticks: Used to mix paint and ensure an even consistency. Wooden sticks or specialized stirring tools are best to avoid damaging the paint.
Painting Techniques
Mastering different painting techniques is crucial for achieving a professional finish. Understanding how to use each technique effectively can streamline your project and ensure a consistent application of paint.
- Rolling: Ideal for large, flat surfaces. Apply an even coat of paint in overlapping strokes. Maintain consistent pressure to avoid uneven coverage.
- Brushing: Essential for detail work, corners, and edges. Use the appropriate brush type for the task and apply strokes in the direction of the wood grain for optimal results. Use short, controlled strokes to ensure accuracy.
- Masking: Protect areas you don’t want to paint. Apply masking tape carefully to create clean lines and prevent paint from seeping into unwanted areas. Remove the tape carefully to avoid paint damage.
Painting Corners, Edges, and Ceilings
These areas require special attention for a professional finish. Proper techniques for these areas ensure a clean, seamless transition between surfaces.
- Corners: Use a small brush or an angled brush for precision. Paint one side of the corner, then the other, working your way along the corner. Use overlapping strokes to ensure complete coverage without gaps or streaks.
- Edges: Use a brush or masking tape to protect the edges and ensure clean lines. Apply paint carefully to avoid paint from bleeding over the edges.
- Ceilings: Use a long-handled roller or a specialized ceiling brush. Work in sections, ensuring overlapping strokes to avoid visible lines. Paint in a methodical manner to avoid streaks or uneven coverage.
Painting Tools Table
This table summarizes the painting tools discussed, their descriptions, and appropriate use cases:
| Tool | Description | Use Case |
|---|---|---|
| Paintbrush | Used for detailed work, edges, and corners. | Detail work, corners, edges, intricate designs |
| Paint Roller | Used for large, flat surfaces. | Walls, ceilings, large surfaces |
| Paint Tray | Used to hold and mix paint. | Holding and mixing paint for rollers |
| Drop Cloth | Protects surfaces from paint spills. | Protecting floors, furniture, and other surfaces |
| Masking Tape | Used to create clean lines and protect areas. | Creating clean lines, masking areas |
Project Planning and Execution: Paint Your Walls Like A Pro
Transforming your walls from drab to fab requires a well-defined plan. This phase bridges the gap between choosing your paint and achieving your desired aesthetic. Effective project planning streamlines the process, minimizing potential problems and maximizing your satisfaction with the finished product. A detailed schedule and accurate paint estimations are key to success.
Creating a Painting Schedule
A well-structured painting schedule prevents chaos and ensures the job gets done efficiently. It allows you to allocate sufficient time for each task, preventing rushed work that can lead to errors. A realistic timeline also considers potential delays, like unexpected weather conditions.
- Initial Assessment: Determine the scope of the project. Identify the areas needing painting, the size of each area, and any preparatory work required (like patching or sanding). Consider the type of paint and the number of coats necessary.
- Timeline Development: Break down the project into manageable steps. These steps might include prepping the walls, painting the first coat, allowing for drying time, and applying subsequent coats. Factor in travel time, material delivery, and unforeseen circumstances.
- Resource Allocation: Determine the resources needed for each step. This includes paint, brushes, rollers, drop cloths, and any other tools. Account for potential equipment rental if necessary. Consider the time required for each step and allow buffer time between them.
- Contingency Planning: Anticipate potential problems. Bad weather could delay the painting process. Include contingency plans for these scenarios, such as backup dates or alternative solutions.
Estimating Paint Needed
Calculating the precise amount of paint is essential to avoid unnecessary purchases or running out mid-project. This saves money and prevents frustrating interruptions. A simple calculation, considering the room’s dimensions and the surface area to be painted, is crucial.
- Calculating Surface Area: Measure the length and width of each wall to determine its area. Calculate the total area of all walls, taking into account windows and doors that won’t be painted. Remember to account for any intricate shapes or irregular surfaces.
- Paint Coverage: Refer to the paint can label for its coverage rate in square feet per gallon. This rate varies between different types of paint. This information is critical for estimating the amount needed.
- Calculating the Required Amount: Divide the total surface area by the paint coverage rate to determine the total amount of paint needed in gallons or liters. Always round up to the nearest whole unit to account for waste or extra coverage in problem areas. For example, if you calculate 12.5 gallons, buy 13 gallons.
Efficient Paint Application Techniques
Employing proper application techniques minimizes drips, runs, and uneven coats, resulting in a professional finish. The correct technique will depend on the type of paint, surface, and the tool being used.
- Proper Brush Strokes: Use even, overlapping strokes for a smooth finish. Apply paint in the direction of the wood grain for best results on wood surfaces. Work in sections, and avoid applying too much paint at once to prevent runs.
- Roller Techniques: Maintain even pressure while rolling to ensure consistent coverage. Avoid excessive pressure, as this can cause paint to splatter or create noticeable roller marks. Work in overlapping sections, starting in one corner and gradually moving across the wall.
- Avoiding Drips and Runs: Apply thin coats, allowing each coat to dry completely before applying the next. This will prevent drips and runs. Work in well-lit areas, and ensure the paint is not too thick or too thin. If the paint is too thick, add a little thinner to achieve the ideal consistency.
Handling Painting Problems
Unexpected issues like drips or mistakes can occur. Knowing how to address them promptly and effectively will save you time and prevent major headaches.
- Drip Repair: Use a damp cloth to gently wipe away fresh drips while the paint is still wet. For older drips, use a putty knife or a scraper to remove the paint. Then, sand the area smooth and repaint the affected area.
- Mistake Correction: If you make a mistake, use a damp cloth or a paint scraper to gently remove the affected area. Clean the area, and apply a new coat of paint to the corrected area. For larger mistakes, consider masking off the area and repainting it.
Step-by-Step Painting Process
This detailed guide Artikels the steps for a successful painting project.
- Preparation: Thoroughly clean the walls, and patch any holes or cracks. Sand the surface to create a smooth finish. Protect floors and furniture with drop cloths.
- Priming (if necessary): Apply a primer to the walls, especially if the surface is uneven or porous. This will improve paint adhesion and coverage.
- Masking: Mask off areas you don’t want to paint, like trim, doors, and windows.
- Applying the Paint: Apply thin coats of paint, allowing each coat to dry completely before applying the next. Use the appropriate tools (brushes, rollers, sprayers) for the job.
- Cleaning Up: Clean all tools and equipment thoroughly after use. Dispose of materials properly.
Maintaining the Finish
Your freshly painted walls are a testament to your hard work and careful planning. Now, the real test begins: keeping them looking their best. Maintaining a painted wall’s pristine appearance involves proactive care and regular attention. This section will provide you with the knowledge and tools to ensure your investment in beautiful walls lasts for years to come.Proper maintenance is key to preserving the beauty and longevity of your painted surfaces.
By understanding the best practices for cleaning, touch-ups, and regular care, you can maintain the pristine finish and avoid costly repairs down the line.
Cleaning and Care
Maintaining a clean and healthy environment for your painted walls is crucial. Regular cleaning prevents the build-up of dirt, dust, and grime, which can lead to discoloration and damage over time. Using the appropriate cleaning methods will protect the paint’s finish and keep your walls looking fresh.Regular dusting with a soft cloth or a duster, and occasional wiping with a damp cloth, are effective preventative measures.
For stubborn marks or dirt, use a mild, non-abrasive cleaner specifically formulated for painted surfaces. Avoid harsh chemicals or abrasive cleaners that could damage the paint. Always test any cleaning solution in an inconspicuous area first to ensure it doesn’t affect the paint’s color or texture.
Touch-Ups and Repairs
Dealing with minor imperfections and damages promptly is crucial to maintain the overall aesthetic of your painted walls. Ignoring these issues can lead to more extensive problems in the future.A small scratch or a chipped paint area, if addressed immediately, can be easily fixed with touch-up paint. Match the touch-up paint to the existing wall color as closely as possible to minimize the visibility of the repair.
Apply the touch-up paint in thin, even coats, ensuring the color blends seamlessly with the surrounding area. For larger areas of damage, consider a professional touch-up service.
Regular Maintenance
Regular maintenance is not just about preserving the aesthetic appeal of your painted walls; it’s about extending their lifespan. Regular inspection and care can prevent issues from escalating. Checking for signs of wear and tear and addressing them promptly will save you time, money, and frustration.Regularly inspect your painted walls for any signs of damage, such as cracks, peeling paint, or water stains.
Addressing these problems quickly will prevent them from spreading and causing more significant damage. This preventative approach is significantly more cost-effective than major repairs down the road.
Transforming a room with fresh paint is amazing, but a beautifully painted space needs to be well-organized to truly shine. Knowing how to organize a room, like tackling storage solutions and decluttering, is key to making the most of your freshly painted walls. For tips on getting your room in order, check out this helpful guide: how to organize a room.
Ultimately, a well-organized space looks even better when the walls are a vibrant hue. Painting your walls like a pro is the perfect finishing touch!
Do’s and Don’ts for Maintaining Painted Walls
Following these simple guidelines will ensure your painted walls remain beautiful and functional for years to come. The following guidelines are designed to help you maintain the paint’s pristine condition.
- Do use a soft cloth or duster to remove dust and debris regularly. This will prevent the build-up of dirt that can lead to discoloration and damage.
- Do use a mild, non-abrasive cleaner specifically formulated for painted surfaces to clean any visible marks or stains. Always test the cleaner in an inconspicuous area first.
- Do inspect your walls regularly for any signs of damage, such as cracks, peeling paint, or water stains, and address them promptly.
- Do use touch-up paint to address minor imperfections, such as scratches or chipped paint.
- Don’t use harsh chemicals or abrasive cleaners that could damage the paint’s finish.
- Don’t ignore minor damage, as it can escalate into larger, more costly problems over time.
- Don’t allow water to stand on the walls, as this can lead to mold or mildew growth.
Inspiration and Examples
Transforming your walls from plain to breathtakingly beautiful is a journey of discovery, guided by inspiration. Drawing inspiration from various styles and color palettes can unlock your creative potential and help you create a space that truly reflects your personality and taste. The key is to find a style that resonates with you and then translate that vision onto your walls.Understanding different design approaches is essential.
Whether you lean towards calming neutrals, vibrant pops of color, or bold statement pieces, the right inspiration can elevate your space and transform your mood. Exploring diverse examples and understanding the techniques behind them will empower you to confidently paint your walls like a pro.
Living Room Inspiration
A living room should be a reflection of your lifestyle and a place for relaxation and socializing. Different styles can be implemented, from serene neutrals to bold and striking designs. Consider the existing furniture and décor in your room. The wall color should complement the furniture and existing décor. A soft, calming palette with subtle accents can promote relaxation, while bolder hues can energize and create a vibrant atmosphere.
- Modern Minimalism: A living room featuring soft gray walls with subtle wood accents and pops of black or white furniture would embody a modern minimalist style. This neutral palette allows the furniture and artwork to take center stage, creating a clean and sophisticated ambiance. The focus is on clean lines, simple shapes, and a sense of calm. This style works well for individuals who appreciate simplicity and order in their homes.
- Rustic Elegance: Imagine warm beige or taupe walls adorned with intricate wooden paneling. A few carefully placed antique mirrors and framed botanical prints will enhance the rustic elegance. This approach evokes a cozy and inviting atmosphere, blending natural textures and warmth with refined elements. The furniture can include natural wood pieces and leather accents to complete the look.
- Bold Accent Wall: A dramatic accent wall with deep navy blue can be incorporated in a modern living room. This will serve as a backdrop for lighter furniture, creating a striking contrast and a bold statement. The color can be applied to a feature wall behind the sofa, adding depth and visual interest to the space. The remaining walls can feature a softer color, such as a light gray or beige, to maintain a balance.
Bedroom Inspiration, Paint your walls like a pro
A bedroom is a sanctuary, a place for rest and rejuvenation. Consider the mood you want to create. A calm and serene atmosphere promotes relaxation, while a vibrant and energizing palette can invigorate your mornings. The color scheme should ideally complement the existing furniture and décor.
- Calming Neutrals: A serene bedroom with soft cream or pale gray walls can create a calming atmosphere. This palette is ideal for individuals seeking tranquility and relaxation. Incorporating warm wood tones in furniture and accessories will add depth and richness to the room. A few strategically placed plants and soft lighting can further enhance the sense of peace and serenity.
- Soft Pastels: A bedroom painted in soft lavender or mint green can create a cheerful and inviting atmosphere. Light and airy, this palette can encourage a feeling of rejuvenation. Matching the color palette to the bedding and accessories will create a cohesive look.
- Bohemian Chic: A bedroom with a bohemian aesthetic can feature earthy tones, like terracotta or burnt orange, with accents of deep blues or greens. This approach can be complemented with woven wall hangings, patterned rugs, and macrame wall decorations. The aim is to create a vibrant and eclectic space that reflects a free-spirited personality.
Kitchen Inspiration
The kitchen is the heart of the home. A carefully selected color scheme can significantly impact the overall mood and functionality of the space. The color palette should ideally complement the existing cabinets and countertops.
- Modern Farmhouse: Imagine a kitchen with crisp white walls, paired with light oak cabinets and warm wood countertops. This approach creates a clean and inviting atmosphere, blending modern and farmhouse elements. Adding pops of color through accessories like textiles and artwork can further enhance the style.
- Coastal Vibes: A kitchen painted in a soft, seafoam green or a light blue can evoke a sense of tranquility and calmness. This palette evokes a coastal vibe and can be complemented by light-colored wood cabinets and white countertops. Adding nautical-themed accessories can further enhance the coastal feel.
- Bold Statement Colors: A bold accent wall with a deep jewel tone, like emerald green or sapphire blue, can add a touch of drama to a kitchen. This approach can be paired with a neutral color palette for the remaining walls, creating a balance between boldness and serenity.
Troubleshooting and FAQs
Painting your walls can be a rewarding experience, but sometimes things don’t go exactly as planned. This section will address common painting problems, providing solutions and explanations to help you overcome any hurdles. Understanding the causes of these issues will empower you to avoid future problems and achieve a flawless finish.
Common Painting Problems and Solutions
Various factors can affect the outcome of your painting project, from the quality of the paint to the preparation of the walls. Recognizing these potential issues and their causes is crucial for achieving a professional-looking result.
- Peeling Paint: Peeling paint often indicates a problem with the underlying surface. Moisture, inadequate surface preparation, or poor adhesion are common culprits. Ensure the wall is completely dry and free of any loose or flaking paint. Proper priming with a suitable primer can significantly improve adhesion and prevent future peeling.
- Bubbling Paint: Bubbling paint typically arises from trapped air or moisture beneath the paint surface. This can be caused by improper application techniques, such as applying too thick a coat or applying paint in excessively hot or cold conditions. Allowing the previous coat to dry completely before applying the next coat is crucial.
- Uneven Coats: Achieving a smooth, even coat depends on proper application techniques. Using the correct tools, like brushes or rollers, is essential. Applying the paint in multiple thin coats, allowing each coat to dry thoroughly, and using a consistent brushing or rolling motion can significantly reduce unevenness. A good quality paint can also help.
- Paint Streaking: Streaking often arises from using too much paint or applying the paint too quickly. Applying the paint in a smooth, consistent manner, with sufficient overlapping, can prevent streaking. Ensure proper ventilation and avoid applying paint in direct sunlight.
Causes of Paint Problems and Their Solutions
Understanding the reasons behind painting issues is key to preventing them in the future.
- Improper Surface Preparation: A crucial step in painting is surface preparation. Dirt, dust, and loose particles can interfere with the paint’s adhesion. Thoroughly cleaning and repairing the wall before painting is essential. This often includes filling any holes or cracks and sanding the surface smooth.
- Incorrect Paint Choice: Choosing the right paint type is important. Using the wrong paint for the surface or the environment can lead to problems. A suitable exterior paint should be used for exterior walls, while interior paints are designed for interior walls. The paint’s formulation should also match the specific needs of the project.
- Temperature and Humidity: Extreme temperatures and high humidity can affect paint drying time and application. Painting in ideal conditions, typically between 65°F and 80°F with low humidity, will promote proper paint drying and adhesion.
Frequently Asked Questions
This section addresses common questions regarding painting walls.
- How do I fix a paint job that’s already done? If the paint has already been applied, try to identify the specific problem. Peeling can often be addressed by scraping off the loose paint and repainting. Bubbling might require sanding the affected area and reapplying a thin coat of paint. Uneven coats may require sanding the surface smooth and repainting.
- What kind of primer should I use? The best primer depends on the surface you are painting. For example, a drywall primer is best suited for drywall surfaces, and a concrete primer is better for concrete walls. Always follow the manufacturer’s instructions for proper application and drying time.
Closure
So, ready to transform your walls into a stunning masterpiece? This guide provides a roadmap for a successful painting project, from initial planning to achieving a beautiful final result. Remember to prioritize preparation, choose colors wisely, and enjoy the process! Your walls will thank you.