


How to make wooden covers for wire shelving? This guide dives deep into the world of transforming basic wire shelving into stylish, custom-made storage solutions. We’ll explore everything from choosing the perfect wood to creating intricate designs, ensuring a flawless finish that elevates your home’s aesthetic.
Transforming your wire shelving from functional to fabulous is easier than you think! We’ll cover essential steps like measuring accurately, selecting the right materials, and implementing various construction techniques, from simple to ornate. Whether you’re a seasoned woodworker or a beginner, this comprehensive guide will equip you with the knowledge and confidence to create beautiful, personalized wooden covers.
Introduction to Wooden Wire Shelving Covers
Transforming your wire shelving from functional to fashionable is easier than you think. Wooden covers provide a seamless way to upgrade the look and feel of your storage solutions. They add a touch of warmth and visual appeal, creating a more cohesive and aesthetically pleasing space. The versatility of these covers allows them to be customized to match any style, from modern minimalist to rustic farmhouse.Wooden covers for wire shelving are not just about aesthetics.
They can also improve the functionality of your storage space. By concealing the wire frame, you can create a more polished and professional look, ideal for display areas, or even a more curated look in a home office. They can also help to protect items stored on the shelves from dust and damage.
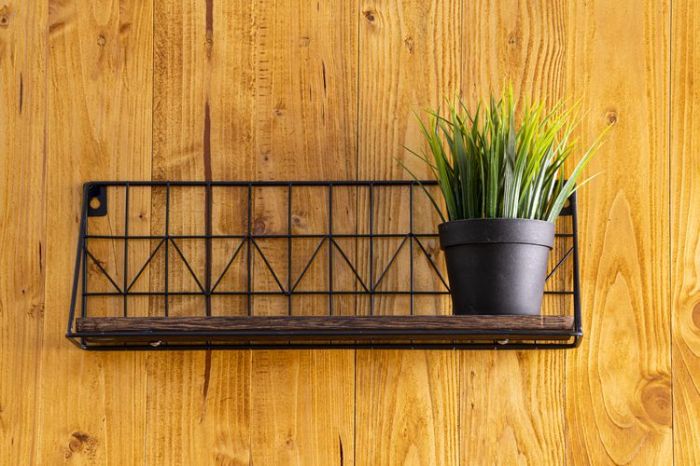
Types of Wire Shelving
Wire shelving comes in a wide variety of styles and sizes. This makes the covers incredibly adaptable. Common types include adjustable shelves, fixed shelves, wall-mounted shelves, and corner shelves. These different types accommodate a variety of needs and spaces, from small apartments to large workshops. Covers can be designed to fit each of these types, offering a tailored solution for any shelving unit.
Styles and Aesthetic Options
The possibilities for design are endless. From simple, clean lines to intricate carvings, you can tailor the look to perfectly match your existing décor. Consider the color of the wood; natural wood tones like oak or walnut complement a variety of styles, while painted finishes can add a vibrant pop of color. For a truly unique touch, explore different finishes like stained or lacquered wood, which offer a range of tones and textures.
Comparison of Shelving Materials
| Material | Pros | Cons | Cost |
|---|---|---|---|
| Metal | Durable, strong, relatively inexpensive, easy to clean, and widely available. | Can appear cold or industrial, prone to rust or corrosion, may not offer as much aesthetic customization. | Generally low. |
| Wood | Warm and inviting aesthetic, customizable in many styles, can improve the overall look of the shelving unit, and potentially add value to the room. | More susceptible to damage from moisture and impacts, requires regular maintenance, and can be more expensive than metal. | Moderate to high, depending on the type of wood and finish. |
| Plastic | Low maintenance, water-resistant, lightweight, and comes in a variety of colors. | Can be less durable than metal or wood, may not be as visually appealing as wood, and may not be as strong as metal. | Generally lower than wood, but higher than metal. |
This table provides a quick comparison of the key characteristics of different shelving materials. Considering the pros, cons, and cost of each material is crucial in making an informed decision for your specific needs and aesthetic preferences.
Crafting wooden covers for wire shelving is surprisingly straightforward. First, you’ll need to measure your shelves accurately. Don’t forget to prep your tools before you begin; remember to clean those tools thoroughly, like the saws and sandpaper, after every use! Proper cleaning, like detailed in tools youre forgetting to clean , will prevent dust buildup and ensure your project stays pristine.
Once you’ve got your measurements and tools clean, you’ll be well on your way to beautiful, custom shelving.
Materials and Tools Required

Transforming your wire shelving into a stylish and functional storage solution starts with the right materials and tools. Careful selection ensures a smooth project and a beautiful, lasting result. Choosing the correct wood type and having the necessary tools on hand will make the process more manageable and efficient.Choosing the right materials and tools is crucial for a successful and enjoyable project.
This section details the essentials, from the wood itself to the necessary equipment for cutting, shaping, and assembling your covers. This detailed guide will equip you with the knowledge to select the perfect materials and tools for your project, ensuring a smooth and efficient workflow.
Suitable Wood Types
Wood selection is a key aspect of creating durable and aesthetically pleasing wire shelving covers. The ideal wood should be strong enough to support the weight of the items stored while maintaining its structural integrity. Consider hardwoods such as oak, maple, or cherry for their strength and attractive grain patterns. These woods are generally more resistant to warping and cracking than softwoods.
Pine, while more affordable, may not be as durable and might require more support for heavy items. The choice depends on the desired balance between cost, aesthetics, and durability.
Essential Tools
A well-equipped toolbox is essential for any woodworking project. The tools needed for creating your wire shelving covers include those for precise cutting, shaping, and assembly. This ensures a clean, professional finish to your project. Having the correct tools available minimizes errors and allows for a more efficient workflow.
Want to spruce up your wire shelving? Making wooden covers is a surprisingly easy DIY project. You’ll need some basic woodworking tools, and remember to declutter your workshop – while you’re at it, consider which garden tools to throw out. This guide can help you identify rusty or broken tools that are no longer worth keeping.
Once you’ve got your tools sorted, you can get started on those beautiful wooden covers for your shelves!
- Saw (e.g., handsaw, circular saw): For cutting the wood to the desired dimensions. A handsaw is suitable for smaller cuts and more intricate designs, while a circular saw is better for larger cuts and straight lines. Precision in cutting is important to avoid gaps or overlaps.
- Measuring tools (e.g., tape measure, ruler): Essential for accurate measurements to ensure proper fitting of the covers to the wire shelving.
- Clamps: For holding pieces of wood together during assembly to maintain alignment and prevent slippage.
- Sandpaper: For smoothing rough edges and creating a finished surface. Different grits of sandpaper are needed for different levels of smoothness. Using various grits will help achieve a professional finish.
- Drill and drill bits: For creating pilot holes before driving screws for secure fastening. Proper pilot holes prevent wood from splitting.
- Screwdriver or drill with screwdriver bit: For attaching the covers to the wire shelving.
- Pencil or marker: For marking measurements on the wood.
Recommended Wood Finishes and Stains, How to make wooden covers for wire shelving
A protective finish and a desirable aesthetic are achievable through various options. Choosing the right finish protects the wood from moisture, scratches, and everyday wear. A stain can enhance the wood’s natural beauty or create a unique color. A variety of options exists, from clear coats to pigmented stains.
- Clear coats (varnish, polyurethane): Protect the wood from damage without significantly altering its appearance. Clear coats come in different levels of gloss, offering a range of finishes.
- Stains (e.g., dark walnut, light oak): Enhance the wood’s natural beauty by adding depth and color. The color options available provide flexibility to match the desired aesthetic of the shelving unit.
- Water-based finishes: Environmentally friendly and easy to apply. They are also generally less toxic than oil-based finishes.
- Oil-based finishes: Provide a more durable and protective layer than water-based options. However, they have a stronger odor and may take longer to dry.
Tools for Wire Shelving Cover Construction
A well-organized toolbox is crucial for the success of this project. Knowing the function and safety precautions for each tool is paramount.
| Tool | Description | Purpose | Safety Precautions |
|---|---|---|---|
| Saw | A tool used for cutting wood | Cutting wood to the desired dimensions | Wear safety glasses to protect eyes from flying debris. Use a sawhorse or similar support for stability. |
| Drill | A power tool used for creating holes in wood | Creating pilot holes for screws and fastening components | Ensure the drill bit is appropriate for the material being drilled. Use appropriate safety glasses and ear protection. |
| Tape Measure | A tool for precise measurement | Measuring and marking dimensions | Handle with care to prevent damage. |
| Sandpaper | Used for smoothing rough edges and creating a finished surface | Creating a smooth surface | Use appropriate personal protective equipment (PPE) such as gloves to avoid skin irritation and dust masks to avoid inhaling dust. |
Design and Measurement Considerations
Transforming your wire shelving into a stylish and functional storage solution starts with careful planning. Accurate measurements and thoughtful design choices are key to creating covers that fit seamlessly and enhance the overall aesthetic. This section will guide you through the process of measuring your shelving, exploring various design options, and selecting the best attachment methods.Precise measurements are crucial for creating custom-fitted wooden covers.
Incorrect measurements will lead to ill-fitting covers, impacting both the functionality and the visual appeal of your shelving unit. A well-measured shelving unit ensures that your covers align perfectly with the wire framework, allowing for smooth installation and long-lasting use.
Measuring Wire Shelving Dimensions
To ensure a perfect fit, carefully measure the wire shelving unit. Measure the width, depth, and height of each shelf. Take note of the distance between the wire supports to understand the precise dimensions of the shelving area. This information is critical for creating covers that align seamlessly with the wire framework. Consider the space between the wires when calculating the cover dimensions to ensure the cover sits snugly and doesn’t wobble.
Take multiple measurements for each shelf to ensure accuracy, as shelving can sometimes vary slightly in dimensions.
Design Options for Wooden Covers
Wooden covers offer a wide range of design possibilities. Simple, clean designs can complement a modern aesthetic, while ornate patterns and carvings can add a touch of elegance to a more traditional space. Decorative elements, like inlays or painted accents, can further personalize your shelving unit. Consider the overall style of your room when selecting a design.
- Simple Designs: These covers are characterized by straightforward shapes and minimal embellishments. A simple rectangular cover with a smooth finish is a versatile choice that can work in most rooms. This design is ideal for those who prefer a clean and uncluttered look.
- Ornate Designs: These covers feature intricate carvings, patterns, and decorative elements. Intricate patterns, such as floral designs or geometric patterns, can add a touch of elegance and personality. Consider the scale of the design when selecting an ornate design to ensure it complements the size and style of the shelving unit.
- Decorative Designs: These covers can incorporate elements like painted accents, inlays, or textures. Painted designs can add pops of color and visual interest to your shelving unit. The addition of inlays can create a unique and customized look. The use of different wood tones or textures can further enhance the decorative appeal.
Methods for Attaching Covers to Shelving
Several methods can secure the wooden covers to the wire shelving. These methods range from simple clips and screws to more elaborate designs that enhance both the structural integrity and aesthetic appeal. The chosen method should be both effective and visually appealing.
- Clipping: Clips provide a quick and straightforward way to attach covers. They are easy to install and remove, making them a good option for temporary or easily changeable displays. This method works best for covers with pre-drilled holes or slots for the clips.
- Screwing: Screws provide a more permanent attachment, ensuring the cover remains securely in place. This method works well for covers that will be used for heavier items. Use appropriate screws and drill pilot holes to prevent damaging the wire shelving.
- Fastening with Wood Glue: A combination of wood glue and screws can provide extra strength and durability. Wood glue creates a strong bond between the cover and the shelving, and screws provide additional support. This method is best for heavy-duty applications and when a very secure fit is desired.
Design Style Comparison Table
This table provides a quick overview of different design styles for wooden wire shelving covers.
| Design Style | Features | Materials | Pros/Cons |
|---|---|---|---|
| Simple | Straightforward shapes, minimal embellishments | Solid wood, plywood | Affordable, easy to create, versatile |
| Ornate | Intricate carvings, patterns, decorative elements | Solid wood, hardwoods | Elegant, personalized, can be costly |
| Decorative | Painted accents, inlays, textures | Solid wood, veneers, paints | Customizable, visually appealing, can be complex |
Construction Techniques
Transforming your wire shelving into a stylish and functional storage solution starts with carefully crafting the wooden covers. This section dives into the practical aspects of building these covers, from basic assembly to decorative embellishments. Understanding the construction techniques ensures a durable and aesthetically pleasing final product.A well-constructed wooden cover not only protects the wire shelving but also enhances its overall appearance.
Precise measurements and careful execution of the joinery techniques are crucial to achieving a strong and visually appealing result.
Basic Cover Construction
This section Artikels the fundamental steps involved in building a simple wooden cover. The method is adaptable to various sizes and designs.
- Cut the Wood: Accurately cut the wood pieces according to the measurements determined in the previous step. Using a sharp saw and a measuring tape is essential for precision. Consider using a miter saw for angled cuts, ensuring clean and accurate edges.
- Prepare the Edges: Sand the edges of the cut wood pieces to create a smooth and even surface. This step ensures a clean fit and prevents splinters. A sanding block or orbital sander is recommended for efficiency.
- Assemble the Cover: Join the wood pieces together using the chosen joinery technique. This step is crucial for the cover’s strength and stability. Ensuring a tight fit is essential.
- Finishing Touches: Apply a wood sealant or finish to protect the wood from moisture and damage. This step enhances the cover’s longevity and aesthetic appeal. Various finishes are available, from clear coats to colored stains.
Joinery Techniques
Selecting the appropriate joinery technique significantly impacts the cover’s strength and durability. Several methods offer different levels of stability and aesthetic appeal.
- Miter Joints: A miter joint involves cutting the edges of two pieces of wood at an angle, typically 45 degrees, and then joining them together. This technique is excellent for creating a strong, visually appealing corner. It is best suited for covers with straight edges and right angles.
A miter joint, when properly executed, creates a very strong and aesthetically pleasing corner.
Crafting wooden covers for wire shelving is a rewarding project. You can really personalize your storage solutions, and it’s surprisingly easy to do! Thinking about vibrant container plants like calibrachoa great container plants , it’s also a great way to add a pop of color and life to a space. Plus, a custom-made wooden cover will keep your shelving looking neat and tidy.
- Dowel Joints: Dowel joints utilize wooden dowels inserted into pre-drilled holes in the wood pieces. These joints are strong and provide a stable connection, ideal for larger covers. Dowel joints offer a robust and aesthetically clean solution.
Example: A simple dowel joint uses cylindrical wooden dowels to connect the cover pieces. These are often glued to enhance strength.
- Glue Joints: Glue joints involve applying wood glue to the surfaces of the wood pieces and joining them together. This method is suitable for various types of joints, providing a robust and reliable connection. Glue joints are essential for ensuring the cover’s structural integrity.
Example: Using wood glue in conjunction with other joinery methods, such as dowels, strengthens the overall structure of the cover.
Ensuring a Snug Fit
A snug fit between the cover and the wire shelving is essential for both functionality and aesthetics. Improper fitting can lead to gaps or instability.
- Accurate Measurements: Precise measurements are critical for a perfect fit. Using accurate measuring tools and double-checking dimensions prevents issues during assembly.
- Careful Cutting: Sharp tools and precise cutting techniques are crucial for achieving a clean fit. Adjusting the saw or cutting tool as needed ensures accuracy.
- Using Wood Filler: Wood filler can be used to address minor gaps or imperfections that arise during assembly. This step ensures a seamless appearance and a smooth transition between the cover and the shelving.
Decorative Elements
Adding decorative elements can personalize the covers and enhance their aesthetic appeal.
- Carvings: Intricate carvings can add a touch of elegance and sophistication. These can be simple geometric patterns or more complex designs. Consider the scale of the carving in relation to the overall size of the cover.
- Inlays: Inlays, which involve inserting pieces of contrasting wood or other materials into the cover, create unique visual patterns and textures. These add a sophisticated and visually appealing element to the cover.
Finishing and Finishing Touches: How To Make Wooden Covers For Wire Shelving
Transforming your wire shelving covers from raw wood to beautiful, functional pieces involves the crucial step of finishing. This process not only enhances the aesthetic appeal but also protects the wood from the elements, ensuring longevity and preventing damage. Proper finishing techniques are essential for a professional and durable result.Careful selection and application of a suitable finish are vital for preserving the integrity and beauty of your wooden covers.
Different finishes offer various levels of protection and visual appeal. Understanding the nuances of each type, combined with meticulous application, ensures your project stands the test of time.
Wood Finishing Options
Various finishes are available, each with its unique characteristics. Paints offer vibrant colors and excellent protection, while stains enhance the natural beauty of the wood grain. Varnishes provide a protective, glossy layer that complements both painted and stained surfaces. The choice depends on the desired aesthetic and the level of protection needed.
Applying the Finish Evenly and Smoothly
Even application is critical for a professional finish. Using a brush or a sprayer, depending on the chosen finish, ensures consistent coverage across the entire surface. Begin with thin, even coats, allowing each coat to dry completely before applying the next. This approach minimizes the risk of drips, runs, or uneven textures. Avoid applying too much pressure, which can cause the finish to build up in certain areas.
Ensure adequate ventilation during application to prevent the build-up of fumes.
Sanding and Surface Preparation
Thorough sanding is a fundamental step before applying any finish. This prepares the wood surface by removing imperfections and ensuring a smooth, consistent texture for the finish to adhere to properly. Start with a coarser grit sandpaper (e.g., 120-grit) to remove any large imperfections. Gradually transition to finer grits (e.g., 180-grit, 220-grit) to achieve a smoother surface.
Dusting the surface thoroughly after each sanding step is crucial to remove any sanding residue. This ensures the finish adheres properly and prevents potential imperfections in the final product.
Applying a Clear Coat Finish: A Step-by-Step Procedure
- Ensure the wood surface is clean, dry, and free of dust or debris. Thoroughly sand the surface with progressively finer grits of sandpaper, ensuring a smooth, even texture. Wipe down the surface with a tack cloth to remove any sanding dust.
- Apply a thin, even coat of clear finish to the surface using a brush or a sprayer. Work in small sections, ensuring consistent coverage.
- Allow the first coat to dry completely according to the manufacturer’s instructions. This typically involves a few hours, depending on the type of finish.
- Sand lightly between coats with fine-grit sandpaper (e.g., 220-grit) to smooth out any imperfections or high spots that may have emerged during the drying process. Thoroughly dust the surface to remove any sanding dust.
- Repeat steps 2 through 4 until the desired number of coats is achieved. A minimum of two to three coats are recommended for optimal protection.
- Allow the final coat to dry completely for a prolonged period, usually overnight, as specified by the manufacturer’s guidelines.
Safety Precautions
- Always wear appropriate personal protective equipment (PPE), including gloves, eye protection, and a respirator when handling finishes. This is essential to prevent skin irritation, eye damage, and respiratory problems.
- Work in a well-ventilated area. Adequate ventilation is crucial to minimize exposure to fumes and vapors, ensuring a safe working environment.
- Follow the manufacturer’s instructions carefully for each finish. These instructions often include specific safety precautions and handling guidelines.
- Store finishes in a cool, dry place, away from direct sunlight and heat sources.
- Dispose of any leftover finish according to local regulations.
Troubleshooting and Maintenance

From wobbly edges to stubborn stains, crafting perfect wooden covers for wire shelving isn’t always smooth sailing. This section dives into common problems, providing solutions and preventative measures to keep your shelving covers looking their best for years to come. Knowing how to address issues promptly will save you time and frustration, ensuring your shelves remain a stylish and functional part of your home.Understanding potential problems and how to remedy them is crucial for maintaining the integrity and aesthetic appeal of your wooden wire shelving covers.
Proactive maintenance will extend their lifespan and keep your project looking its best.
Common Construction Issues
Addressing problems during construction is key to achieving a flawless finished product. Early identification and quick solutions will prevent larger issues later on.
- Uneven edges or warped panels: Improper clamping or drying can cause panels to warp or edges to become uneven. Ensure proper clamping during assembly and allow the wood to dry completely before finishing. If warping occurs after assembly, consider carefully repositioning the clamps or using a moisture-controlled environment to gradually adjust the wood’s moisture content. For severe warping, a professional woodworker may be needed to safely and effectively realign the pieces.
- Gaps or misalignment: Precise measurements and careful assembly are vital for a seamless fit. Double-check measurements before cutting and ensure all pieces align perfectly. Use wood glue and clamps for a strong bond, and meticulously check for alignment after each step. If gaps remain, carefully reposition the pieces and reapply glue and clamps. Consider using wood filler to address minor gaps, then sanding and refinishing the area.
- Improperly adhered joints: Weak glue joints can lead to structural issues. Use a high-quality wood glue appropriate for the wood type and ensure proper clamping pressure and time. Re-apply glue to loose joints and re-clamp, ensuring the glue is completely dry before removing the clamps. If the problem persists, use wood filler to fill the gaps, sand, and re-finish.
Maintenance Strategies
Regular care will significantly prolong the life of your wooden covers.
- Dusting and cleaning: Regular dusting and cleaning prevent dust buildup, which can lead to scratches and discoloration. Use a soft, dry cloth for dusting. For stubborn stains, use a slightly damp cloth, and always wipe dry.
- Protecting from moisture: Moisture is a common enemy of wood. Protect your covers from direct water exposure and excessive humidity. If water does get on the covers, wipe it up immediately. Storing them in a dry, well-ventilated area will help maintain their integrity.
- Regular inspection: Regularly check for any signs of damage or wear and tear, such as cracks, splinters, or discoloration. Early detection of problems will help prevent them from worsening.
Repairing Damaged Covers
Dealing with damage promptly can prevent the spread of damage and preserve the appearance of your covers.
- Minor scratches: Use wood filler to fill in minor scratches. Sand the area smooth and re-finish the affected area to match the original finish.
- Larger cracks: For larger cracks, use wood glue and wood plugs to repair the damaged area. Sand and re-finish the repaired area to match the original finish.
- Significant damage: For significant damage that can’t be repaired, consider replacing the damaged cover with a new one. This is often more cost-effective than attempting extensive repairs.
Troubleshooting Table
| Problem | Cause | Solution | Prevention |
|---|---|---|---|
| Uneven edges | Improper clamping or drying | Re-clamp, adjust drying conditions | Proper clamping during assembly, complete drying |
| Gaps | Inaccurate measurements or misalignment | Reposition pieces, re-glue, re-clamp | Double-check measurements, meticulous alignment |
| Loose joints | Insufficient glue or improper clamping | Re-apply glue, re-clamp, allow to dry | High-quality glue, proper clamping pressure and time |
| Scratches | Rough handling or abrasive materials | Wood filler, sanding, refinishing | Gentle handling, use soft cloths |
Wrap-Up
In conclusion, crafting wooden covers for wire shelving is a rewarding project that blends practicality with aesthetic appeal. From selecting the perfect wood and tools to achieving a flawless finish, this guide has equipped you with all the necessary knowledge. Now you’re ready to personalize your storage solutions and create a space that truly reflects your style. So go ahead, embrace the project, and let your creativity shine!