


How to make spray starch? This guide dives deep into the world of homemade spray starch, revealing the secrets to creating a perfect stiffener for your fabrics and crafts. We’ll explore the science behind spray starch, from its chemical composition to historical context, and walk you through step-by-step recipes. Discover various types of spray starch, compare their effectiveness, and learn about the essential ingredients, equipment, and safety precautions.
You’ll find detailed instructions on mixing, storage, troubleshooting common issues, and a variety of applications.
From simple laundry starch to elaborate craft projects, spray starch is a versatile tool. This comprehensive guide will equip you with the knowledge and skills to confidently craft your own spray starch, ensuring your projects always have the perfect finish.
Introduction to Spray Starch
Spray starch, a versatile chemical compound, is a crucial component in various industries, primarily for enhancing the texture and appearance of fabrics and other materials. Its ability to create stiffness and resistance to wrinkles makes it indispensable in laundry care, textile manufacturing, and more. Understanding its composition, history, and applications is key to appreciating its wide-ranging utility.Spray starch is essentially a suspension of starch granules in water, often with additives for specific purposes.
Ever wondered how to make spray starch? It’s surprisingly simple, and a great way to get your laundry looking fresh. But, while I’m on the topic of DIY cleaning solutions, I’ve been having trouble with my cedar tree lately. It seems to be losing its vibrant green color, and I’m wondering if anyone knows why my cedar tree is turning brown?
For more info on diagnosing similar issues, check out this helpful resource: why is my cedar tree turning brown. Regardless, I’m determined to find a solution, and hopefully I’ll figure out how to make spray starch soon! Once I do, I’ll be sure to share the recipe.
These additives might include preservatives, fragrances, and other chemicals to enhance its performance and stability. The fundamental chemical structure of starch is based on glucose polymers, providing the necessary properties for its function as a stiffening agent.
Chemical Composition of Spray Starch
The core component of spray starch is starch, a complex carbohydrate derived from plants like corn, wheat, or potatoes. Starch is a polymer composed of amylose and amylopectin, two types of glucose chains. These chains form granules, which, when suspended in water, create a viscous solution. Additives, like preservatives and thickeners, modify the starch’s properties to suit different applications.
Making spray starch is surprisingly straightforward. Just mix a bit of cornstarch with water, heat it gently, and stir until smooth. This simple process can really brighten up your home, much like the beautiful easy perennials for shade easy perennials for shade can add vibrancy to your garden. The key is a good, even consistency, which is just as important for your spray starch as it is for your plants.
Then, you’re ready to tackle those tricky projects around the house!
A common additive is a cross-linking agent, which further strengthens the starch’s ability to hold its shape.
Historical Context of Spray Starch Development
The development of spray starch is closely tied to the evolution of textile manufacturing and laundry practices. Early methods involved soaking fabrics in starch solutions, a time-consuming and often messy process. The invention of spray technology revolutionized the application process, making starch application faster, more efficient, and more controlled. This innovation significantly improved the production efficiency of various industries.
The need for a more convenient and effective stiffening agent for fabrics drove the development of spray starch.
Common Applications of Spray Starch
Spray starch finds wide-ranging applications across various industries. In the textile industry, it’s used for stiffening fabrics, creating specific textures, and enhancing the aesthetic appeal of garments. In the home, it’s a common tool for improving the appearance of clothes, reducing wrinkles, and providing a crisp finish. The use of spray starch also extends to other sectors like papermaking and surface treatment, highlighting its versatility.
Types of Spray Starch
- Laundry spray starch is formulated for household use, providing a crisp finish to clothes. It’s typically less concentrated than other types to avoid over-stiffening garments.
- Fabric stiffener, a type of spray starch, is specifically designed for stiffening fabrics and adding a structured look. It’s commonly used in the textile industry and often contains higher concentrations of starch.
Comparison of Spray Starch Types
| Type | Primary Use | Concentration | Additives | Typical Applications |
|---|---|---|---|---|
| Laundry Spray Starch | Crisping and wrinkle-reducing clothes | Lower | Preservatives, fragrances | Home laundry |
| Fabric Stiffener | Stiffening and texturing fabrics | Higher | Cross-linking agents, stabilizers | Textile manufacturing, garment production |
Homemade Spray Starch Recipes

Homemade spray starch offers a cost-effective and eco-friendly alternative to store-bought options. It’s a great way to experiment with different ingredients and achieve varying levels of starchiness for your projects. This section delves into several homemade spray starch recipes, outlining the steps, ingredients, and safety considerations involved.Understanding the different types of starches and their properties is key to achieving the desired results.
Different starches will yield different consistencies and effectiveness in spray form. This guide provides clear instructions and comparisons to help you choose the best recipe for your needs.
Cornstarch-Based Spray Starch
This recipe utilizes cornstarch, a common and readily available starch. It’s generally the easiest to work with and produces a good spray consistency.
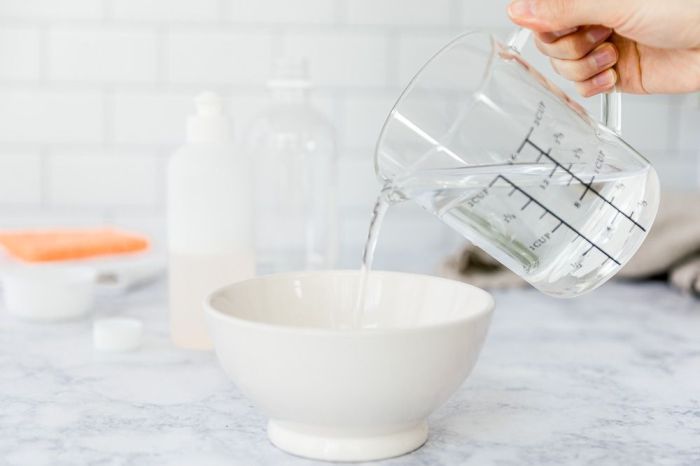
- Materials and Procedure: Combine cornstarch with a small amount of water in a bowl. Gradually add more water, whisking constantly until a smooth paste forms. Heat the mixture over low heat, stirring continuously until it reaches a smooth, translucent consistency. Remove from heat and let cool completely. Add a small amount of water to the mixture if it seems too thick to spray.
Finally, pour the mixture into a spray bottle.
| Ingredient | Quantity |
|---|---|
| Cornstarch | 1 cup |
| Water | 1-2 cups |
Potato Starch-Based Spray Starch
Potato starch is another option for a homemade spray starch. It often provides a slightly different texture compared to cornstarch.
- Materials and Procedure: Combine potato starch and water in a saucepan. Stir over low heat until a smooth paste forms, ensuring no lumps are present. Continue stirring until the mixture reaches a smooth, translucent consistency. Allow the mixture to cool completely before transferring to a spray bottle.
| Ingredient | Quantity |
|---|---|
| Potato Starch | 1 cup |
| Water | 1-2 cups |
Safety Precautions
- Always use caution when handling hot liquids. Use oven mitts or pot holders to protect your hands. Ensure the mixture is cooled completely before transferring to a spray bottle.
- Never leave the stove unattended while the mixture is heating.
- Always ensure the spray bottle is tightly sealed to prevent spills and maintain the quality of the mixture.
- If the spray starch becomes too thick, add a small amount of water, one tablespoon at a time, and mix thoroughly.
Effectiveness Comparison
- Cornstarch-based spray starch is generally easier to make and produces a good spray consistency for most uses. It is also readily available and relatively inexpensive.
- Potato starch-based spray starch offers a slightly different texture, sometimes producing a more viscous spray. This may be preferred for certain applications.
Ingredients and Equipment
Crafting a potent spray starch at home requires careful selection of ingredients and appropriate equipment. This section delves into the critical components needed for a successful batch, highlighting the importance of quality and proper handling for optimal results. Understanding the nuances of each ingredient and the equipment will contribute to a smoother and more effective starch-making process.High-quality ingredients, while seemingly straightforward, play a significant role in the final product’s efficacy and aesthetic appeal.
Using inferior ingredients can compromise the starch’s ability to create the desired effect on fabrics, resulting in inconsistencies in the finish and potentially damaging the material over time. A crucial aspect is understanding the relationship between ingredient quality and the final product quality.
Common Ingredients
A fundamental aspect of spray starch production lies in understanding the common ingredients used. Cornstarch, a readily available and affordable option, forms the basis of most spray starch recipes. Its fine consistency allows for even distribution and a smooth finish on fabrics. Other options like potato starch and tapioca starch are also available, each offering slightly different characteristics in terms of texture and performance.
The choice of starch depends on the desired outcome and the specific fabric being treated.
Essential Equipment
The selection of appropriate equipment is just as crucial as choosing the right ingredients. The key pieces of equipment needed include measuring cups and spoons for precise ingredient ratios, mixing bowls for proper blending, and a spray bottle for the final application. The selection of appropriate tools ensures accurate measurements and facilitates a smooth blending process.
- Measuring Tools: Accurate measurement of ingredients is paramount. Use measuring cups and spoons specifically designed for dry ingredients. This precision avoids inconsistencies in the starch mixture, which can affect the final spray starch’s effectiveness.
- Mixing Bowls: A sturdy mixing bowl is essential for blending the starch with water. Ensure the bowl’s size is adequate for the recipe’s needs to prevent spills and ensure thorough mixing. A large, deep mixing bowl is beneficial for larger batches.
- Spray Bottle: The spray bottle is the final critical component. Select a bottle with a fine mist nozzle for even distribution. A spray bottle with a wide mouth makes filling and cleaning easier. Consider the volume needed for your application when selecting the size of the bottle.
Cleaning and Maintenance
Proper cleaning and maintenance of equipment are crucial to ensure consistent performance and prevent the buildup of residue. After each use, rinse all equipment thoroughly with water. Use mild soap or a specialized cleaning solution for stubborn stains. Ensure all parts are completely dry before storing to prevent mold or mildew growth. This ensures that the equipment is ready for the next batch, and helps maintain hygiene.
Choosing the Right Spray Bottle
The choice of spray bottle is essential for achieving a consistent spray pattern. Consider the size of the bottle in relation to the amount of spray starch you need to prepare. A smaller bottle is suitable for smaller projects, while a larger bottle is better for larger tasks. Look for a spray bottle with a fine mist nozzle for even distribution of the starch, preventing clogging or uneven application.
A bottle with a trigger mechanism is preferable for precise control of the spray.
Mixing and Preparation Procedures: How To Make Spray Starch
Crafting a potent and effective homemade spray starch relies heavily on meticulous mixing techniques. Properly combining the ingredients ensures a smooth, consistent product that sprays evenly and dries quickly, avoiding clumping and uneven application. This section details the precise steps involved, highlighting the importance of proper mixing and temperature control, and addressing potential issues that can arise.
Mixing Process for a Cornstarch-Based Recipe
This recipe utilizes cornstarch, water, and a touch of vinegar for a balanced spray starch. The key to a successful outcome lies in the methodical blending of these components. Carefully following the steps will yield a high-quality, user-friendly spray starch.
Step-by-Step Mixing Instructions
- In a medium saucepan, combine 1 cup of cool water and 1/4 cup of cornstarch. The initial temperature of the water is crucial, as it affects the dissolving process.
- Stir the mixture continuously and vigorously until the cornstarch is completely dissolved, creating a smooth paste-like consistency. Avoid lumps by ensuring thorough mixing; any lumps can lead to uneven spraying and clumping.
- Gradually whisk in 1/4 cup of white vinegar. This addition aids in preventing the starch from breaking down and improves its ability to form a spray.
- Bring the mixture to a simmer over medium heat, stirring constantly. A low and steady simmer helps in achieving a uniform consistency.
- Once the mixture comes to a gentle simmer, reduce the heat to low. Continue stirring until the spray starch thickens. This will take about 2-3 minutes, depending on the heat and the stove. Constant stirring during this stage is critical to preventing scorching or uneven thickening.
- Remove the mixture from the heat and let it cool completely. Allowing the starch to cool prevents the formation of clumps and ensures proper storage. After it has cooled, the spray starch can be poured into a spray bottle for use.
Importance of Proper Mixing Techniques
Proper mixing is paramount for achieving a smooth, lump-free spray starch. Inconsistent mixing can lead to clumping and uneven application, impacting the effectiveness of the spray. The techniques Artikeld ensure an even distribution of starch particles throughout the mixture, maximizing the spray’s efficiency. For instance, vigorous stirring during the thickening stage prevents the formation of hot spots that can cause uneven thickening and potential scorching.
Potential Issues and Solutions
- Lumps: Insufficient stirring, especially in the initial stages, can result in lumps. Dissolving the cornstarch thoroughly in the initial step, and maintaining constant stirring throughout the thickening process, will prevent this problem. Ensure the cornstarch is completely dissolved before adding the vinegar. If lumps appear, strain the mixture through a fine-mesh sieve to remove them.
- Uneven Spray: An uneven spray can be caused by lumps in the starch or insufficient heating. Thorough mixing, and appropriate heating, along with consistent stirring throughout the process, will result in a smooth, even spray.
- Burning/Scorching: High heat during the thickening process can lead to burning. Maintain a low, consistent heat setting throughout the thickening stage. Constant stirring prevents any part of the mixture from overheating and scorching.
Temperature Control
Temperature plays a crucial role in the mixing process. Cold water is essential for dissolving cornstarch without lumps, while a gentle simmer during thickening ensures even heat distribution. Avoiding high heat prevents scorching and maintains a smooth consistency. The ideal temperature for the water in the initial step is cool, around 60-70 degrees Fahrenheit. This helps ensure complete dissolution of the cornstarch without creating lumps.
Spray Starch Storage and Shelf Life

Homemade spray starch, like its store-bought counterpart, is best kept under the right conditions to maintain its effectiveness and prevent spoilage. Proper storage significantly impacts the shelf life and quality of your homemade spray starch, ensuring it remains usable for various projects. Understanding the factors that influence shelf life and implementing the right storage methods is crucial for maximizing the longevity of your homemade starch solution.Preserving the quality and effectiveness of your homemade spray starch relies heavily on the correct storage conditions.
Factors like humidity, temperature, and the type of container used all contribute to how long your spray starch remains usable. By understanding these factors, you can optimize storage to prolong the life of your homemade spray starch, avoiding unnecessary waste.
Appropriate Storage Conditions
Proper storage is key to maintaining the quality of homemade spray starch. Store it in a cool, dry place away from direct sunlight and heat sources. High temperatures can cause the starch solution to break down or thicken prematurely, while excessive moisture can lead to mold growth. Choose a container that seals tightly to prevent evaporation and maintain the desired consistency of the solution.
Factors Affecting Shelf Life
Several factors influence the shelf life of spray starch. The type of starch used, the preparation method, and the storage conditions all play a significant role. Homemade spray starch is generally less stable than store-bought options due to the absence of preservatives. Additionally, the presence of moisture or microbial contamination can significantly reduce the lifespan of the solution.
Storage Procedure for Maximized Shelf Life
To maximize the shelf life of your homemade spray starch, follow these steps:
- Store the spray starch in a clean, airtight container.
- Select a container made of a non-reactive material like glass or plastic to avoid any chemical reactions.
- Store the container in a cool, dark place, ideally a pantry or a cool cabinet, to avoid exposure to direct sunlight or high temperatures.
- Check the solution regularly for any signs of discoloration, unusual odor, or separation of components.
Identifying Signs of Spoilage
Recognizing signs of spoilage in spray starch is important to prevent using a compromised product. Pay close attention to changes in appearance and smell.
Ever wondered how to make spray starch? It’s surprisingly simple, and a great way to keep your clothes crisp. Speaking of things that need a little extra oomph, have you ever noticed how some kitchen features just scream eyesore? Things like that stained countertop or the wonky faucet can really detract from the whole vibe. Check out this article on kitchen features always eyesores for some ideas on how to fix those problems.
Back to the starch, though – you’ll need a few simple ingredients and a bit of elbow grease.
- Discoloration: A noticeable change in color, such as cloudiness or the appearance of a film on the surface, suggests spoilage.
- Unusual Odor: A sour, musty, or otherwise unpleasant odor indicates bacterial or fungal growth, rendering the spray starch unusable.
- Separation of Components: If the spray starch separates into layers or becomes visibly thick, it’s likely deteriorated and should be discarded.
Comparison of Storage Methods and Shelf Life
The following table compares the storage methods and estimated shelf life of different spray starch types, highlighting the impact of factors like preservatives and preparation methods.
| Spray Starch Type | Storage Method | Estimated Shelf Life (at room temperature) |
|---|---|---|
| Homemade Spray Starch (from scratch) | Cool, dark, airtight container | 1-3 weeks |
| Homemade Spray Starch (with preservatives) | Cool, dark, airtight container | 4-6 weeks |
| Store-bought Spray Starch | Cool, dark, airtight container | 3-6 months (or as indicated on the label) |
Note: Shelf life estimations are approximate and can vary based on specific conditions. Always prioritize safety and discard any spray starch exhibiting signs of spoilage.
Troubleshooting and Common Problems
Making spray starch at home can be a rewarding experience, but sometimes you might encounter unexpected issues. Understanding potential problems and their solutions can save you time and frustration. This section will cover common problems like clumping, separation, and inconsistencies, and how to fix them. Knowing how to troubleshoot your spray starch recipe will allow you to create a consistent and effective product for your needs.
Clumping Issues
Clumping is a common problem in homemade spray starch. This often occurs when the starch mixture is not thoroughly mixed or if the ingredients are not properly combined. This can lead to uneven application and potentially damage surfaces.
- Improper Mixing: Insufficient mixing can cause starch granules to clump together. Ensure you use a whisk or a blender to thoroughly combine the starch and water until the mixture is smooth and free of lumps. A high-speed blender can be effective in reducing clumps, especially with thicker mixtures. The goal is a completely homogeneous mixture.
- Incorrect Ratio: A significant deviation from the recommended starch-to-water ratio can also lead to clumping. Use a measuring cup and spoon to ensure precise measurements. If you find your mixture is too thick, add more water gradually, whisking continuously. Conversely, if it’s too thin, add more starch.
- Cold Ingredients: If the water or starch is too cold, it can hinder the dissolving process, potentially leading to clumping. Use lukewarm water to facilitate the dissolution of the starch granules, resulting in a smoother mixture.
Separation Issues
Separation in the spray starch mixture is another common issue. This happens when the starch settles at the bottom of the container, leaving a clear liquid on top. This can affect the effectiveness and consistency of the spray starch.
- Incorrect Storage: Allowing the mixture to stand for extended periods before use can lead to separation. Store the spray starch in a tightly sealed container in the refrigerator. This will help maintain its consistency and prevent separation, as long as the mixture is still usable.
- Insufficient Stirring: If the mixture is not stirred well enough after being stored, the starch can settle. Ensure the mixture is thoroughly stirred before each use, particularly if it has been refrigerated. This step is critical in ensuring even distribution and preventing separation.
- Temperature Fluctuations: Significant temperature changes can also cause separation. Avoid placing the mixture in direct sunlight or other locations with fluctuating temperatures. This can affect the density and consistency of the spray starch, potentially leading to separation.
Adjusting Recipes for Different Needs
Adjusting recipes to suit your specific needs can greatly enhance the spray starch experience. Different surfaces and applications might require different consistencies or levels of starch concentration.
- Thickness Control: Adjust the starch-to-water ratio to achieve the desired thickness. A thicker mixture is ideal for stiffening fabrics, while a thinner mixture might be more suitable for light dusting. This can be adjusted by gradually adding more starch or water to the mixture.
- Desired Results: Experiment with different types of starch to see which one best suits your needs. For example, corn starch might work better for certain fabrics or surfaces. This adjustment can result in varied degrees of stiffness or hold.
- Alternative Ingredients: For a unique result, you can explore the use of different types of water or additional ingredients. For example, the addition of a small amount of white vinegar can help to enhance the spray starch’s sticking ability. This might be useful for specific projects or preferences.
Spray Starch Applications and Uses
Spray starch, beyond its role in smoothing out wrinkles, offers a surprisingly wide range of applications, extending far beyond the ironing board. Its versatility stems from its ability to temporarily stiffen and enhance various materials, making it a valuable tool for both everyday tasks and creative endeavors. This versatile starch provides a unique textural and aesthetic boost, transforming ordinary items into something extraordinary.Spray starch’s diverse utility extends from everyday ironing to intricate craft projects, offering a simple yet powerful way to achieve specific results.
Its ability to create a temporary structure, while remaining easily removable, makes it an ideal choice for numerous tasks.
Ironing and Fabric Enhancement
Spray starch is a staple for ironing, especially for delicate fabrics or those that tend to wrinkle easily. A light mist of spray starch can significantly reduce wrinkles, providing a smooth, crisp finish. This is particularly helpful for blouses, shirts, and formal wear, where a perfect appearance is crucial. The starch acts as a temporary support, holding the fabric’s fibers in place, making ironing easier and achieving a more polished look.
Craft Applications, How to make spray starch
Spray starch is a game-changer for a wide array of craft projects. Its ability to stiffen and hold shapes makes it invaluable for paper crafts, fabric crafts, and more. Its temporary nature ensures that the starch can be easily removed when the project is complete.
Paper Crafts
Spray starch offers unique possibilities for paper crafts. Applying a light mist of starch to paper before cutting or assembling can create a more rigid and structured surface. This is especially useful for card making, where a sturdier paper stock is desired, or for intricate paper sculptures. It can prevent paper from tearing or creasing during manipulation, enhancing the overall aesthetic appeal of the project.
For example, when making intricate paper flowers, spray starch can provide the necessary support for maintaining the shape of each petal.
Fabric Crafts
In fabric crafts, spray starch provides a distinct advantage in enhancing the texture and appearance of various projects. It can help to stiffen fabric for appliqué projects, creating a more defined shape and preventing wrinkles. Applying spray starch to fabric before cutting can help with precision and prevent distortion during the crafting process. For example, in making fabric flowers, spray starch can hold the petals in place, making the flower more rigid and durable.
Comparison of Applications
| Craft Type | Application | Benefits |
|---|---|---|
| Paper Crafts | Strengthening paper, maintaining shapes | Enhanced durability, reduced tearing |
| Fabric Crafts | Stiffening fabric, creating defined shapes | Improved precision, reduced wrinkling, enhanced structural integrity |
Spray starch’s ability to provide temporary support without permanently altering the material makes it a versatile tool for a wide array of crafting needs. Its versatility allows for a variety of creative outcomes, enabling artisans to experiment with different techniques and styles, from intricate paper sculptures to detailed fabric designs.
Safety Precautions and Handling
Making spray starch at home can be a rewarding experience, but safety should always be a top priority. Proper handling of ingredients and adherence to safety guidelines are crucial to prevent accidents and ensure a pleasant and safe process. Understanding potential hazards and appropriate disposal methods will contribute to a responsible and safe environment.
Safety Measures for Ingredient Handling
Thorough safety measures are essential when handling the ingredients for spray starch. Always ensure proper ventilation in the area to prevent inhalation of any potential irritants. Wear gloves to protect your skin from any chemical reactions or potential allergens. Use appropriate containers to store ingredients to prevent spills and contamination.
- Thoroughly read labels and safety data sheets (SDS) for all ingredients before use. This crucial step provides details about potential hazards, safe handling procedures, and emergency response measures.
- Store ingredients in designated, airtight containers, away from direct sunlight and extreme temperatures. This helps maintain the quality and stability of the ingredients, minimizing the risk of degradation and unexpected reactions.
- Handle ingredients carefully to avoid spills and splashes. Spills can lead to contamination, and splashes can cause irritation to the skin and eyes.
- Use appropriate personal protective equipment (PPE), such as gloves, eye protection, and a mask, to prevent contact with potentially harmful substances. Choose PPE that provides adequate protection against the specific ingredients used.
Safety Guidelines for Mixing and Preparation
Careful attention to detail is critical during the mixing and preparation phases of spray starch. Mixing ingredients should be done in a well-ventilated area to avoid inhaling any fumes or dust. Use appropriate tools for mixing to prevent accidents. Stir the mixture gently and avoid creating splashes or spills.
- Always mix ingredients slowly and carefully to avoid splashing or splattering. This step minimizes the risk of burns or chemical exposure to skin or eyes.
- Use a non-reactive container for mixing, such as glass or stainless steel, to prevent chemical reactions or contamination.
- Keep children and pets away from the area during mixing and preparation. This precaution reduces the risk of accidental exposure or contamination.
- Avoid using excessive heat or strong mixing speeds to prevent splattering or the risk of burns.
Potential Hazards Associated with Spray Starch Preparation
Potential hazards during spray starch preparation include chemical reactions, allergic reactions, and inhalation of dust or fumes. Reactions can occur if incompatible ingredients are mixed, leading to unexpected byproducts or harmful substances. Always consult safety data sheets (SDS) for detailed information about the ingredients used.
- Chemical reactions: Mixing incompatible ingredients can cause unexpected reactions, potentially producing harmful substances or fumes. Always check for compatibility before combining ingredients.
- Allergic reactions: Some individuals may be allergic to certain ingredients used in spray starch. Symptoms can range from mild skin irritation to severe allergic reactions. Always wear gloves and be aware of any potential allergies.
- Inhalation of dust or fumes: Fine dust or fumes generated during mixing can be inhaled, causing respiratory irritation or other health problems. Ensure adequate ventilation to prevent inhalation.
- Eye and skin irritation: Contact with spray starch ingredients can cause irritation to the eyes and skin. Always wear appropriate eye protection and gloves to prevent contact.
Proper Disposal Methods
Proper disposal of spray starch and related materials is crucial to prevent environmental contamination. Dispose of used containers and materials according to local regulations. Check with your local waste management authorities for specific guidelines on proper disposal.
- Used containers should be cleaned thoroughly before disposal to prevent contamination of other materials. Always follow local regulations for disposal of chemicals.
- Dispose of used spray starch solution responsibly. Avoid pouring it down the drain as it can clog pipes. Check with local waste management authorities for appropriate disposal methods.
- Dispose of any contaminated materials according to local regulations. Always consult safety data sheets for specific disposal instructions for each ingredient.
- Follow local regulations regarding the disposal of chemicals and hazardous materials. Improper disposal can lead to environmental pollution and health risks.
Safety Precautions Table
| Step | Safety Precautions |
|---|---|
| Ingredient Handling | Read labels, wear gloves, store properly, handle carefully. |
| Mixing and Preparation | Use well-ventilated area, gentle mixing, non-reactive container, avoid excessive heat. |
| Disposal | Clean containers, follow local regulations, do not pour down drain. |
Final Summary
In conclusion, creating your own spray starch is a rewarding experience, opening doors to a world of creative possibilities. This comprehensive guide has provided a detailed roadmap, from understanding the basics to mastering the art of homemade spray starch. Armed with the knowledge shared here, you can confidently tackle various projects, ensuring that your fabrics and crafts are always at their best.
Experiment with different recipes, explore diverse applications, and enjoy the satisfaction of creating your own personalized spray starch!