


How to grow better hydrangeas? This guide dives deep into the secrets of these beautiful blooms, revealing the specific needs of different varieties. From soil prep to pruning, we’ll explore every step to ensure your hydrangeas thrive and flourish, bringing stunning color to your garden.
We’ll cover everything from the ideal soil pH and types, to the perfect light exposure and watering techniques. You’ll discover how to feed your hydrangeas for optimal growth, and how to protect them from pests and diseases. Plus, learn the best pruning methods and propagation techniques for expanding your hydrangea collection.
Soil Requirements
Hydrangeas, with their stunning blooms, are prized for their beauty. However, their vibrant colors and healthy growth depend heavily on the soil they inhabit. Understanding the soil’s pH, type, drainage, and the right amendments is crucial for achieving a thriving hydrangea garden. A well-prepared soil bed will nurture the roots and support the plant’s overall health, resulting in magnificent displays of color year after year.The ideal soil conditions for hydrangeas are vital for their success.
A balanced approach to soil preparation, encompassing pH, type, drainage, and amendments, ensures optimal growth and blooms.
Ideal Soil pH Range
Hydrangeas thrive in slightly acidic to neutral soil. The ideal pH range for most hydrangea varieties is between 5.5 and 6.5. This range allows for the optimal uptake of essential nutrients, promoting healthy growth and vibrant blooms. Soils with a pH outside this range may lead to nutrient deficiencies and stunted growth. Regular soil testing can help maintain the ideal pH level.
Suitable Soil Types, How to grow better hydrangeas
Hydrangeas adapt to various soil types, but certain types offer better conditions than others. Loamy soil is often the preferred choice for hydrangeas, as it provides excellent drainage, aeration, and water retention. Sandy soil, while allowing for good drainage, can be prone to drying out quickly, potentially stressing the hydrangea. Clay soil, on the other hand, may retain too much water, leading to root rot.
Amendments can often improve the drainage and structure of clay or sandy soil, creating a more ideal environment for the hydrangea.
Hydrangeas are beautiful, but sometimes they struggle to thrive. Proper watering and sunlight are key, but did you know that learning how to care for delicate fabrics like dress shirts can offer surprising parallels? For instance, gentle hand washing techniques, like those detailed in this guide on how to wash dress shirts at home , can translate to a more delicate approach when nurturing your hydrangeas.
This careful approach, combined with a well-drained soil mix, will ultimately lead to a healthier, more vibrant bloom.
Soil Drainage
Proper soil drainage is paramount for hydrangea health. Poor drainage can lead to waterlogged soil, which deprives the roots of oxygen and causes root rot. This condition can significantly impact the hydrangea’s growth and even lead to its demise. Ensuring good drainage is a key element in successful hydrangea cultivation.
Improving Soil Drainage
Improving soil drainage involves several methods. Adding organic matter such as compost, peat moss, or well-rotted manure can significantly enhance soil structure, allowing water to drain effectively. Creating raised beds or incorporating gravel or perlite can also improve drainage. These methods help prevent waterlogging and promote healthy root development.
Learning how to grow better hydrangeas is all about understanding their needs. Plenty of sunlight and well-drained soil are key, but sometimes a thriving garden can attract unwanted visitors. For example, if you’re noticing an unusual influx of flies, check out this helpful guide on why are there so many flies in my house to rule out any potential problems in your home environment.
Once you’ve addressed those pesky pests, you can return to focusing on your beautiful hydrangeas and their healthy growth.
Soil Amendments and Their Effects
The following table illustrates how different soil amendments affect hydrangea growth.
| Amendment | Effect on Hydrangea Growth |
|---|---|
| Compost | Improves soil structure, drainage, and nutrient content. Enhances water retention. |
| Peat Moss | Excellent water retention, improves drainage. Can lower pH. |
| Well-rotted Manure | Adds essential nutrients and improves soil structure. May require pH adjustment. |
| Perlite | Excellent drainage and aeration. Can increase soil porosity. |
| Sand | Improves drainage, but can reduce water retention. Requires additional amendments for better nutrient availability. |
Soil Preparation Before Planting
Proper soil preparation before planting hydrangeas is crucial for successful establishment and long-term growth. This involves digging a hole twice as wide and just as deep as the root ball of the plant. Amend the soil in the hole with organic matter, such as compost or peat moss, to improve drainage and nutrient content. Mix the amendments thoroughly with the existing soil to create a rich and well-drained environment for the hydrangea’s roots.
Ensure the planting hole is appropriately sized and that the amended soil is well-mixed. This ensures the roots have ample space to develop and access nutrients.
Light Requirements
Hydrangeas, with their stunning blooms, are susceptible to various environmental factors. Proper light exposure is crucial for their health and vibrant displays. Understanding the specific light needs of different hydrangea varieties is key to achieving the best results in your garden. This section will delve into the optimal sunlight requirements for different types of hydrangeas, exploring the effects of varying light conditions and providing guidance on choosing the right planting location.Hydrangeas thrive in a range of light conditions, but their success is directly tied to the amount and type of sunlight they receive.
Full sun, partial shade, and full shade all affect growth, bloom production, and overall plant health. By carefully considering these factors, you can cultivate healthy and beautiful hydrangeas that flourish in your garden.
Hydrangeas are gorgeous, but sometimes they just don’t thrive. To get those vibrant blooms, consider the soil – a well-draining mix is key. And for those hydrangea-loving gardeners, choosing the right paint for your outdoor projects can also be a great idea. Understanding the differences between acrylic and latex paint, like the pros and cons of acrylic vs latex paint , can help you create stunning flower beds and structures.
Ultimately, the best way to achieve those magnificent hydrangeas is a balance of good soil, proper care, and the right materials.
Optimal Sunlight for Different Varieties
Hydrangeas, in general, appreciate filtered sunlight. Direct, intense sunlight, especially during the hottest part of the day, can lead to leaf scorch and reduced flowering. Different varieties, however, have slightly varying needs. Some prefer more sun than others, and this difference in need must be taken into account when choosing a location.
Impact of Sunlight Exposure
The amount of sunlight a hydrangea receives directly impacts its growth and flowering. Full sun, while providing sufficient energy for photosynthesis, can also cause stress if the intensity is too high. Partial shade offers a balance between sunlight and protection, encouraging healthy growth and abundant blooms. Full shade, while preventing leaf burn, may result in less vigorous growth and potentially fewer flowers.
Protecting Hydrangeas from Harsh Afternoon Sun
Afternoon sun, particularly during the summer months, can be extremely harsh. Hydrangeas are susceptible to leaf damage and stress from prolonged exposure to intense sunlight. Consider strategically placing your hydrangeas where they receive filtered light during the hottest part of the day. For example, planting them beneath a larger tree or shrub can provide the necessary protection.
Choosing the Right Planting Location
When selecting a planting location, carefully consider the amount of sunlight your chosen spot receives throughout the day. Observe the sun’s path and how it affects the area throughout the year. Consider the surrounding vegetation and structures that may cast shade. The goal is to find a spot where your hydrangeas will receive adequate sunlight while being protected from harsh afternoon sun.
Preferred Light Conditions for Various Hydrangea Types
| Hydrangea Type | Preferred Light Conditions |
|---|---|
| Bigleaf Hydrangea (Hydrangea macrophylla) | Partial shade to light shade; morning sun and filtered afternoon shade. |
| Oakleaf Hydrangea (Hydrangea quercifolia) | Full sun to partial shade; tolerates some afternoon sun. |
| Smooth Hydrangea (Hydrangea arborescens) | Partial shade to full sun; adaptable to various light conditions. |
| Climbing Hydrangea (Hydrangea anomala petiolaris) | Partial shade; needs support for climbing and protection from direct sun. |
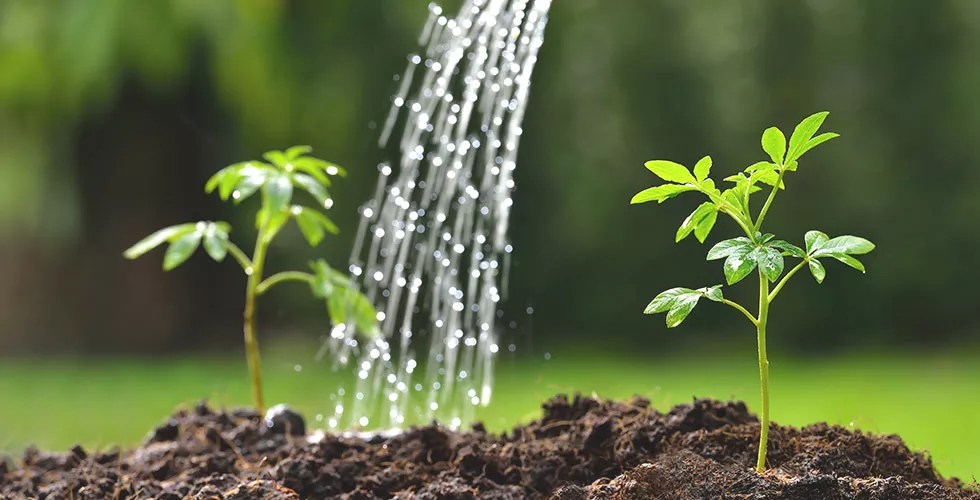
Watering Techniques

Hydrangeas, with their stunning blooms, require consistent moisture to thrive. Proper watering is crucial for maintaining healthy growth and vibrant color. Understanding the right techniques and avoiding common pitfalls is key to keeping your hydrangeas happy and healthy. Consistent watering prevents stress and allows the plants to focus their energy on producing beautiful flowers.Watering hydrangeas effectively involves more than just a quick sprinkle.
The key is to maintain consistent soil moisture without overwatering, which can lead to root rot, or underwatering, which can cause wilting and stunted growth. Finding the balance is essential for healthy plant development.
Watering Frequency and Amount
Hydrangeas generally need consistent moisture, especially during hot and dry periods. The frequency and amount of water depend on several factors, including the size of the plant, the type of soil, and the weather conditions. Newly planted hydrangeas require more frequent watering to establish their root systems. Mature plants may need watering every 7-10 days during dry spells.
Avoid letting the soil completely dry out between waterings, as this can stress the plant. A good rule of thumb is to check the soil moisture by inserting your finger about 2-3 inches deep. If the soil feels dry, it’s time to water.
Watering Methods
Different watering methods offer varying benefits and drawbacks. The goal is to deliver water directly to the root zone while minimizing water waste.
- Drip Irrigation: Drip irrigation systems deliver water directly to the roots of each plant. This method is highly efficient, as it minimizes water loss to evaporation and runoff. It also reduces the risk of wetting the foliage, which can lead to fungal diseases. This method is particularly effective for established hydrangeas, as it allows for precise watering around the root zone.
It is an excellent choice for large plantings or areas where conserving water is important.
- Soaker Hoses: Soaker hoses are another excellent way to water hydrangeas. These hoses slowly release water directly to the soil, ensuring thorough watering of the root zone. Soaker hoses are especially helpful for watering larger areas, and their slow release allows for better water absorption by the soil. They also minimize foliage wetting, reducing the risk of fungal diseases.
- Overhead Sprinklers: Overhead sprinklers are a common and convenient method, but they can be less efficient. The water can easily be lost to evaporation or runoff, and wetting the foliage can increase the risk of fungal diseases. Using sprinklers on a schedule, ensuring adequate coverage of the plant’s root zone, and choosing a sprinkler that doesn’t spray water into the air can help mitigate these issues.
For smaller plants, overhead watering may be sufficient, but be mindful of potential water waste.
Avoiding Overwatering and Underwatering
Overwatering and underwatering can both severely harm hydrangeas. Understanding the signs of each is critical for maintaining optimal growth.
- Overwatering: Signs of overwatering include yellowing leaves, wilting, and soggy soil that doesn’t drain well. Standing water around the base of the plant is also a telltale sign. Overwatering can lead to root rot, which can kill the plant. If you suspect overwatering, reduce the frequency of watering and ensure proper drainage.
- Underwatering: Signs of underwatering include wilting leaves that don’t perk up after watering, and dry, crumbly soil. Underwatering can cause stress to the plant, making it more susceptible to pests and diseases. Increasing watering frequency and ensuring consistent moisture levels are essential to prevent underwatering.
Maintaining Consistent Moisture Levels
Maintaining consistent moisture levels is key to healthy hydrangea growth. Several strategies can help you achieve this.
- Mulching: Applying a layer of mulch around the base of the plant helps retain moisture in the soil. Mulch also helps suppress weeds, which can compete with hydrangeas for water and nutrients.
- Watering at the Base: Water directly at the base of the plant, minimizing water loss to evaporation. Avoid splashing water on the foliage.
- Monitor Soil Moisture: Regularly check the moisture levels in the soil, adjusting your watering schedule as needed. A good rule of thumb is to water when the top few inches of soil feel dry.
Fertilizing Strategies

Hydrangeas, with their stunning blooms, thrive on proper nourishment. Fertilizing plays a crucial role in achieving healthy growth and vibrant color displays. This section delves into the importance of fertilization, optimal fertilizer types, and a strategic feeding schedule to help your hydrangeas flourish.
Importance of Fertilizing Hydrangeas
Hydrangeas, like all plants, require essential nutrients for healthy growth and vibrant blooms. Fertilizers provide these crucial nutrients, promoting strong stems, abundant foliage, and impressive flower displays. Without adequate fertilization, hydrangeas may exhibit stunted growth, pale foliage, and reduced flowering.
Best Types of Fertilizers for Hydrangeas
Choosing the right fertilizer is key to achieving optimal results. Different fertilizer types offer various benefits and drawbacks. Understanding these nuances helps gardeners tailor their approach to their specific hydrangea needs.
- Slow-release fertilizers provide a consistent nutrient supply over an extended period. This allows for steady growth and reduces the need for frequent applications. They are often preferred for their convenience and reduced risk of over-fertilizing. However, they may not provide the immediate nutrient boost needed during periods of rapid growth.
- Water-soluble fertilizers offer a rapid nutrient delivery system, perfect for addressing immediate needs, such as during a period of rapid growth. Their quick-release nature is ideal for supplementing existing soil conditions. However, they need more frequent application, which can be inconvenient.
Fertilizer Schedule for Hydrangeas
A well-structured fertilization schedule ensures optimal nutrient delivery throughout the growing season. This strategy promotes consistent growth and encourages vibrant blooms.
- Spring fertilization: Applying fertilizer in spring promotes new growth and encourages the development of healthy blooms. Early spring application supports the development of robust stems and foliage.
- Summer fertilization: Continued fertilization during the summer helps maintain vibrant foliage and promotes continued blooming. However, ensure that the application doesn’t coincide with periods of extreme heat.
- Fall fertilization: Fall fertilization is essential for preparing the hydrangeas for the winter dormancy period. It helps strengthen the roots and supports the plant’s overall health.
Importance of Balanced Fertilizers
A balanced fertilizer contains equal proportions of nitrogen, phosphorus, and potassium. These three macronutrients are vital for different aspects of plant growth. Nitrogen supports leaf growth, phosphorus encourages root development and flowering, and potassium promotes overall plant health and disease resistance.
Avoiding Fertilizing During Extreme Weather
Hydrangeas are susceptible to nutrient burn when exposed to excessive heat or cold. Applying fertilizer during these periods can damage the roots, potentially leading to plant stress or death. Avoid fertilization when temperatures are extremely high or low. Always check the weather forecast and adjust your application schedule accordingly.
Pruning Techniques
Hydrangeas, with their stunning blooms, require regular pruning to maintain their shape, size, and flowering vigor. Proper pruning encourages healthy growth and abundant blooms year after year. Ignoring pruning can lead to overgrown, misshapen plants and reduced flowering. Understanding the specific pruning needs of different hydrangea types is key to achieving the desired results.
Importance of Pruning
Pruning hydrangeas is crucial for maintaining their health and beauty. It removes dead, diseased, or damaged wood, improving air circulation and reducing the risk of pests and diseases. Proper pruning also encourages new growth, leading to fuller plants and more abundant blooms. The removal of spent flowers also prevents energy from being directed toward seed production instead of blooms.
Different Pruning Techniques for Hydrangea Types
Different hydrangea varieties require slightly different pruning approaches. Understanding these variations ensures you’re tailoring your technique to the specific type of hydrangea you’re caring for.
Mophead Hydrangeas
Mophead hydrangeas, known for their large, rounded flower heads, benefit from a combination of techniques. Light pruning, such as removing spent flowers and dead or damaged branches, is beneficial throughout the year. Harder pruning is typically done in late winter or early spring, removing about a third of the oldest stems to encourage new growth.
Lacecap Hydrangeas
Lacecap hydrangeas, with their delicate, layered flower clusters, require similar pruning principles as mopheads. Removing spent flowers and dead or damaged branches is essential throughout the year. In late winter or early spring, cut back older stems to stimulate new growth, though the amount of pruning should be less aggressive than for mopheads.
Climbing Hydrangeas
Climbing hydrangeas require pruning to maintain their shape and encourage continued growth up their support structure. Prune out dead, damaged, or diseased branches throughout the year. In late winter or early spring, remove any crossing or competing branches, and prune back stems that have outgrown their space to encourage new growth.
Best Time to Prune
The ideal time to prune most hydrangea varieties is in late winter or early spring, before new growth begins. This allows the plant to quickly heal from the pruning and direct energy toward new blooms.
Encouraging New Growth and Blooms
Proper pruning techniques encourage the development of new stems and buds, leading to more blooms. By removing spent flowers and older stems, you direct the plant’s energy towards producing new growth, which will ultimately result in larger and more abundant displays of flowers.
Pruning Techniques Table
| Hydrangea Type | Pruning Technique | Frequency |
|---|---|---|
| Mophead | Light pruning throughout the year, hard pruning in late winter/early spring (remove 1/3 of oldest stems) | Annual |
| Lacecap | Light pruning throughout the year, moderate pruning in late winter/early spring (remove less than 1/3 of oldest stems) | Annual |
| Climbing | Remove dead, damaged, or diseased branches throughout the year; remove crossing or competing branches, and prune back stems that have outgrown their space in late winter/early spring | Annual |
Pest and Disease Management: How To Grow Better Hydrangeas
Hydrangeas, with their stunning blooms, are susceptible to various pests and diseases. Proper identification and management are crucial for maintaining healthy, vibrant plants. Ignoring these issues can lead to significant damage, impacting the overall health and beauty of your hydrangea bushes. This section details common problems and effective solutions.Effective pest and disease management involves a proactive approach, combining preventative measures with timely interventions.
By understanding the signs of potential problems and implementing appropriate strategies, you can significantly minimize the impact of pests and diseases on your hydrangeas. This will ensure your hydrangeas thrive and display their full beauty.
Common Hydrangea Pests
Understanding the pests that target your hydrangeas is the first step towards successful management. Common culprits include aphids, spider mites, and leafhoppers. These tiny insects can cause significant damage to the foliage, hindering growth and impacting the plant’s overall health.
- Aphids: These sap-sucking insects cluster on leaves and stems, causing distortion and yellowing. They excrete honeydew, which can lead to sooty mold growth.
- Spider Mites: These microscopic pests create fine webbing on the undersides of leaves, leading to stippling and discoloration. They also suck sap from the leaves, causing them to wither.
- Leafhoppers: These hopping insects feed on plant sap, causing yellowing and distortion of leaves, particularly on new growth. They can also transmit diseases.
Common Hydrangea Diseases
Various fungal and bacterial diseases can affect hydrangeas, leading to leaf spots, blights, and wilts. Proper identification and treatment are key to preventing further spread and damage.
- Leaf Spot Diseases: These fungal diseases manifest as spots on leaves, often with concentric rings or irregular shapes. The spots may be various colors, from brown to black to gray.
- Blights: Blights are rapid-acting diseases that can quickly defoliate hydrangeas. Symptoms often include sudden browning or wilting of leaves and stems. Early detection is critical.
- Powdery Mildew: This fungal disease appears as a white, powdery coating on leaves and stems. It can reduce leaf function and make the plant more susceptible to other problems.
- Bacterial Leaf Spot: This bacterial disease causes brown or black spots on leaves, often with yellow halos around them. It can lead to premature leaf drop and overall weakening of the plant.
Preventing and Controlling Pests and Diseases
Preventive measures are often more effective than reactive ones.
- Proper Sanitation: Regularly remove and dispose of fallen leaves and debris around the hydrangeas to minimize the overwintering and spread of diseases and pests. This includes pruning out infected plant parts immediately.
- Good Air Circulation: Ensure adequate spacing between hydrangeas to promote good air circulation, preventing moisture buildup that favors fungal growth. This will also help prevent the spread of diseases.
- Natural Pest Control: Encourage beneficial insects like ladybugs and lacewings, which prey on aphids and other pests. Consider introducing nematodes that are specific to certain insect pests. Use insecticidal soap or neem oil as needed, but use them judiciously and according to product instructions.
Treating Hydrangea Diseases
Identifying the specific disease is essential to choose the right treatment.
- Fungal Diseases: Apply fungicides labeled for the specific disease, following the instructions carefully. Make sure to remove infected plant parts.
- Bacterial Diseases: Unfortunately, bacterial diseases can be more difficult to control. Removing affected branches and practicing good sanitation is often the most effective course of action. Specific bacterial control measures may be necessary.
Propagation Methods
Hydrangeas, with their stunning blooms and adaptable nature, are rewarding plants to cultivate. Propagating them allows you to expand your collection or create unique cultivars. This section explores various methods, from straightforward cuttings to more involved layering techniques, ensuring you can successfully propagate your favorite hydrangeas.
Cuttings
Cuttings are a common and effective method for propagating hydrangeas. They involve taking a piece of stem and encouraging it to root, eventually growing into a new plant. This method is relatively straightforward and can yield several new plants from a single parent plant.
- Selecting the Right Cuttings: Choose semi-hardwood cuttings, typically taken from new growth in late spring or early summer. These cuttings are firm but not completely woody. A length of 4-6 inches is ideal. Ensure the cutting has at least two sets of leaves. Avoid cuttings from overly mature or dormant wood, as they may struggle to root.
- Preparing the Cuttings: Carefully remove the leaves from the lower half of the cutting. This promotes rooting at the bottom. Dip the cut end in rooting hormone to stimulate root development. Rooting hormone is not essential, but it can significantly increase the chances of success.
- Planting the Cuttings: Plant the cuttings in a well-draining rooting medium, such as a mix of perlite and vermiculite. Ensure the cutting is planted at an angle, ensuring the nodes are slightly buried. Maintain a consistent moisture level by misting the medium regularly.
- Maintaining the Cuttings: Place the cuttings in a warm, humid environment, ideally under a clear plastic dome or inside a propagator. This helps retain moisture and prevents excessive drying. Regular misting is vital for maintaining humidity. Check the rooting medium’s moisture level regularly. Gradually acclimate the cuttings to outdoor conditions over several weeks to prevent shock.
Layering
Layering is a propagation method that involves encouraging roots to develop on a stem while it’s still attached to the parent plant. This method is gentle on the parent plant and often results in a strong, established new plant.
- Choosing the Right Branch: Select a healthy, flexible stem that is not yet woody. This usually means a branch from the current year’s growth. Find a spot on the stem that will be able to touch the soil.
- Making the Cut: Make a shallow cut on the stem, just below a node. This will be the point of root development. Ensure the cut is not too deep.
- Encouraging Root Growth: Gently bend the stem to the ground and bury the cut section in the soil. Secure the stem in place using a small rock or a piece of wire. Keep the stem moist. Root development will take several weeks.
- Establishing the New Plant: Once the stem has rooted, you can carefully separate the new plant from the parent plant in the following spring or early summer. Carefully dig around the roots to avoid damaging them. Plant the rooted cutting in its permanent location.
Division
Division is a propagation method for hydrangeas that involves separating the roots of a mature plant into smaller sections. This method is ideal for creating new plants from established clumps and is relatively quick.
- Timing is Crucial: Divide hydrangeas in early spring, before new growth begins, or in late fall, after the foliage has died back. This timing allows the plants to establish themselves before the heat of summer.
- Carefully Dig the Plant: Carefully dig the entire root ball of the mature hydrangea. Use a sharp shovel or spade to avoid damaging the roots. Use a garden fork to gently loosen the soil around the roots.
- Separate the Sections: Carefully separate the root clumps into smaller sections. Each section should have a healthy root system and a few shoots.
- Plant the Divisions: Plant the divisions in their designated locations. Water thoroughly after planting to help settle the soil around the roots. Keep the soil consistently moist until the new plants establish themselves.
Choosing the Right Hydrangea Variety
Picking the perfect hydrangea for your garden depends on several factors, including your desired bloom time, flower size and color, and the specific growing conditions of your area. Understanding the different types of hydrangeas and their unique characteristics will help you make an informed decision and ensure a thriving hydrangea plant. Each variety offers a distinct aesthetic appeal, making your garden a vibrant display.Knowing the specific needs of each variety is key to successful cultivation.
Different hydrangeas have varying requirements for sunlight, soil, and water, so selecting a variety that suits your garden’s environment will help your plants flourish. Careful consideration of these factors will ensure your hydrangea thrives and provides years of enjoyment.
Hydrangea Variety Overview
Different hydrangea varieties exhibit distinct characteristics in flower size, color, and bloom time. Choosing the right variety ensures a harmonious blend of beauty and practicality within your garden. Knowing the distinctions between varieties helps you select the best fit for your desired aesthetic and garden conditions.
Types of Hydrangeas
There are several types of hydrangeas, each with its own unique charm. The most common include Bigleaf, Smooth, Climbing, and Peegee. Understanding these differences allows for informed decisions about selecting the ideal hydrangea for your space.
- Bigleaf Hydrangeas (Hydrangea macrophylla): Known for their large, showy flower heads, bigleaf hydrangeas come in a wide array of colors, including pink, blue, purple, and white. Their vibrant blooms are a popular choice for gardens. The flower color can be affected by soil pH, influencing the hues from blue to pink.
- Smooth Hydrangeas (Hydrangea arborescens): These hydrangeas feature lacecap or mophead flowers, typically in shades of pink, red, or white. They are known for their adaptability and resilience, making them a good choice for various garden conditions.
- Climbing Hydrangeas (Hydrangea anomala petiolaris): These climbing varieties offer a unique vertical element to the garden. They produce showy clusters of flowers, often in shades of white or pink. Their ability to climb supports vertical growth in the garden. Climbing hydrangeas require appropriate support structures for their growth.
- Peegee Hydrangeas (Hydrangea paniculata ‘Grandiflora’): These hydrangeas feature large, panicle-shaped flower clusters. They offer a classic beauty with blooms in shades of creamy white, and later turn into a soft pink or red. Their robust nature makes them highly adaptable to various garden environments.
Bloom Time, Size, and Color
The bloom time, size, and color of hydrangeas vary significantly between varieties. Choosing a hydrangea that matches your desired aesthetic and seasonal preferences is crucial.
- Bigleaf Hydrangeas: Bloom from late spring to early fall. Flower sizes range from large to medium, depending on the specific cultivar. Color can range from vibrant blue to soft pink, and even white, affected by soil pH.
- Smooth Hydrangeas: Bloom during late spring and summer. Flower sizes are typically smaller than bigleaf varieties. Colors include various shades of pink, red, and white. The flower heads are more of a loose lacecap form.
- Climbing Hydrangeas: Bloom in late spring and early summer. Flower size is medium. Colors are typically white or pink. These varieties are more suited to vertical displays in gardens.
- Peegee Hydrangeas: Bloom in late summer and fall. Flower size is large, in panicle form. Colors start as creamy white and mature to soft pink or red. They are well-suited to adding late-season color to the garden.
Comparison Table of Hydrangea Varieties
The table below summarizes the key characteristics of different hydrangea varieties. This comparison aids in selecting the right hydrangea for your garden.
| Variety | Growth Habit | Bloom Time | Flower Size | Flower Color | Soil Preference |
|---|---|---|---|---|---|
| Bigleaf | Upright, bushy | Late spring-early fall | Large | Pink, blue, purple, white | Acidic to neutral |
| Smooth | Upright, rounded | Late spring-summer | Medium | Pink, red, white | Moist, well-drained |
| Climbing | Climbing | Late spring-early summer | Medium | White, pink | Well-drained |
| Peegee | Upright, rounded | Late summer-fall | Large, panicle | Creamy white to pink/red | Moist, well-drained |
Specific Care Requirements for Different Types
Different hydrangea varieties have slightly different care needs. Understanding these requirements will ensure the health and longevity of your plants.
- Bigleaf Hydrangeas: Require consistent moisture and well-drained soil. They prefer acidic soil for blue flowers and neutral soil for pink. Regular pruning is crucial for maintaining their shape and promoting flowering.
- Smooth Hydrangeas: Prefer consistently moist soil and adequate sunlight. Regular watering is essential, especially during dry periods. They are relatively low maintenance and resilient.
- Climbing Hydrangeas: Require support structures for climbing. Ensure the soil is well-drained and the plant receives sufficient sunlight. Pruning is needed to manage growth and encourage flowering.
- Peegee Hydrangeas: Tolerate a wider range of soil conditions. Consistent moisture and adequate sunlight are important for healthy growth. Prune after flowering to maintain shape and encourage future blooms.
Outcome Summary
In conclusion, growing thriving hydrangeas is achievable with the right knowledge and care. This comprehensive guide has provided you with the essential steps to cultivate these stunning plants, from understanding their unique needs to selecting the perfect variety. Armed with this knowledge, you can transform your garden into a vibrant haven of hydrangea beauty.