


How to get rid of mold in shower is a common bathroom problem, but it’s crucial to address it promptly. Mold growth can be unsightly, but more importantly, it can pose health risks if ignored. This guide provides a comprehensive overview of identifying, understanding, and effectively removing mold from your shower, along with preventing future occurrences. From identifying the telltale signs to implementing preventative measures, we’ll walk you through every step of the process.
This in-depth guide explores various aspects of mold removal, from the initial identification process to the final steps of preventing future growth. We’ll cover different types of mold, their health implications, and the best practices for tackling this common bathroom issue.
Identifying Mold in Showers
Mold in your shower can be a hidden health hazard. Ignoring its presence can lead to serious respiratory issues and other problems. Knowing how to identify mold early is crucial for maintaining a healthy home environment. Understanding the different types of mold and their potential risks is equally important.Identifying mold isn’t always straightforward. Different types of mold have various appearances, and some can be hard to spot, especially in the darker, damp areas of a shower.
Early detection is key to preventing further growth and minimizing health risks. This section will delve into the visual clues, the importance of early detection, and potential health risks associated with various molds.
Visual Indicators of Mold Growth
Mold growth in showers often manifests in various colors, textures, and locations. Pay close attention to these indicators:
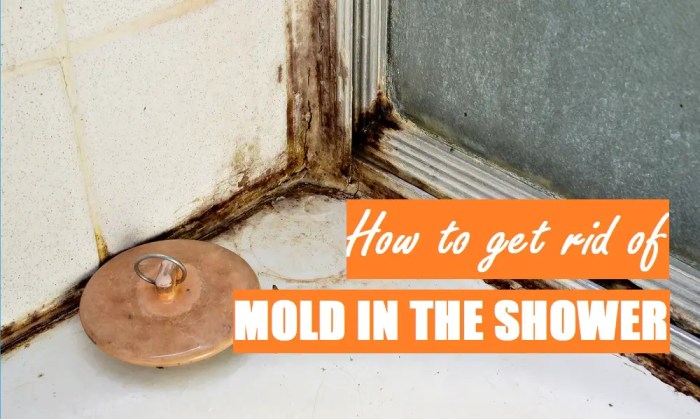
- Black, Green, or Grayish Spots: These are common colors associated with mold growth. They might appear as fuzzy or slimy patches on shower walls, grout, or caulking. Sometimes, these patches can be small, barely noticeable spots, and can quickly spread.
- Musty Odor: A distinctive musty or earthy smell is another clear sign. This odor can be strong or subtle, but it’s often a reliable indicator of mold presence, especially in conjunction with visible signs.
- Discolored Grout or Caulking: Mold frequently grows within the porous materials like grout and caulking. Look for discoloration, darkening, or staining, particularly along seams and joints. Grout, especially, can become discolored and textured as mold takes hold.
- Soft or Fuzzy Textures: Mold often presents a soft, velvety, or fuzzy texture. This is a strong indication of active growth, which can quickly spread if not addressed promptly.
- Water Damage: Water damage in the shower, like persistent leaks or condensation, creates ideal conditions for mold growth. Look for any signs of water damage, as it frequently precedes visible mold.
Importance of Early Detection
Ignoring early signs of mold can lead to serious health consequences. The longer mold is left untreated, the more it can spread and the greater the health risks.
- Health Risks: Mold exposure can trigger allergic reactions, respiratory problems (like asthma attacks), and other health issues. People with pre-existing respiratory conditions are especially vulnerable to mold-related problems.
- Damage to Materials: Mold can cause significant damage to materials in your shower, including grout, caulk, and even the drywall. Left unchecked, mold can cause structural problems.
- Cost Implications: Remediation efforts for mold can be costly. Early intervention can often prevent the need for extensive repairs and save money in the long run.
Types of Mold and Potential Health Risks
Different types of mold have different health effects. It’s crucial to understand the possible risks associated with each type.
| Type of Mold | Appearance | Potential Health Risks |
|---|---|---|
| Stachybotrys chartarum (Black Mold) | Dark, velvety patches, often black or dark green | Can cause respiratory problems, allergic reactions, and in severe cases, more serious health complications. |
| Aspergillus | May appear as fuzzy, greenish-gray, or black spots | Can trigger allergies, asthma, and respiratory infections, especially in individuals with compromised immune systems. |
| Penicillium | May appear as fuzzy, greenish-blue, or gray-green | Can cause allergic reactions, skin irritation, and respiratory problems. |
| Cladosporium | May appear as dark green, black, or brown spots | Can cause allergic reactions, skin irritation, and respiratory problems. |
Common Misconceptions About Mold in Showers
Some common misconceptions can lead to delayed or ineffective mold removal. It’s essential to understand these misconceptions to address mold effectively.
- Mold only grows in dark, damp areas: While these conditions favor mold growth, mold can also develop in seemingly dry areas. Moisture is a key element, not just darkness.
- Mold is harmless: All mold is a concern, although some types are more harmful than others. Mold can pose a significant health risk, and its presence requires immediate attention.
- Mold can be easily cleaned with bleach: While bleach can kill mold, it’s not always the most effective or safe method, and it may not remove the mold completely. Professional remediation may be necessary for extensive mold infestations.
Understanding Mold Growth
Mold thrives in bathrooms due to the perfect storm of conditions: high humidity, warm temperatures, and often poor ventilation. These factors create an environment where mold spores can germinate, multiply, and form visible colonies. Understanding the life cycle and the specific conditions that encourage mold growth is crucial for effective prevention and remediation.Mold, a type of fungus, needs moisture to survive.
Bathrooms, with their frequent showers and tubs, often retain high levels of moisture. This constant humidity, combined with the warmth of the room, provides an ideal breeding ground for mold. Poor ventilation further exacerbates the problem, trapping moisture and encouraging mold growth.
Environmental Factors Promoting Mold Growth
Mold growth is heavily influenced by environmental factors. Moisture is the cornerstone, as mold needs water to survive. High humidity levels, often present in bathrooms due to showering and bathing, provide the moisture mold needs. Temperature also plays a crucial role. Warm temperatures accelerate mold growth, making bathrooms, especially those lacking ventilation, susceptible.
Poor ventilation, by preventing the escape of moisture, traps humidity, creating a perfect environment for mold to flourish.
Mold Life Cycle
Mold begins its life cycle as a spore, a microscopic reproductive unit. These spores are carried through the air and can land on surfaces where conditions are favorable for germination. Once landed, if the surface is damp, the spore germinates, growing into a hypha, a thread-like structure. These hyphae then form a network, called a mycelium, which absorbs nutrients from the surrounding environment.
As the mycelium grows, it produces more spores, which are then released into the air, completing the life cycle and enabling the spread of mold. This continuous cycle explains how mold can rapidly spread in a poorly maintained bathroom.
Mold vs. Mildew
While often used interchangeably, mold and mildew are distinct types of fungi. Both thrive in damp environments, but their appearance and growth conditions differ. Mildew typically appears as a fuzzy, often grayish-green or white coating, while mold can manifest in various colors, including black, brown, green, or yellow. Mildew usually develops on surfaces exposed to direct moisture, while mold can grow in a wider range of conditions, including those with less obvious moisture.
Mold Remediation Methods
Effective mold remediation depends on the extent and type of mold. Prevention methods, such as improved ventilation and reduced moisture, are crucial in preventing future mold growth. Various remediation methods are available, ranging from simple cleaning solutions to professional mold removal services. The effectiveness of each method depends on factors like the type of mold, the extent of contamination, and the specific surface affected.
Chemical treatments, for example, are effective against mold but may pose health risks if not used correctly. Professional mold remediation services ensure that the process is handled safely and effectively, preventing secondary contamination and health risks.
Dealing with shower mold can be a real pain, but tackling it head-on is key. A good cleaning routine is essential, and knowing how to properly clean your appliances is just as important. For example, if you’re looking for tips on keeping your Cuisinart coffee maker sparkling clean, check out this helpful guide on cuisinart coffee maker how to clean.
Ultimately, consistent cleaning is the best way to prevent mold from growing in the first place, ensuring a fresh and clean shower experience every time.
Preparing for Mold Removal
Getting rid of shower mold requires careful preparation to ensure your safety and the effectiveness of the removal process. Ignoring these precautions can lead to health risks and ineffective mold eradication, potentially resulting in the mold returning. This section will detail the safety measures, necessary tools, and proper ventilation techniques to safely and successfully remove mold.Thorough preparation is crucial for a successful mold removal project.
This involves not just the physical act of cleaning but also the safety measures and correct procedures to prevent re-growth and protect your health. A comprehensive approach that considers the safety aspects, tools, and ventilation will guarantee a more efficient and effective solution.
Safety Precautions
Mold can pose significant health risks, ranging from allergic reactions to more serious respiratory issues. Protecting yourself during mold removal is paramount. Essential safety gear includes protective clothing and equipment to prevent direct contact with mold spores.
- Protective Gear: Wear gloves, a respirator mask (N95 or higher), and eye protection. This will shield your skin, lungs, and eyes from mold spores and potentially harmful substances used in cleaning solutions. Choose a respirator mask that filters out mold spores effectively. A simple dust mask won’t offer adequate protection.
- Personal Protective Equipment (PPE): Long-sleeved shirts and pants, preferably made of tightly woven material, should be worn to prevent mold spores from contacting exposed skin. Rubber boots will protect your feet from contact with contaminated surfaces and solutions.
Necessary Tools and Materials
Effective mold removal requires the right tools and materials. The selection of tools and materials will depend on the extent of the mold infestation and the type of surface being treated.
- Tools: A scraper, stiff brush, putty knife, and disposable towels are essential for removing mold from surfaces. A stiff brush will help remove mold from grout and crevices. Use a putty knife to remove stubborn mold or caulk. A scraper can remove loose mold from larger areas. Disposable towels are used for cleaning and should be disposed of properly.
- Cleaning Solutions: A mold-killing solution is necessary. Select a solution appropriate for the surface material. A bleach solution (1 part bleach to 10 parts water) is a good option for many surfaces. Always follow the product instructions carefully. Ensure that the solution is appropriate for the surfaces involved.
Avoid using abrasive cleaners as they may damage the surface.
- Ventilation: A powerful fan is crucial for ventilating the area. This is essential to remove mold spores from the air and prevent re-growth.
Ventilation Procedures
Proper ventilation is critical to prevent the inhalation of mold spores and ensure the safety of the work environment. The process should be implemented both before and during the removal.
- Pre-Removal Ventilation: Open windows and doors to allow fresh air circulation before beginning the mold removal process. Use fans to increase air circulation and expel the contaminated air.
- During Removal Ventilation: A powerful fan should be positioned in the area to exhaust the air containing mold spores. Keep the fan running continuously during the entire removal process. Maintain the ventilation system throughout the mold removal process.
- Post-Removal Ventilation: Continue airing out the area for several hours after the removal process is completed to ensure that any remaining mold spores are dispersed. Ensure the area is well-ventilated to prevent mold growth.
Disposal Methods for Mold-Contaminated Materials
Proper disposal of mold-contaminated materials is essential to prevent the spread of mold and to maintain a healthy environment.
| Material | Disposal Method |
|---|---|
| Mold-contaminated towels and rags | Place in a sealed plastic bag and dispose of in a designated trash container. Ensure proper labeling. |
| Mold-contaminated caulk | Remove the caulk carefully and dispose of it in a sealed plastic bag. Label clearly. |
| Mold-contaminated drywall | Dispose of the drywall in a sealed plastic bag. If the mold is extensive, contact a professional waste removal service. |
| Mold-contaminated grout | If possible, replace the grout. Dispose of any removed grout in a sealed plastic bag. Consult with a professional if the mold is extensive. |
Removing Mold from Showers
Getting rid of shower mold is a crucial step in maintaining a healthy and hygienic bathroom environment. Ignoring mold can lead to more than just an unsightly problem; it can affect your family’s health. This section will guide you through the process of removing mold from various shower surfaces, providing effective cleaning solutions and safety precautions.Mold removal requires a systematic approach, starting with proper preparation and using appropriate cleaning solutions.
The following steps Artikel the process, emphasizing the importance of safety measures and effective cleaning techniques.
Cleaning Different Shower Surfaces
Different shower surfaces require specific cleaning methods. Understanding the materials will help you choose the right approach and avoid damaging your shower.
- Tiles: Tiles are often the most common surface in showers. Use a solution of mild detergent and water for initial cleaning. If mold persists, consider a commercial mold remover. Be sure to rinse thoroughly to prevent residue buildup.
- Grout: Grout, the spaces between tiles, is often a haven for mold. Use a grout brush to apply a mold-removing solution. Focus on scrubbing the affected areas, ensuring you reach all the crevices. Pay close attention to areas where water collects. Once finished, rinse thoroughly.
- Caulking: Caulking, which seals areas around the shower, can also harbor mold. Use a stiff brush or a utility knife to remove old, loose caulking. Apply a new bead of caulking and allow it to dry completely according to the manufacturer’s instructions.
Cleaning Solutions for Mold Removal
Various cleaning solutions can be used for mold removal. Choosing the right one depends on the severity of the mold and the materials in your shower.
- Commercial Mold Removers: These products are specifically designed for mold removal and often contain bleach or other powerful disinfectants. Always follow the product instructions carefully, paying close attention to safety precautions. Some commercial mold removers contain bleach and can cause irritation if not used properly. Ensure good ventilation and wear appropriate protective gear.
- Baking Soda and Vinegar: This natural cleaning method can be effective for mild mold. A paste of baking soda and water can be applied to affected areas and left to sit for a few minutes. Then, add white vinegar to create a bubbling solution that loosens the mold. Rinse thoroughly.
- Hydrogen Peroxide: Hydrogen peroxide is a mild bleaching agent that can be effective against mold. Mix it with water, apply it to the affected areas, and allow it to sit for a few minutes before rinsing.
Comparing Commercial Mold Removers
Commercial mold removers vary in effectiveness and safety. Factors such as ingredients, concentration, and user reviews can be considered when choosing a product.
| Product | Effectiveness | Safety Concerns | User Reviews |
|---|---|---|---|
| Brand A | High | Moderate (use with caution) | Generally positive |
| Brand B | Medium | Low | Mixed |
| Brand C | Low | Low | Mostly negative |
Note: This table provides a general comparison and individual results may vary. Always follow product instructions and safety guidelines.
Dealing with shower mold can be a real drag, but tackling it is super important! A good cleaning routine is key, and remember to also focus on making your home smell amazing during Thanksgiving. For some great tips on creating a fantastic aroma, check out this helpful guide on make home smell good during thanksgiving. Once you’ve tackled the smells, you can return to your mold-fighting efforts and get that shower sparkling again!
Safe Application and Removal of Cleaning Solutions, How to get rid of mold in shower
Safe application and removal of cleaning solutions are crucial to avoid potential health risks. Always wear appropriate personal protective equipment (PPE) like gloves and eye protection. Ensure adequate ventilation in the area to prevent inhalation of fumes.
Proper ventilation and the use of appropriate personal protective equipment are essential when dealing with cleaning solutions.
Thoroughly rinse all surfaces to remove any residue. If you experience any discomfort or allergic reaction, discontinue use immediately and seek medical attention.
Preventing Future Mold Growth

Mold prevention is crucial for maintaining a healthy and safe home environment. Addressing the underlying causes of mold growth is far more effective than simply removing visible mold. This involves understanding and controlling moisture, a key factor in mold proliferation.Effective mold prevention is a proactive approach, shifting the focus from reactive removal to a preventative strategy. By implementing these strategies, you can significantly reduce the risk of mold returning, saving time, money, and stress.
Crucial Steps for Preventing Shower Mold
Preventing mold in your shower requires a multi-faceted approach focusing on controlling moisture and improving ventilation. Implementing these steps will create an environment less hospitable to mold growth.
- Proper Ventilation: Adequate ventilation is essential to remove moisture from the shower area. This prevents condensation buildup, a primary breeding ground for mold. Ensure your shower has a functional exhaust fan or consider installing one if it’s lacking. A properly functioning exhaust fan should be able to remove moisture quickly after showering, significantly reducing the risk of mold.
- Moisture Control: Moisture is the lifeblood of mold. Taking steps to control moisture is a critical element in preventing future mold growth. This involves addressing potential sources of water leaks, dripping faucets, and ensuring that the shower area is well-ventilated. Regularly wiping down the shower walls with a damp cloth after each use can also help remove excess water.
This simple step can prevent water from pooling and providing a moist environment for mold to thrive.
- Regular Shower Cleaning: Consistent cleaning and maintenance are essential for preventing mold buildup. Clean your shower regularly, ideally after each use. This involves wiping down surfaces with a damp cloth to remove any residual water. Cleaning the shower regularly helps maintain a dry environment, making it less conducive to mold growth. A thorough cleaning should include scrubbing mildew stains, and using a mold-killing cleaner to prevent future growth.
Getting rid of shower mold can be a real pain, but a good scrub with bleach usually works wonders. Speaking of plants, have you ever wondered if you can overwinter your coleus? Knowing how to care for your plants through the colder months is key, and finding resources like can i overwinter coleus can be a huge help.
Once you’ve tackled the mold, you can enjoy a clean, fresh shower again!
Improving Bathroom Ventilation
Proper ventilation is crucial in preventing moisture buildup and, consequently, mold growth. Effective ventilation systems create a dry environment, making it harder for mold to take hold.
- Exhaust Fans: A well-functioning exhaust fan is a cornerstone of preventing shower mold. Ensure your exhaust fan is in good working order and is used after each shower. If the fan is not adequately powerful, consider replacing it with a more efficient model. A simple check of the fan’s functionality can make a substantial difference in preventing mold.
- Window Placement and Size: If your bathroom has a window, ensure it’s properly sized to facilitate airflow and remove moisture. Consider the placement of the window and how it interacts with the bathroom’s layout to maximize natural ventilation.
Preventing Water Damage and Leaks
Water damage is a significant contributor to mold growth. Identifying and addressing potential leaks is critical to preventing mold and preserving your shower’s integrity.
- Regular Inspections: Inspecting the shower area for any signs of leaks, drips, or water damage is essential. Regular checks can prevent water from accumulating and allowing mold to take root. This includes examining the shower walls, floor, and caulking for any signs of water damage or moisture. Addressing any issue promptly can prevent costly repairs down the line.
- Caulking Maintenance: Caulking around the shower area is crucial in preventing water from seeping into areas where it shouldn’t be. Regularly inspecting and replacing caulking can prevent water damage. A simple, well-maintained caulking job can significantly reduce the risk of water infiltration and subsequent mold growth.
Dealing with Difficult Mold Cases: How To Get Rid Of Mold In Shower
Sometimes, mold infestations in showers go beyond a simple surface cleaning. Extensive spread or stubborn, resistant mold requires a more strategic approach. Understanding when professional help is needed is crucial for effective and safe mold removal. Ignoring these situations can lead to more significant problems down the line, affecting your health and potentially causing structural damage.
Signs of Extensive or Resistant Mold
Mold that won’t budge with standard cleaning solutions, or that spreads rapidly beyond the initial spot, signals a deeper problem. Look for discoloration that’s more than just a small patch, and for mold growth in areas not directly exposed to water, as this suggests moisture issues are affecting the whole structure. Evidence of black, green, or gray fuzzy growth, that appears to be spreading along grout lines or caulking, should trigger further investigation.
Additionally, if the mold is in hard-to-reach areas like behind tiles or within walls, it’s likely to be more extensive than initially perceived.
When Professional Mold Remediation is Necessary
Professional mold remediation services are essential when the mold is extensive, pervasive, or resistant to standard cleaning methods. For example, if the mold covers large areas of the shower, including the walls and ceiling, a professional assessment is recommended. If the mold is growing behind tiles or within wall cavities, access and removal might require specialized tools and expertise.
Another situation demanding professional attention is when the mold appears in multiple areas of the house, suggesting a wider moisture problem that needs to be addressed. Finally, if the mold is growing in areas that are difficult to access, or if you notice unusual odors or health symptoms related to the mold, professional help is highly advisable.
Identifying When Professional Help is Needed
Determining whether to call in professionals is based on the extent of the problem. Consider the size of the affected area. If the mold covers more than a few square feet, or if it’s growing in multiple locations, professional intervention is usually required. Another key factor is the presence of mold in hidden areas. If the mold is behind tiles, within walls, or in other hard-to-reach places, professional remediation is generally the safest and most effective approach.
If the mold shows signs of resistance to standard cleaning solutions, like bleach or other disinfectants, this also indicates a need for specialized expertise.
Questions to Ask When Considering Professional Services
When seeking professional mold remediation services, thorough questions are crucial. These questions should help determine the professional’s qualifications, experience, and approach to the problem. Important considerations include the certifications and licenses held by the company or individual. Inquire about their experience handling similar mold infestations in showers and bathrooms. Ask about the specific methods they will employ to remove the mold, and ensure they are familiar with safe and effective procedures.
Crucially, inquire about the cost of the service and what is included in the quote. Finally, ask for references or examples of previous successful projects to gauge their credibility.
Post-Mold Removal

The arduous task of mold removal is not complete until the area is thoroughly disinfected and monitored for regrowth. This final stage ensures the safety and health of the occupants and prevents the costly and time-consuming process from being repeated. Proper post-removal steps are critical for complete remediation and long-term mold prevention.A comprehensive approach to post-mold removal involves meticulous disinfection, rigorous monitoring, and necessary replacements to ensure a mold-free environment.
This includes carefully selecting and replacing items that may have been exposed to mold, such as towels, shower curtains, and rugs. This comprehensive approach prevents future mold growth and maintains a hygienic living space.
Disinfection Procedures
Thorough disinfection is essential to eliminate any lingering mold spores and prevent further contamination. This process goes beyond simply cleaning the affected area. It requires using appropriate disinfectants and following the manufacturer’s instructions meticulously. Ensure that the disinfectant is effective against the type of mold found in the shower. This includes appropriate ventilation to allow for complete evaporation of the cleaning solution.
Monitoring for Mold Regrowth
Vigilance is crucial in the weeks and months following mold removal. Regular visual inspections of the affected area are essential to detect any signs of mold regrowth. This monitoring ensures that the remediation efforts were successful and that the underlying causes of mold growth are addressed. Pay particular attention to areas that were heavily affected or had standing water issues.
Replacement of Items
Certain items that were exposed to mold during the remediation process should be replaced. This is vital to ensure the complete eradication of the mold. Mold can penetrate fabrics and materials, making thorough cleaning ineffective. Examples of items to replace include:
- Shower Curtains: Shower curtains, especially if made of fabric, are often affected by mold and mildew. The porous nature of some fabrics allows mold to penetrate the fibers, making them difficult to fully sanitize.
- Towels: Towels, used repeatedly in the shower area, can absorb moisture and become a breeding ground for mold. Replacing them ensures a clean and mold-free environment for personal hygiene.
- Shower Rugs: Shower rugs, often made of fabric or rubber, can trap moisture and become ideal environments for mold to thrive. Replacing them prevents future mold growth in these areas.
Mold-Free Confirmation Testing
Verification of a mold-free environment is essential after remediation. This ensures that the removal process was effective and that no mold remains. Testing methods include:
- Visual Inspection: A thorough visual inspection of the affected area is the first step in determining if mold has reappeared. Pay close attention to any discoloration, unusual textures, or smells. Inspect for signs of water damage, such as leaks or dripping water, as they can lead to mold growth.
- Professional Mold Testing: Professional mold testing can provide conclusive evidence of a mold-free environment. A professional can use specialized equipment to analyze air quality and identify any remaining mold spores.
- Air Quality Monitoring: Monitoring the air quality in the shower area after remediation can help identify the presence of mold spores. This involves using air quality monitors and comparing the results to baseline levels.
Visual Aids
Seeing is believing, especially when it comes to mold. Visual aids can help you identify the specific type of mold, understand its growth patterns, and visualize the necessary protective gear and removal techniques. These tools are crucial for a safe and effective mold removal process.
Mold Type Identification
Visual identification of mold is crucial for proper treatment. Different mold types exhibit distinct colors and textures. Understanding these variations allows you to pinpoint the specific type of mold and tailor your removal strategy.
| Mold Type | Typical Color | Texture |
|---|---|---|
| Penicillium | Green, blue-green, or white | Fuzzy, powdery |
| Aspergillus | Green, yellow, black, or white | Fuzzy, powdery, or velvety |
| Cladosporium | Black, dark green, or brown | Fuzzy, often with a slimy or dusty appearance |
| Alternaria | Brown, olive-green, or black | Often appears in spots or blotches, sometimes with a rough texture |
| Stachybotrys chartarum (Black Mold) | Dark gray, black, or greenish-black | Often appears in clumps, sometimes with a velvety texture |
Mold Growth Stages in Showers
Understanding how mold grows is vital for effective prevention and removal. Mold growth typically progresses through distinct stages, from initial colonization to extensive growth. Monitoring these stages helps to intervene before the problem becomes significant. 
(Note: A hypothetical infographic would depict a shower stall. The stages would be visually represented by progressively darker and larger mold spots. Early stages might be small, light-colored spots. As the stages progress, the spots become larger, darker, and more widespread.)
Protective Gear for Mold Removal
Safety is paramount during mold removal. Appropriate protective gear prevents exposure to mold spores and harmful chemicals used in cleaning solutions. 
(Note: The image would display a person wearing a respirator mask, safety glasses, disposable gloves, a long-sleeved shirt, and pants. The image should clearly showcase the full coverage of the protective gear to emphasize the importance of proper attire.)
Mold Removal Techniques
Various techniques can be used to remove mold effectively. Choosing the right method depends on the type and extent of mold growth. 
(Note: The image should show a person carefully spraying a mold-killing solution onto a shower wall. The caption would explain the technique, such as “Applying a diluted bleach solution to the affected area using a spray bottle. Ensure proper ventilation.”)
(Note: The image would show a person using a stiff-bristled brush to scrub away mold. The caption would highlight the importance of scrubbing thoroughly but gently to avoid damaging the surface.)
Closing Notes
In conclusion, tackling mold in your shower requires a multifaceted approach. By understanding the factors that contribute to mold growth, taking necessary safety precautions, and employing effective cleaning techniques, you can successfully eliminate mold and maintain a healthy and hygienic bathroom environment. Remember, prevention is key, so implementing regular maintenance and moisture control measures will significantly reduce the risk of future mold infestations.
This comprehensive guide will equip you with the knowledge and tools to tackle mold effectively and prevent future issues.