How to get burnt smell out of a microwave? This guide delves into the science behind burnt odors in your microwave and offers effective solutions, from identifying the source to specialized cleaning techniques. We’ll cover everything from common culprits like burnt meats and dairy to preventing future incidents and dealing with stubborn smells.
Understanding the source of the smell is crucial for effective removal. Different foods burn differently, creating unique smells. This guide will explain how to pinpoint the specific food that caused the problem. We’ll also look at various cleaning methods, from natural solutions like baking soda and vinegar to commercial cleaners.
Identifying the Source of the Smell
Unpleasant burnt odors emanating from your microwave often point to a specific food item that’s undergone unwanted charring. Pinpointing the culprit is crucial for effective cleaning and preventing future incidents. Understanding the chemical reactions behind these smells helps us identify the source more accurately.Identifying the source of the burnt smell isn’t just about cleaning; it’s about understanding the food’s composition and how it interacts with heat in the microwave.
This knowledge allows for more proactive cooking techniques and avoids unnecessary cleanup efforts.
Common Food Sources of Burnt Smells
Different food types react differently to microwave heat, leading to distinct burnt smells. Recognizing these patterns helps you isolate the source of the problem.
- Meats: Meats, especially those with high fat content, can easily burn in the microwave if not monitored closely. Overcooked or improperly placed meats can generate a smoky, charred aroma. Examples include beef, chicken, fish, and pork.
- Dairy Products: Dairy products like cheese and milk can burn quickly, often resulting in a pungent, acrid smell. This is especially true if the dairy is exposed to high heat for prolonged periods or if it’s not evenly distributed within the microwave.
- Vegetables: Certain vegetables, particularly those with high sugar content, can burn if overcooked or if the microwave power is too high. Examples include corn, potatoes, and carrots.
Chemical Reactions Leading to Burnt Smells
The chemical reactions behind burnt smells vary depending on the food type. These reactions are primarily due to the breakdown of complex molecules under high temperatures.
- Meats: The Maillard reaction, a chemical reaction between amino acids and sugars, occurs in meats when they’re cooked at high temperatures. This reaction creates the browned, flavorful compounds we associate with cooked meats, but if carried to extremes, it also produces undesirable burnt aromas.
- Dairy Products: Dairy products contain proteins and sugars that break down and decompose when heated beyond their safe temperature range. This decomposition leads to the production of volatile compounds responsible for the pungent, burnt smell.
- Vegetables: Sugars in vegetables caramelize when heated, resulting in a sweet burnt smell. If this caramelization process occurs excessively, it produces a more intense and less desirable burnt flavor.
Identifying the Burnt Food Source by Smell
The smell of burnt food can be a helpful clue in determining the source. Different food types have different characteristics when they’re burnt.
| Smell Characteristic | Likely Source |
|---|---|
| Smoky, charred | Meats (especially high-fat meats) |
| Pungent, acrid | Dairy products (cheese, milk) |
| Sweet, burnt | Vegetables (high-sugar content) |
Cleaning Methods for a Burnt Smell
Dealing with that lingering burnt smell in your microwave can be frustrating. It’s more than just an unpleasant odor; it can also indicate potential damage to the appliance if not addressed promptly. Fortunately, several effective methods, both natural and commercial, can help eliminate the burnt smell and restore your microwave to its pristine condition.
Natural Cleaning Methods
Natural cleaning solutions are often preferred for their gentler approach and reduced environmental impact. These methods typically rely on household ingredients, minimizing the risk of harsh chemicals and potentially harmful fumes.
- Baking Soda and Vinegar: This classic combination is remarkably effective for tackling burnt odors. Baking soda acts as an absorbent, neutralizing the lingering smell, while vinegar provides an acidic cleaning power to break down stubborn food particles. This approach is relatively inexpensive and environmentally friendly.
- Lemon Juice: The acidity of lemon juice is another potent tool for removing burnt smells. Cut a lemon in half, place it in the microwave, and heat it on high for a few minutes. The steam will help loosen the burnt residue, while the citrus scent helps to mask any lingering odor.
- White Vinegar: Vinegar’s acidity can effectively cut through burnt food particles and odors. Pour a cup of white vinegar into a microwave-safe bowl, heat on high for a few minutes, then let it sit for 15 minutes. The steam helps loosen the residue, and the vinegar neutralizes the burnt smell.
Commercial Cleaning Solutions
While natural methods are generally safe and effective, commercial cleaners can provide a quicker solution for stubborn burnt smells. However, it’s crucial to use these products cautiously, following the manufacturer’s instructions to avoid potential damage to the microwave or health risks.
- Microwave Cleaner Sprays: These specialized cleaners are designed to tackle tough stains and odors in microwaves. They usually contain stronger chemicals to effectively break down stubborn food particles and odors. It’s important to carefully follow the instructions on the product label to ensure proper usage and safety precautions.
Step-by-Step Procedure: Baking Soda and Vinegar
This method effectively tackles burnt smells and requires minimal effort.
- Prepare the Solution: Mix one-half cup of baking soda with a few tablespoons of water in a microwave-safe bowl to form a paste.
- Microwave Application: Place the baking soda paste in the microwave. Heat on high for two to three minutes. The baking soda will begin to bubble as it reacts with the moisture.
- Vinegar Application: After the baking soda has heated, add one cup of white vinegar to a separate microwave-safe bowl. Microwave on high for one to two minutes. The steam from the vinegar will help loosen any remaining burnt particles.
- Rest and Wipe: Allow the mixture to sit for 15-20 minutes to further break down the residue. Then, use a damp cloth or sponge to wipe away any remaining residue. The microwave should be noticeably cleaner and free of burnt odors.
Effectiveness and Safety Comparison
The effectiveness of different cleaning methods varies depending on the severity of the burnt smell and the length of time the smell has been present. Natural methods, like baking soda and vinegar, are generally effective for milder burnt odors and are safer for use in the home. Commercial cleaners, while often faster, can potentially damage the microwave or pose health risks if not used correctly.
Cleaning Method Comparison Table
| Cleaning Method | Effectiveness | Safety | Pros | Cons |
|---|---|---|---|---|
| Baking Soda and Vinegar | Good | High | Natural, inexpensive, safe | May take longer for stubborn odors |
| Lemon Juice | Moderate | High | Natural, pleasant scent | Less effective for severe burns, may not fully eliminate smell |
| White Vinegar | Good | High | Natural, effective for mild odors | May not be sufficient for stubborn odors |
| Microwave Cleaner Sprays | Excellent | Moderate | Fast, effective for stubborn odors | Potentially harmful chemicals, follow instructions carefully |
Preventing Future Burnt Smells

A lingering burnt smell in your microwave can be frustrating and even potentially damaging to the appliance. Prevention is always better than cure, and by understanding how microwaves work and how to use them properly, you can significantly reduce the risk of burning food and unpleasant odors. By following these proactive steps, you can enjoy delicious, evenly cooked meals without the worry of burnt smells.Proper microwave use involves more than just hitting the start button.
It’s about understanding the nuances of power levels and cooking times, especially when dealing with various types of food. By following a structured approach, you can ensure your microwave meals are perfect, every time.
Microwave Cooking Guidelines
Microwave cooking often requires a different approach than traditional stovetop or oven cooking. Understanding the principles of microwave cooking is crucial to preventing burnt smells. Microwaves work by exciting water molecules in food, causing them to vibrate and generate heat. This rapid heating can lead to uneven cooking if not managed properly.
Getting that burnt smell out of your microwave can be a real pain, but thankfully, there are some easy solutions. One trick I’ve found works wonders is using a mixture of baking soda and water. It’s a bit like those resilient plants that naturally overwinter, plants that naturally overwinter , toughing it out through the cold months.
You can also try a lemon or vinegar solution – just make sure to run the microwave empty after. Hopefully, these tips will help banish that burnt smell and have your microwave smelling fresh again!
- Appropriate Cooking Times and Power Levels: Different foods require varying cooking times and power levels. A general guideline is to start with lower power levels (like 50%) and shorter cooking times, then increase the power level or time as needed. Observe the food closely and adjust as necessary. For example, frozen vegetables may need a longer time on a lower power setting to cook thoroughly without burning.
Conversely, a delicate dish might only need a few seconds at high power to warm up.
- Inspect Food Before Microwaving: Always inspect food before placing it in the microwave. Ensure there are no visible areas of dryness or unevenness in the food that might lead to localized burning. Look for areas that might concentrate heat, such as thick or dense sections of food, and adjust cooking times or power accordingly. If you notice something suspicious, remove it and re-evaluate its suitability for microwave cooking.
Checklist for Preventing Burnt Smells
Preventing burnt smells in your microwave is a straightforward process, involving a few simple steps. By following a consistent checklist, you can avoid those unwanted smells and ensure your microwave remains a reliable cooking appliance.
- Check for dry spots or unevenly distributed food. If you see dry spots, remove them and re-evaluate the cooking process. This step is critical for preventing localized burning.
- Start with lower power settings. Many recipes begin with a low power setting (e.g., 50%) to allow for more uniform heating. This method helps prevent burning, especially with thick foods or those with high water content.
- Monitor the food closely during the cooking process. Using a microwave-safe timer is a good practice, as it helps you stay on top of the cooking time. Pay close attention to the food’s appearance and texture during the process to adjust the power level or cooking time as needed. For example, a thick steak might need lower power for longer periods than a simple soup.
Getting rid of that burnt smell in your microwave can be a real pain, but thankfully, there are some simple solutions. One thing I’ve found super helpful is to fill a bowl with water and lemon slices, then microwave it for a few minutes. While you’re at it, why not check out some gorgeous new home decor items?
You can find some fantastic options to refresh your kitchen or any room in your home by shop for home decor online. Once you’ve got your new look sorted, you can then give your microwave a thorough clean with a mild detergent and some warm water, and the burnt smell should be gone!
- Use microwave-safe containers. Using appropriate containers helps prevent hot spots and uneven heating, reducing the risk of burning.
- Stir or rotate food during the cooking process. This step is crucial for ensuring even cooking and preventing hot spots. Stirring or rotating helps distribute the heat more evenly throughout the food. For example, stirring pasta sauce during cooking helps to distribute heat and prevent scorching.
- Follow recipe instructions carefully. Recipes often provide specific cooking times and power levels for particular foods. Following these guidelines is critical for achieving the desired results and preventing burnt smells.
Specialized Cleaning Techniques: How To Get Burnt Smell Out Of A Microwave

Sometimes, a simple wipe-down just isn’t enough to banish the lingering aroma of burnt food from your microwave. Stubborn burnt-on residue requires a more targeted approach. This section dives into specialized cleaning tools and methods to tackle even the most persistent burnt smells and food particles.Specialized tools and techniques are crucial for dealing with burnt-on food. Employing the right methods prevents further damage to your appliance and ensures a thorough cleaning, leaving your microwave sparkling clean and smelling fresh.
Dealing with Burnt-on Food Residue
Burnt-on food residue can be a real challenge, often requiring a multi-pronged approach. Understanding the different types of residue helps determine the best removal technique.
- Carbonized Residue: This type of residue, often found after a particularly intense burning incident, requires a more aggressive approach. Soaking is a useful initial step, followed by a scrubbing action using a specialized tool.
- Sticky, Gooey Residue: Sticky, gooey substances, like caramelized sugar or melted cheese, can be tricky to remove. Using a microwave-safe spatula to scrape away as much as possible is a good initial step, then soaking in a cleaning solution can loosen the residue further.
- Crumbled Residue: For crumbled or broken food particles, a combination of scraping and a gentle scrubbing motion with a soft brush or sponge is usually effective. Ensure you don’t damage the microwave interior by using excessive force.
Using Microwave-Safe Scrub Brushes or Sponges
A microwave-safe scrub brush or sponge is an excellent tool for tackling burnt-on residue. The material is specifically designed to avoid scratching or damaging the microwave’s interior. Carefully apply gentle pressure, focusing on the affected areas.
- Proper Application: Dip the scrub brush or sponge in a cleaning solution. Gently scrub the burnt areas in a circular motion. Avoid harsh scrubbing, as it can damage the interior of the microwave.
- Specific Cleaning Solutions: For stubborn residue, consider a solution of warm water and a mild dish soap or a dedicated microwave cleaner. These solutions help loosen the burnt food and make the cleaning process more efficient.
- Safety Precautions: Always ensure the scrub brush or sponge is microwave-safe before using it inside the appliance. This prevents any potential damage to the appliance and ensures a safe cleaning process.
Specialized Cleaning Tools
Beyond basic sponges and brushes, certain tools are specifically designed for removing stubborn burnt residue.
- Microwave-Safe Spatulas: These spatulas are specifically designed for use inside microwaves. They are usually made of a flexible, non-scratching material that won’t damage the microwave’s interior while effectively scraping away stubborn food particles.
- Specialized Microwave Cleaners: Commercial microwave cleaners can help break down burnt residue, making it easier to remove. Always follow the manufacturer’s instructions carefully when using these cleaners to avoid damaging the microwave or causing chemical burns.
Microwave Interior Materials and Smell Retention
Microwave interiors, while designed for cooking, aren’t always built to withstand the onslaught of burnt smells. The materials used play a crucial role in how effectively a burnt aroma is absorbed and retained. Understanding these materials and their properties is key to choosing the right cleaning methods and preventing future issues.The interior surfaces of microwaves are typically coated with materials designed for heat resistance and ease of cleaning.
However, different materials react differently to the chemical compounds released during burning. Some materials may absorb and trap these compounds more effectively than others, impacting the longevity of the smell and the effectiveness of cleaning solutions.
Common Microwave Interior Materials, How to get burnt smell out of a microwave
Microwave interiors often employ a variety of materials, each with its own properties regarding smell retention. The most common materials include coated steel, plastic, and ceramic. The choice of material can greatly influence the overall performance of the appliance, including its ability to resist smells.
Impact of Material on Smell Retention
Different materials vary in their ability to absorb and retain odors. This impacts the longevity of a burnt smell and the effectiveness of cleaning methods.
| Material | Smell Absorption Capacity | Smell Retention Potential |
|---|---|---|
| Coated Steel | Moderate | Moderate |
| Plastic | High | High |
| Ceramic | Low | Low |
Coated steel, often used in many microwave models, offers a balance between resistance to stains and odor retention. Plastic, due to its porous nature, can absorb and trap smells more readily than other materials. Ceramic, generally smooth and non-porous, is often less prone to smell absorption and retention.
Ever have that burnt popcorn smell lingering in your microwave? A simple solution is often baking soda paste. But while you’re tackling those kitchen odors, remember to keep your nightstand clutter-free. Consider what items you shouldn’t put on your nightstand, like old medications or stacks of paperwork. For more tips on decluttering, check out this helpful guide on items to not put on the nightstand.
After all, a clean nightstand and a fresh-smelling microwave create a peaceful home environment. Once the baking soda solution is done, you’ll be back to enjoying your microwave without that lingering burnt smell.
Effect of Microwave Interior Design on Smell Removal
The design of the microwave’s interior can significantly affect the ability to eliminate burnt smells. Features like smooth, seamless surfaces are easier to clean and less likely to trap odors. Conversely, recessed areas or intricate designs can create pockets where smells accumulate. This impacts the effectiveness of general cleaning methods and specialized procedures. For example, a microwave with a deep, rounded interior will likely hold smells longer than one with a flat, smooth bottom.
Longevity of Burnt Smell Removal
The type of material used in a microwave’s interior plays a significant role in the longevity of burnt smell removal. Microwaves with plastic interiors may require more intensive cleaning and potentially more specialized methods to completely eliminate persistent burnt smells. Those with ceramic interiors often prove easier to clean and maintain. In general, smooth surfaces and straightforward designs facilitate easier cleaning and a shorter time needed for burnt smell elimination.
Dealing with Persistent Burnt Smells
Persistent burnt smells in your microwave can be incredibly frustrating. Even after thorough cleaning, the lingering aroma can linger, making the kitchen unpleasant and affecting the taste of food. This often points to a deeper issue than just surface grime. Understanding why the smell persists is crucial to effective resolution.
Identifying Persistent Smell Sources
Burnt smells that refuse to dissipate after multiple cleaning attempts often indicate underlying problems beyond simple food residue. These issues could stem from the microwave’s components or ventilation. Proper identification of the source is the first step in a successful resolution.
Potential Underlying Causes of Persistent Smells
Several factors can contribute to persistent burnt odors, even after extensive cleaning. Faulty components, like a damaged heating element or a malfunctioning door seal, can cause the smell to persist. Additionally, insufficient ventilation in the surrounding area can trap the odors, leading to a persistent smell. Improper ventilation within the microwave itself, such as a blocked air vent, can also be a contributing factor.
Troubleshooting Persistent Burnt Smells
If cleaning methods fail to eliminate the persistent burnt odor, several steps should be considered. First, carefully examine the microwave’s interior for any visible damage or unusual discoloration. Look for scorch marks on the interior walls or components. Check the door seal for any signs of damage or warping, which could allow the smell to escape.
Locating the Source of the Smell (Beyond the Interior)
Determining if the burnt smell originates from a component other than the microwave’s interior is crucial. Listen for any unusual sounds during operation. A humming or sputtering sound might indicate a problem with the heating element or transformer. If the smell persists even after cleaning the interior, consider whether the microwave is situated near a ventilation duct or if there are other appliances nearby that might be emitting similar odors.
If the smell is present when the microwave is
not* in use, then the source may not be directly related to the microwave’s operation.
Taking Action for Persistent Burnt Smells
If the burnt smell persists despite cleaning attempts, consider these steps:
- Check the heating element: A damaged heating element can produce a persistent burnt smell. If you suspect a problem, consult a qualified appliance technician.
- Assess the door seal: A faulty door seal can allow odors to escape or enter the microwave. Examine the seal for any damage or cracks. Replacing the seal may resolve the problem.
- Verify ventilation: Ensure adequate ventilation around the microwave. Poor ventilation can trap odors, leading to persistence.
- Inspect other components: If the smell persists, consult a qualified technician. They can check the internal wiring and other components for possible issues.
- Consider a professional assessment: If the problem persists despite these checks, a professional appliance repair technician should be consulted. They have the expertise to identify and address complex issues that might be contributing to the persistent smell.
Illustrative Examples
Seeing is believing, right? Understanding how different foods and cleaning methods affect microwave odors requires visual aids. Let’s dive into some real-world examples to solidify your knowledge of tackling burnt smells in your microwave.
Microwave Interior with Different Food Types
Visualizing the varying degrees of burnt smells caused by different food types is crucial for effective cleaning. The image below depicts a microwave interior. Different food types are arranged in the microwave, showcasing the varying degrees of burnt smells. A dark, burnt pizza crust in the center of the microwave demonstrates a significant odor impact. Next to it, a slightly scorched piece of popcorn shows a moderate odor, while a container of unburnt vegetables exhibits no odor impact.
This visual representation highlights the correlation between food type, cooking temperature, and the resulting smell. 
Cleaning Solutions Applied to Microwave Interior
Demonstrating various cleaning solutions applied to a microwave interior to remove burnt smells provides a practical guide. The image below showcases different cleaning solutions being applied to a microwave interior. A spray bottle containing baking soda paste is positioned next to a bowl of white vinegar, and a separate container of dish soap is clearly visible. Each cleaning solution is carefully applied to the interior of the microwave.

Clean Microwave Interior with No Burnt Smells
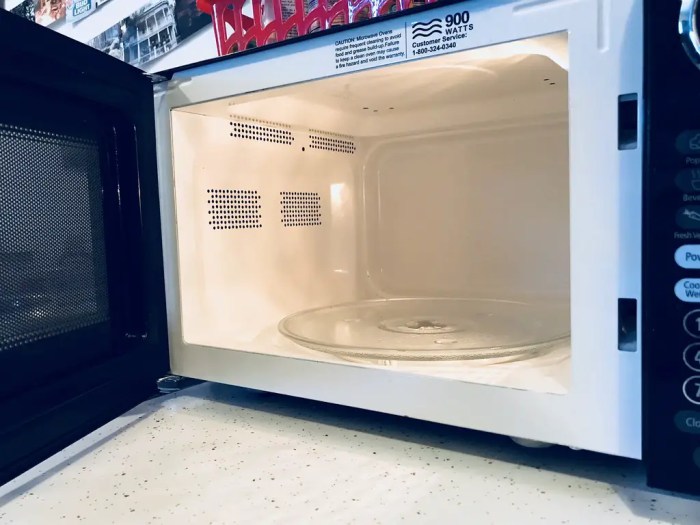
A clean microwave interior, free from burnt smells, serves as a visual benchmark. The image below presents a spotless microwave interior. The interior is gleaming, devoid of any burnt food residue or stains. The successful removal of the odors is evident, illustrating the effectiveness of the cleaning methods previously discussed. 
Food Items and Cooking Temperatures
Understanding the cooking temperatures of various food items helps in preventing burning. The table below illustrates different food items, their ideal cooking temperatures in a microwave, and their potential for burning if overcooked.
| Food Item | Ideal Cooking Temperature (°F) | Potential for Burning (High/Medium/Low) |
|---|---|---|
| Popcorn | 350-375 | Medium |
| Pizza | 300-350 | High |
| Vegetables | 200-250 | Low |
| Fish | 200-225 | Medium |
This table highlights the importance of monitoring cooking times and temperatures to prevent burnt smells. Different food types require different cooking conditions to avoid unwanted odors.
Final Thoughts
Successfully eliminating burnt smells from your microwave requires a multifaceted approach. From identifying the source to employing the right cleaning methods and preventative measures, this guide equips you with the knowledge and tools to restore your microwave to its pristine condition. We’ve covered a range of options, from simple solutions to tackling stubborn residue, empowering you to confidently tackle any burnt odor.
The key is to act promptly and be proactive in preventing future issues.


