


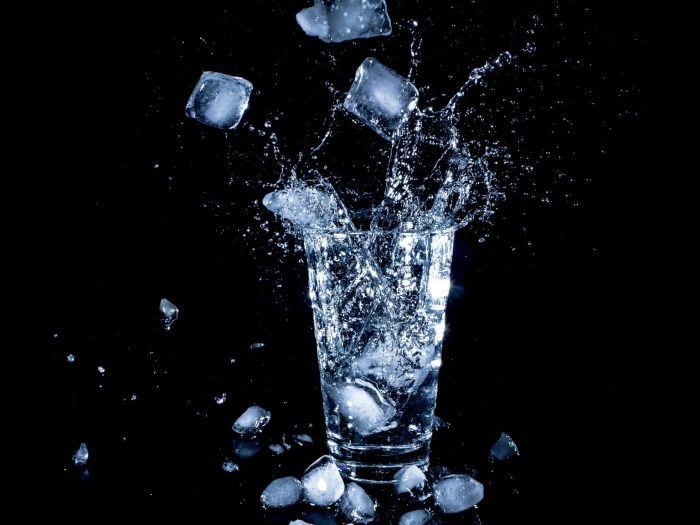
How to clean countertop ice maker? Keeping your countertop ice maker clean is crucial for maintaining a healthy home environment. Ignoring this important task can lead to the growth of harmful bacteria and mold, impacting your family’s well-being. This guide breaks down the entire process, from understanding the different ice maker types to troubleshooting common problems, ensuring you have a crystal-clear approach to keeping your ice fresh and safe.
This comprehensive guide covers everything from essential cleaning supplies to step-by-step procedures, making the process simple and effective for all ice maker types. We’ll explore the importance of regular maintenance, preventative measures, and how to tackle common issues. From water-only models to those producing both water and ice, you’ll find a tailored cleaning strategy for your specific machine.
Introduction to Countertop Ice Maker Cleaning
Keeping your countertop ice maker clean is crucial for maintaining both its functionality and your family’s health. A neglected ice maker can harbor bacteria and other harmful microorganisms, posing a significant risk to your well-being. This article explores the importance of regular cleaning, common reasons for delaying it, and the specific cleaning needs for various ice maker types.
Proper maintenance extends the life of your appliance and ensures the quality of the ice you consume.Neglecting to clean your countertop ice maker can lead to health risks. Accumulated grime and bacteria in the ice maker’s water reservoir, ice bin, and production components can easily contaminate the ice you consume. This can lead to food poisoning, illness, and other health problems.
The risk is amplified if you or someone in your household has a compromised immune system.Common reasons for delaying ice maker cleaning often include a lack of awareness of the necessity, busy schedules, or simply forgetting about it. Many people believe that because the ice maker is hidden, cleaning isn’t as important. However, regular maintenance is vital for preventing buildup and ensuring a hygienic environment.Regular cleaning offers numerous benefits.
It prevents the growth of harmful bacteria and molds, thus minimizing the risk of foodborne illnesses. Consistent maintenance ensures your ice maker operates efficiently, prolonging its lifespan. Proper cleaning also prevents unpleasant odors and ensures a clean and appealing ice supply for your family.
Keeping your countertop ice maker sparkling clean is a breeze, but sometimes a thorough scrub is needed. A little elbow grease and some simple solutions go a long way. Similar to how you might tend to your strawberry plants, ensuring proper hygiene is key for optimal function. For instance, check out how to grow strawberry plants in pots for tips on nurturing your little strawberry patch, remember the same meticulous care is important for your ice maker.
Regular cleaning prevents bacteria build-up and ensures your ice cubes are fresh and safe to consume. So, get those cleaning supplies ready!
Different Types of Countertop Ice Makers and Their Cleaning Requirements
This table Artikels the recommended cleaning frequencies and specific needs for various countertop ice maker types. Understanding these differences helps you tailor your cleaning routine to your specific appliance.
| Ice Maker Type | Cleaning Frequency | Specific Cleaning Needs |
|---|---|---|
| Water-only ice maker | Weekly | Focus on the water reservoir and ice bin. Disassemble the ice bin and thoroughly clean all parts, including the bin’s base and any crevices. Sanitize the water reservoir with a mild cleaning solution, ensuring all surfaces are clean. |
| Water and ice maker | Bi-weekly | Clean the water reservoir, ice bin, and the ice production components. Disassemble the ice bin for thorough cleaning. Pay particular attention to the ice molds and any parts that come into contact with the water. Sanitize the water reservoir and all parts with a mild cleaning solution. |
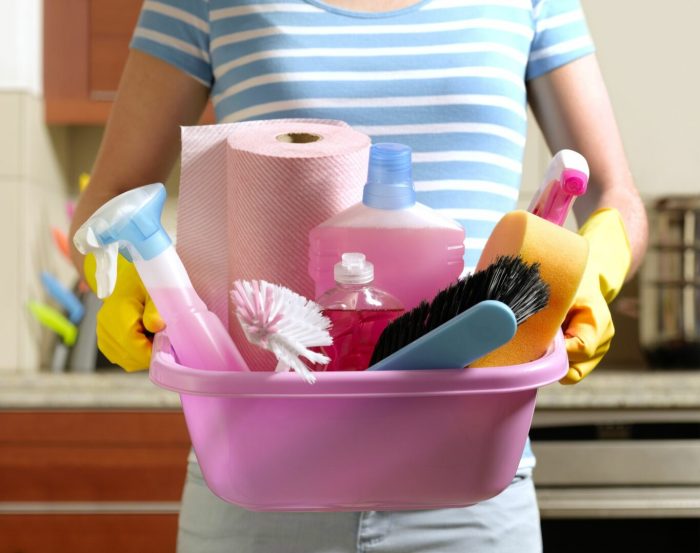
Essential Cleaning Supplies and Tools
Keeping your countertop ice maker clean is crucial for maintaining its functionality and preventing the growth of bacteria. Proper cleaning not only ensures the quality of your ice but also contributes to a hygienic kitchen environment. A thorough cleaning regimen should involve the right tools and solutions to effectively remove grime and residue without damaging the appliance.A well-maintained ice maker is a critical part of a well-functioning kitchen.
By understanding the proper cleaning supplies and tools, you can keep your ice maker in top condition and enjoy fresh, clean ice for your beverages.
Essential Cleaning Supplies
Proper cleaning supplies are essential for a thorough and safe ice maker cleaning. This includes specialized tools and cleaning solutions designed to effectively remove dirt, grime, and potentially harmful bacteria without damaging the appliance. The selection of cleaning supplies should prioritize safety and effectiveness, preventing damage to the ice maker’s components.
- Soft-bristled brush: A soft-bristled brush is ideal for scrubbing hard-to-reach areas within the ice maker, such as crevices and corners. The soft bristles prevent scratching delicate plastic or metal surfaces.
- Sponge or cloth: A non-abrasive sponge or cloth is important for wiping down surfaces and removing loose debris. Choose materials that won’t scratch the ice maker’s finish.
- Cleaning solution: A suitable cleaning solution is necessary for effectively removing stubborn stains and residue. Choose a solution that is safe for use on the ice maker’s materials.
- Gloves: Using gloves is important for protecting your hands during the cleaning process. Chemical cleaning solutions can be irritating or cause skin reactions. This is particularly important when dealing with potentially harsh solutions.
Choosing the Right Cleaning Solutions
Selecting the correct cleaning solution is crucial for both effectiveness and safety. Using inappropriate solutions can damage the ice maker’s components, rendering it less efficient or potentially unsafe to use. The choice of solution should consider the material of the ice maker’s components and the specific type of dirt or grime present.
- Avoid harsh chemicals: Avoid using abrasive cleaners, bleach, or other harsh chemicals. These can damage the plastic or metal parts of the ice maker and potentially contaminate the ice.
- Avoid acidic solutions: Concentrated acidic solutions, like lemon juice or vinegar, while sometimes effective, can also damage certain materials. They may react with the metal parts and cause corrosion or discoloration.
- Avoid abrasive cleaners: Abrasive cleaners, including scouring powders, should never be used on ice makers. These cleaners can scratch the surface of the ice maker, compromising its integrity and potentially making it more susceptible to damage.
Cleaning Solution Comparison
The following table compares common cleaning solutions based on effectiveness, safety, and suitability for ice maker cleaning.
| Cleaning Solution | Effectiveness | Safety | Suitability |
|---|---|---|---|
| White vinegar | High | Low (if used in high concentration) | Moderate (dilute solutions are better) |
| Baking soda | High | Low (if used in high concentration) | Moderate (dilute solutions are better) |
| Mild dish soap | Moderate | High | High |
Using a diluted solution of cleaning agents is often the best approach for optimal results while minimizing potential risks.
Step-by-Step Cleaning Procedures: How To Clean Countertop Ice Maker
Keeping your countertop ice maker clean is crucial for its longevity and the quality of the ice it produces. Proper cleaning prevents the buildup of bacteria and contaminants, ensuring a safe and hygienic ice supply for your household. This section details the steps for safely disconnecting the ice maker, thoroughly cleaning the components, and maintaining optimal performance.A clean ice maker is a happy ice maker.
By following these procedures, you can ensure your ice maker operates efficiently and provides consistently good-quality ice for years to come.
Disconnecting the Ice Maker
Before beginning any cleaning process, safety is paramount. Always disconnect the ice maker from the power source to prevent electrical hazards. Locate the power cord and unplug it from the electrical outlet. This crucial step prevents electrical shocks and ensures the safety of yourself and others.
Cleaning the Ice Bin and Water Reservoir
Thorough cleaning of the ice bin and water reservoir is essential for maintaining hygiene. First, remove the ice bin and rinse it thoroughly under warm, running water. Use a sponge or brush to scrub away any ice buildup or debris. Next, clean the water reservoir. Empty the reservoir and rinse it with warm water, ensuring all traces of old water are removed.
A gentle scrub with a sponge or brush can help remove any mineral deposits or residue. Allow both the ice bin and water reservoir to air dry completely before replacing them.
Cleaning the Ice Maker’s Interior Components
Cleaning the interior components is critical for maintaining the overall hygiene of the ice maker. Begin by removing any loose debris or ice from the interior. Using a sponge or soft brush, carefully clean the interior walls and any crevices where ice or water may accumulate. Pay close attention to the area where the ice cubes are formed.
Ensure that all surfaces are thoroughly rinsed and dried. This step is vital for preventing the growth of mold or bacteria.
Cleaning Procedures for Different Ice Maker Types
The cleaning process may vary slightly depending on the type of ice maker. The following table Artikels the cleaning steps for different ice maker types:
| Ice Maker Type | Step 1 | Step 2 | Step 3 |
|---|---|---|---|
| Water-only ice maker | Remove ice bin and wash | Clean water reservoir | Sanitize the exterior with a mild bleach solution (diluted according to instructions on the bleach container) or a commercial cleaner specifically designed for countertop appliances. |
| Water and ice maker | Remove ice bin and wash | Clean water reservoir | Clean ice maker chamber, paying special attention to the ice-making mechanism and any crevices where ice may accumulate. |
Preventing Future Issues
Keeping your countertop ice maker sparkling clean isn’t just about aesthetics; it’s about ensuring the quality of your ice and extending the life of your appliance. Regular maintenance goes a long way in preventing costly repairs and unpleasant surprises. By following a few simple preventative measures, you can significantly reduce the chances of encountering common ice maker problems.Maintaining a pristine ice maker requires proactive measures beyond just the occasional deep clean.
Proactive maintenance, including regular filter replacements and attention to mineral buildup, ensures your ice maker functions optimally and delivers consistently refreshing ice for years to come.
Keeping your countertop ice maker sparkling clean is crucial, but did you know that a well-maintained appliance can actually enhance your kitchen’s overall aesthetic? A spotless ice maker, combined with some clever design choices like using sleek storage solutions and high-quality countertop materials, can give the impression of a more upscale kitchen. Check out these fantastic tips for making your kitchen look more expensive by browsing tricks to make a kitchen look expensive.
Once you’ve spruced up your kitchen’s style, you can then focus on keeping the ice maker clean and functional, ensuring that it continues to look pristine for years to come.
Regular Maintenance Checklist
Regular maintenance is key to preventing issues. A simple, consistent routine will help you keep your ice maker in top condition and avoid costly repairs. This checklist will help you stay on track.
- Filter Replacement: Replacing ice maker filters according to the manufacturer’s recommendations is crucial. Clogged filters can impede water flow, leading to reduced ice production or even complete failure. Consult your appliance’s manual for the specific replacement interval. A common interval is every 3-6 months, but check your manual for your specific model.
- Water Quality Check: Pay attention to the water quality in your home. Hard water can contribute to mineral buildup in the ice maker, leading to clogs and reduced efficiency. Consider using a water softener if your water is particularly hard. Water hardness can be assessed by a water quality test kit available at most hardware stores.
- Regular Cleaning: Establish a regular cleaning schedule, such as monthly or bi-monthly, to prevent the accumulation of residue. Even a quick wipe-down can prevent the build-up of grime, which can lead to bacteria growth and a less than desirable taste of your ice. Cleaning should include the exterior, interior, and any detachable components.
- Inspect for Leaks: Regularly check for any leaks around the ice maker. Early detection and repair can prevent water damage and costly repairs.
Preventing Mineral Buildup and Mold Growth
Mineral buildup and mold are common problems that can arise from neglecting regular maintenance. They can affect the taste and safety of your ice.
- Water Softener Use: A water softener can significantly reduce mineral buildup in your ice maker. Hard water is the primary culprit behind mineral deposits that accumulate in the ice maker’s internal components. A water softener helps prevent this.
- Regular Cleaning of Water Reservoir: Clean the water reservoir regularly to remove any mineral deposits that may have accumulated. This prevents buildup and subsequent clogs. Use a mild cleaning solution as recommended in your appliance’s manual.
- Avoid Overfilling: Overfilling the ice maker’s water reservoir can cause water to spill and potentially contribute to mineral buildup or mold growth. Stick to the recommended fill levels. This will help keep the interior dry.
- Proper Air Circulation: Ensure good air circulation around the ice maker. This prevents moisture from accumulating and promotes drying, reducing the risk of mold or mildew growth. Ensure there’s adequate space around the ice maker.
Common Ice Maker Problems and Prevention, How to clean countertop ice maker
Understanding the causes of common problems can help you avoid them.
Keeping your countertop ice maker sparkling clean is essential for a healthy kitchen. You know how important it is to maintain a clean environment, but did you know that similar care is needed for your houseplants? For instance, when you’re learning how to propagate African violets, when and how to propagate African violets is a crucial step for ensuring healthy growth.
Proper cleaning techniques for your ice maker will ensure the best taste and avoid the spread of bacteria.
- Reduced Ice Production: Clogged filters, mineral buildup, and low water pressure can all lead to reduced ice production. Addressing these issues promptly will help you maintain consistent ice production.
- Ice Maker Not Dispensing Ice: A jammed dispenser, debris in the dispensing mechanism, or a malfunctioning motor are common culprits. Check the manual for troubleshooting steps or contact a qualified technician if the problem persists.
- Ice Cubes Too Small or Irregular Shape: Insufficient water pressure, mineral buildup, or a faulty ice mold can cause the ice cubes to form improperly. Inspect for any clogs or issues with the ice mold.
Troubleshooting Common Problems
Keeping your countertop ice maker humming along smoothly often involves a little detective work. Just like a car that sputters, a finicky ice maker can point to a variety of potential issues. This section will guide you through common problems, how to diagnose them, and when to seek professional help.Understanding the potential causes of these issues is crucial for effective troubleshooting.
A thorough examination, considering the specific model and its operational characteristics, can help you pinpoint the source of the problem. Sometimes, a simple cleaning isn’t enough, and further investigation is necessary.
Identifying Ice Maker Malfunctions
Ice makers can exhibit a variety of symptoms, from slow ice production to complete cessation. A systematic approach to troubleshooting is essential. Understanding the different mechanisms within the ice maker is key to identifying the root cause of any problem. Careful observation of the ice maker’s behavior can provide valuable clues.
Troubleshooting Ice Production Issues
- Insufficient Ice Production: Potential causes include low water pressure, a clogged water inlet line, or a malfunctioning water valve. Inspect the water supply line for kinks or blockages. Check the water pressure at the faucet. If the pressure is low, there may be an issue with your home’s plumbing system.
- Ice Formation Issues: Problems like uneven ice cubes or ice that’s not freezing properly could stem from issues with the ice mold or the freezing mechanism. Examine the ice molds for obstructions or uneven surfaces. If the ice is not forming properly, ensure the ice compartment is correctly filled and the freezing process is operating correctly.
- No Ice Production: This could be due to a lack of water, a faulty water valve, a blocked water inlet line, or a problem with the ice maker’s internal mechanisms. Check the water supply to the ice maker. If there’s no water, the issue is likely outside the ice maker itself. Examine the water valve and inlet line for blockages.
If the problem persists, it’s best to consult the manufacturer’s instructions or a professional.
Troubleshooting Power-Related Issues
- Ice Maker Not Turning On: This could indicate a tripped circuit breaker, a problem with the power cord, or a malfunctioning control board. Check the circuit breaker panel for tripped breakers. Ensure the power cord is securely plugged into the outlet. If the problem persists, consult the manufacturer’s instructions.
- Intermittent Operation: This might be caused by fluctuations in the electrical supply or a faulty timer or control board. Inspect the electrical wiring for any loose connections or damage. If the issue persists, it’s best to contact a qualified technician.
Determining When Professional Help is Needed
- Complex Issues: If you’ve tried basic troubleshooting steps and the problem persists, it’s time to seek professional assistance. Complex issues involving internal components or electrical systems should be handled by qualified technicians.
- Safety Concerns: If you encounter any electrical issues or smell burning odors, immediately turn off the ice maker and contact a qualified electrician.
Comparing Troubleshooting Approaches for Different Models
| Model Type | Troubleshooting Approach |
|---|---|
| Compact Ice Makers | Often have simplified mechanisms. Basic troubleshooting steps, like checking water supply and power, are usually sufficient. |
| Large Capacity Ice Makers | Can have more complex internal mechanisms. Consult the manufacturer’s troubleshooting guide or seek professional assistance for complex issues. |
Additional Tips and Considerations
Taking care of your countertop ice maker goes beyond the basic cleaning routine. Understanding the specific parts, the manufacturer’s recommendations, and best practices for various models ensures optimal performance and longevity. This section delves deeper into these crucial aspects, helping you maintain your ice maker in tip-top shape.
Using Appropriate Cleaning Tools and Techniques
Effective cleaning hinges on the right tools. Harsh chemicals or abrasive scrubbing pads can damage the plastic or metal components of your ice maker. Always use a soft-bristled brush, a non-abrasive sponge, and mild dish soap or a designated ice maker cleaner. Avoid using scouring powders or bleach, as these can dull or corrode the surfaces.
Handling Specific Ice Maker Parts and Components
Different parts of your ice maker require specific handling. The ice trays and the water reservoir are usually removable and can be cleaned separately in warm, soapy water. The ice dispenser and the compressor (if applicable) should be treated with care, avoiding excessive force or direct water contact. Consult your manufacturer’s instructions for precise guidelines.
Cleaning According to Manufacturer’s Instructions
Your ice maker’s manual provides critical information about its specific cleaning requirements. Carefully review the instructions to understand the optimal cleaning methods, the types of cleaners that are safe to use, and the necessary precautions to take. Following these guidelines ensures that you are not voiding any warranties and avoid potential damage.
Visual Representation of Ice Maker Components
Imagine your ice maker as a mini-fridge. You have the main unit, the ice-making chamber, the ice trays, the water reservoir, the ice dispenser, and a drainage system. The water reservoir collects water from the ice-making process and needs periodic cleaning to prevent buildup. The ice trays hold the ice cubes and are often removable for easy cleaning.
The ice dispenser releases the ice, so ensure its smooth operation by regularly cleaning around it. The drainage system prevents water from accumulating.
Best Practices for Different Ice Maker Models
Different models may have varying features and designs. Some models have removable ice bins that allow for easier cleaning of the entire unit. Others might require a more meticulous approach to cleaning the internal mechanisms. Always refer to your specific model’s instructions for the best practices to maintain optimal performance. Researching similar models or contacting the manufacturer’s customer support can be helpful.
Final Thoughts

In conclusion, maintaining a clean countertop ice maker is a straightforward process that ensures the safety and longevity of your appliance. By following the steps Artikeld in this guide, you can prevent potential health risks and keep your ice consistently fresh. Remember regular maintenance, proper cleaning techniques, and prompt troubleshooting when needed are key to enjoying clean, safe, and delicious ice for years to come.
Now go forth and enjoy your perfectly clean ice maker!