


How to clean a water cooler sets the stage for a deep dive into maintaining a healthy and hygienic water source. Keeping your water cooler clean is crucial for preventing the spread of bacteria and viruses, ensuring everyone has access to safe, refreshing hydration. This guide will cover everything from understanding the different types of water coolers to detailed cleaning procedures and essential maintenance tips.
We’ll explore the various parts of a water cooler and how to effectively clean each one, from the dispenser to the water reservoir, and even the exterior surfaces. Proper cleaning prevents potential health risks and keeps your water cooler functioning optimally.
Understanding the specific needs of different water cooler models is key. This guide provides a table comparing various types and their corresponding cleaning frequencies and specific requirements. This allows you to tailor your cleaning schedule and approach to the exact type of water cooler you have.
Introduction to Water Cooler Cleaning: How To Clean A Water Cooler
A water cooler is a device designed to dispense cool, potable water. It’s a common fixture in offices, schools, and other communal spaces, providing a convenient and readily available source of hydration. Proper maintenance and cleaning are essential to ensure the safety and health of those who use it.Regular cleaning is crucial to prevent the buildup of bacteria, mold, and other microorganisms that can contaminate the water and pose significant health risks.
Neglecting these cleaning procedures can lead to various illnesses, from minor stomach upset to more serious conditions. The quality of the water and the overall hygiene of the cooler directly impact the well-being of users.
Keeping your water cooler clean is crucial for good health, but did you know that some things you absolutely shouldn’t store in your car could also impact its cleanliness? For example, avoid storing anything that might leak or spill, like chemicals or certain food items. Checking out this list of things you should never store in your car can help you avoid contamination issues.
A clean water cooler is a healthy water cooler, so make sure to follow proper cleaning procedures! Remember to regularly sanitize your water cooler to prevent bacteria growth.
Potential Health Risks of Unclean Water Coolers
Unclean water coolers can harbor a multitude of harmful microorganisms, including bacteria like E. coli, Salmonella, and Legionella. These bacteria can cause gastrointestinal issues, respiratory problems, and even more severe illnesses. The risk is especially high in environments where the water cooler is not regularly cleaned and maintained. Legionella, for instance, can multiply in stagnant water within the cooler’s system, leading to Legionnaires’ disease, a potentially fatal pneumonia-like illness.
Different Types of Water Coolers
Water coolers come in various designs, each with unique features and cleaning requirements. Common types include dispenser-style coolers, countertop models, and those with built-in filtration systems. The complexity of the design dictates the cleaning frequency and the procedures needed.
Comparison of Water Cooler Types and Cleaning Needs
| Water Cooler Type | Cleaning Frequency | Specific Cleaning Needs |
|---|---|---|
| Dispenser | Weekly | Regularly replace the water filter, disinfect the interior of the dispenser unit, and ensure the dispensing mechanism is clean. |
| Cooler | Bi-weekly | Disinfect the exterior and interior of the cooler unit, thoroughly clean the water lines to prevent stagnation, and inspect the water reservoir. |
Gathering Supplies and Tools
Properly cleaning your water cooler is crucial for maintaining its hygiene and preventing the spread of bacteria. A thorough cleaning regimen ensures the safety and quality of the water dispensed. This section details the essential supplies and tools needed for a successful water cooler cleaning session.A comprehensive cleaning approach involves not only sanitizing the visible surfaces but also addressing the internal components that may harbor contaminants.
This necessitates careful selection of cleaning solutions and tools, ensuring both effectiveness and safety.
Essential Cleaning Supplies
A well-stocked cleaning kit is paramount for an effective water cooler sanitization. The following supplies are indispensable for a thorough cleaning process.
- Disinfectant Solution: A reliable disinfectant, such as a diluted bleach solution (following manufacturer’s instructions) or a commercial water cooler cleaner, is essential for sanitizing the interior of the cooler. A solution with proven effectiveness against microbial growth, like E. coli and Salmonella, is ideal. Ensure the solution is compatible with the materials used in the water cooler.
- Cleaning Cloths/Sponges: Soft, non-abrasive cleaning cloths or sponges are necessary for wiping down surfaces and removing any visible dirt or grime. Microfiber cloths are particularly effective at capturing and retaining dirt and grime, reducing the risk of scratching surfaces.
- Gloves: Protecting your hands from potentially harsh cleaning solutions is crucial. Disposable nitrile or latex gloves are recommended for safe handling of cleaning agents and to prevent contamination. This precaution is vital for personal hygiene and safety.
- Protective Equipment: Depending on the cleaning agent used, eye protection, such as safety glasses, might be necessary to avoid splashes or contact with harmful chemicals.
- Water: Clean, potable water is essential for rinsing and ensuring thorough cleaning.
Cleaning Solution Selection
Selecting the right cleaning solution is vital for effective sanitization. Various solutions are available, each with its own strengths and weaknesses.
- Diluted Bleach Solution: A common household disinfectant, diluted bleach solution effectively kills bacteria. However, improper dilution can damage the cooler’s components, so strictly follow the manufacturer’s instructions for mixing and use.
- Commercial Water Cooler Cleaners: Specialized cleaners are formulated to handle the unique components and materials of water coolers. They often provide more effective and targeted sanitization, as well as being more environmentally friendly than some bleach solutions.
- Vinegar: A natural cleaning agent, vinegar can be used for cleaning hard surfaces and eliminating odors. However, its effectiveness in killing bacteria is less pronounced compared to disinfectants.
Tools for Disassembly and Cleaning
Disassembling the water cooler is often necessary for thorough cleaning. Appropriate tools aid in this process, preventing damage to the cooler.
- Screwdrivers: Depending on the water cooler model, various types of screwdrivers may be needed to remove screws and panels. A Phillips head screwdriver is commonly used.
- Cleaning Brushes: Small brushes are useful for reaching hard-to-reach areas within the cooler, including crevices and internal components.
- Bucket: A bucket or container is needed for mixing cleaning solutions and rinsing parts.
Preparing Cleaning Supplies and Tools
Efficient preparation is crucial for a successful cleaning session. The following steps Artikel the preparation process.
- Gather all necessary supplies, including disinfectant, cleaning cloths, gloves, protective equipment, and water.
- Ensure the water cooler is turned off and unplugged to prevent electrical hazards.
- Dilute the disinfectant according to the manufacturer’s instructions, if necessary. Carefully follow instructions to avoid accidental injury or damage to the water cooler.
- Put on the protective gear, including gloves, and eye protection if required.
- Prepare the cleaning tools, ensuring brushes are clean and ready for use.
Table of Supplies and Purpose
| Supply | Purpose |
|---|---|
| Disinfectant | Sanitizing the water cooler interior |
| Cleaning cloths/sponges | Cleaning and wiping surfaces |
| Gloves | Protecting hands from cleaning solutions |
| Screwdrivers | Disassembling and reassembling the cooler |
| Cleaning brushes | Cleaning hard-to-reach areas |
Disassembling the Water Cooler
Taking apart your water cooler for a deep clean might seem daunting, but with a methodical approach, it’s surprisingly straightforward. Proper disassembly ensures you reach every nook and cranny, guaranteeing a sparkling clean result and preventing future issues. Understanding the steps and potential challenges ahead will equip you to confidently tackle the task.Careful disassembly is crucial for a thorough cleaning and preventing damage to the water cooler’s components.
By systematically removing parts, you minimize the risk of breakage and ensure a complete cleaning process. The following steps will guide you through the process.
Identifying Removable Parts
Thorough inspection of the water cooler is vital before beginning the disassembly process. Identify all detachable components, including the water reservoir, the filter housing, the dispensing mechanism, and any other removable parts. This preliminary step allows for a structured approach and prevents overlooking critical components during the cleaning process.
Disassembly Steps
Following these steps will guide you in removing parts for thorough cleaning. This organized approach prevents damage and ensures all components are effectively cleaned.
- Step 1: Disconnect Power and Water Supply: Before starting any disassembly, ensure the water cooler is unplugged and the water supply is turned off. This prevents accidental shocks or water damage.
- Step 2: Empty the Water Reservoir: Carefully empty the water reservoir and any associated containers. This is essential to prevent spills during the disassembly process and to facilitate thorough cleaning of the reservoir itself.
- Step 3: Detach the Filter Housing: Refer to the manufacturer’s instructions for specific detachment methods. Some housings may have clips or screws; others might be held in place by simple friction. Carefully loosen or remove the clips/screws to detach the filter housing. If the filter housing has a locking mechanism, ensure you follow the appropriate steps to unlock it.
- Step 4: Remove the Dispenser Mechanism: Locate the screws or clips holding the dispensing mechanism in place. Using the appropriate tools (small screwdriver, pliers), carefully remove these fasteners to detach the mechanism. Be cautious not to apply excessive force, as this could damage the delicate components.
- Step 5: Carefully Disassemble Other Parts: Take your time and examine each part to see how it connects to the rest of the water cooler. Refer to the manufacturer’s instructions for the specific disassembling process for your model. Use small screwdrivers, pliers, or other tools as needed. Take note of the placement of each part for reassembly.
Special Attention Areas
Certain areas of the water cooler may require extra care during disassembly. These include the water lines, seals, and any delicate components.
- Water Lines: Carefully disconnect any water lines to prevent leaks. Use appropriate tools and techniques to ensure you don’t damage the lines. If necessary, mark the position of each connection to ensure accurate reassembly.
- Seals: Seals are critical for maintaining water tightness. Handle them with care to prevent damage during disassembly. If seals appear damaged or worn, replace them during reassembly. This is critical for ensuring long-term functionality.
- Delicate Components: Treat any fragile or delicate components with extra care during the disassembly process. Handle them with clean hands and use soft cloths to avoid scratching or damaging them. If unsure about how to handle a specific part, consult the manufacturer’s instructions or contact customer support.
Reassembly
The reassembly process is the reverse of the disassembly process. Ensure you follow the steps in reverse order and carefully align all components. This is essential for restoring the water cooler’s functionality and preventing leaks or other issues.
Flowchart of Disassembly
[A visual flowchart depicting the steps Artikeld above would be beneficial here, but it cannot be created in text format.]
Keeping your water cooler sparkling clean is crucial for hygiene. Regular cleaning is easy, just follow the manufacturer’s instructions. While we’re on the topic of maintenance, did you know how long vinyl siding lasts? Factors like climate and upkeep can significantly affect its lifespan. For more details on vinyl siding longevity, check out this helpful guide: how long does vinyl siding last.
Once you’ve got that sorted, remember to always use appropriate cleaning solutions and tools recommended by the water cooler’s manual.
Cleaning Procedures
Now that you’ve gathered your supplies and disassembled your water cooler, it’s time to dive into the nitty-gritty of cleaning. Proper cleaning is crucial for maintaining the hygiene of your water cooler and ensuring the quality of the water it dispenses. A clean water cooler prevents the growth of bacteria and other microorganisms, which can lead to health issues.
This section details the steps for meticulously cleaning each component, from the reservoir to the water lines.Thorough cleaning of each part of the water cooler is essential to prevent the buildup of contaminants. This ensures that the water dispensed remains safe and palatable for everyone who uses it. Following the Artikeld procedures will guarantee a clean and healthy water cooler for years to come.
Cleaning the Water Reservoir
Proper cleaning of the water reservoir is essential to eliminate any residue or contaminants that may have accumulated. This includes removing any lingering food particles or mineral deposits that can affect the taste and safety of the water.
- First, empty the reservoir completely.
- Next, fill the reservoir with a mixture of warm water and a mild cleaning solution, such as white vinegar or a specialized water cooler cleaner.
- Allow the cleaning solution to sit in the reservoir for at least 15-30 minutes. This allows the solution to break down any lingering contaminants.
- Thoroughly rinse the reservoir with fresh water, ensuring all traces of the cleaning solution are eliminated. This prevents any chemical aftertaste in the water.
- Finally, allow the reservoir to air dry completely before refilling with fresh water.
Cleaning the Dispenser
The dispenser is a critical component that needs meticulous cleaning. Regular cleaning of the dispenser ensures that water remains sanitary and prevents the growth of harmful bacteria.
- Disassemble the dispenser, carefully separating all parts. This might involve removing the dispensing spout and the cup holder.
- Clean each removable part with warm soapy water and a soft-bristled brush, paying particular attention to crevices and seams where bacteria can accumulate.
- Use a specialized cleaner if necessary. For example, if you have a specific water cooler model with a stainless steel dispensing spout, using a mild abrasive cleaner and a soft cloth is recommended.
- Rinse each part thoroughly and allow them to air dry completely before reassembling the dispenser.
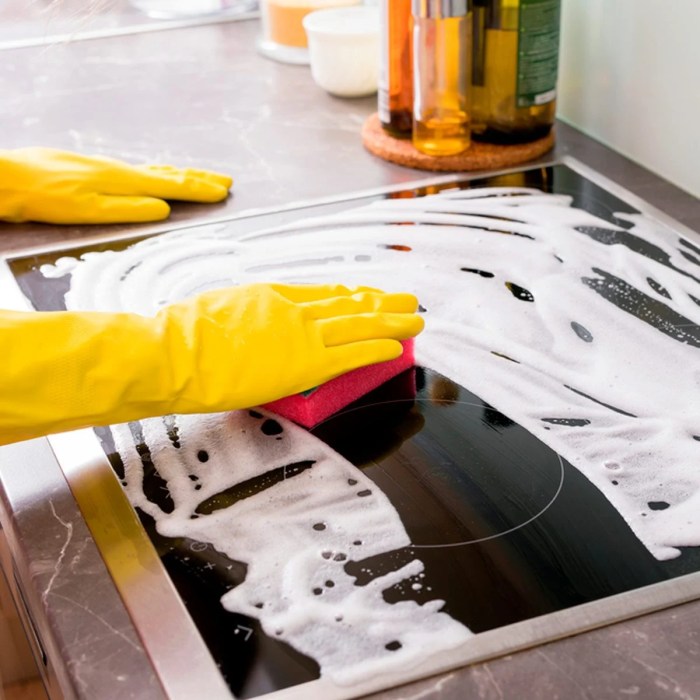
Cleaning the Exterior Surfaces
Maintaining the cleanliness of the exterior surfaces of the water cooler is crucial. This prevents the buildup of dirt, dust, and other contaminants, which can potentially affect the water quality.
- Begin by wiping down the exterior surfaces with a damp cloth.
- For stubborn stains or marks, use a mixture of warm water and mild dish soap. Ensure that the mixture does not contain harsh chemicals or abrasives.
- Use a soft cloth to avoid scratching the surface. For instance, avoid using abrasive sponges, especially on polished surfaces, as these can cause damage.
- Rinse the exterior surfaces thoroughly with clean water.
- Dry the exterior surfaces with a clean, dry cloth, ensuring that all traces of moisture are removed to prevent water spots.
Cleaning the Water Lines
Cleaning the water lines is crucial for maintaining the hygiene of your water cooler. Clogged or contaminated water lines can lead to poor water quality and the growth of harmful bacteria.
Keeping your water cooler sparkling clean is crucial for health, and a simple cleaning routine can make a big difference. A crucial step is to regularly sanitize the reservoir and dispenser. Plus, you might find that using those same cleaning methods on your vibrant calibrachoa great container plants calibrachoa great container plants will make them thrive.
So, next time you’re tackling your water cooler, remember to give it a good scrub and disinfection.
- First, ensure the water cooler is turned off and the water supply is shut off.
- Using a specialized water cooler cleaning solution, carefully flush the water lines with the solution, following the manufacturer’s instructions. This step often involves letting the solution run through the lines for a specified amount of time.
- Thoroughly rinse the water lines with fresh water until all traces of the cleaning solution are eliminated. This ensures that no residue remains in the water lines, which can potentially contaminate the water.
- Turn the water supply back on to ensure that the water lines are properly flushed and ready for use.
Reassembling the Water Cooler
Putting your water cooler back together correctly is crucial for its optimal function and longevity. A meticulous approach to reassembly prevents leaks, ensures proper water flow, and maintains the overall integrity of the system. Following the steps precisely will guarantee a successful reassembly process.
Reassembly Steps in Order
Careful reassembly is vital to avoid complications and ensure the water cooler functions seamlessly. This involves placing each part in its designated location and ensuring all connections are secure.
- Begin by carefully aligning the water reservoir with its designated compartment. Make sure the reservoir sits snugly in place. Ensure there are no gaps that could lead to leaks.
- Next, reconnect the water filter assembly. Confirm the filter housing and filter cartridge are properly aligned and secured in their respective locations. If using a multi-stage filter, ensure each stage is correctly placed.
- Pay close attention to the water dispensing valve. Carefully align the valve with the dispensing spout, ensuring a proper fit. Tighten the connections using the provided tools, avoiding over-tightening.
- Reconnect the water lines, making sure they are securely fastened and that there are no kinks or bends in the tubing. This is a critical step, as any issues here can lead to water leaks.
- After connecting all the water lines, proceed to reconnect the cooling components. This may involve connecting the refrigeration unit or the water pump. Pay attention to any specific instructions provided in the user manual.
- Secure the base components. Ensure the water cooler base, or any other structural components, are properly aligned and tightened. A wobbly base can lead to problems and leaks.
- Now, carefully replace the outer casing and tighten all fasteners. Double-check that all components are properly placed and that no parts are protruding.
- Finally, inspect all connections for leaks. Run a small amount of water through the system. Look for any signs of water leakage around joints or connections. If you notice any leaks, re-tighten the connections and repeat the leak check until the cooler is leak-free.
Testing the Functionality, How to clean a water cooler
Thorough testing after reassembly guarantees the water cooler’s operational efficiency. This step helps identify and rectify any issues promptly.
- After reassembling all components, turn on the water cooler and allow it to run for a period of time to allow the cooling system to function properly. This will allow the system to reach its optimal temperature and ensure that the water is properly chilled.
- Check the water temperature at various dispensing points. Ensure the temperature is within the desired range. If not, check the connections of the refrigeration unit or other cooling components. If there is still no satisfactory result, contact a professional.
- Test each dispensing spout to ensure proper water flow. Ensure that the water flow is consistent and not erratic or intermittent. If there are issues with water flow, recheck the water lines for kinks or obstructions.
- Observe the water cooler for any unusual noises or vibrations. These could indicate a problem with the cooling system or other internal components. If any unusual noises or vibrations persist, contact a qualified technician.
Maintaining a Clean Water Cooler
Keeping your water cooler clean isn’t just about aesthetics; it’s crucial for maintaining a hygienic and safe drinking water supply for everyone. Regular maintenance prevents the growth of harmful bacteria and other microorganisms, protecting your employees, customers, or family from potential health risks. This crucial aspect ensures the longevity of your water cooler, minimizing costly repairs and replacements.Proper maintenance goes beyond just a one-time cleaning.
It involves a proactive approach that includes regular checks, preventative measures, and a structured schedule to guarantee a consistently clean and safe water source.
Importance of Regular Maintenance
Regular maintenance is essential for preventing the buildup of bacteria, algae, and other contaminants in the water cooler system. Without proper cleaning, these contaminants can multiply rapidly, leading to unpleasant tastes, odors, and potentially harmful health effects. Proactive maintenance also ensures the water cooler functions optimally, reducing the risk of malfunctions and extending its lifespan.
Optimal Cleaning Frequency
The frequency of cleaning depends heavily on the type of water cooler and its usage. A standard countertop water cooler, used by a small office, might need cleaning every 2-3 weeks, whereas a large office water cooler with a higher usage rate could require cleaning every 1-2 weeks. For a commercial establishment or public area with higher traffic, more frequent cleaning is recommended.
Preventive Measures
Implementing preventive measures is critical in preventing future contamination. Regularly changing the water filter, as recommended by the manufacturer, is paramount. Storing the water cooler in a clean and dry environment, away from dust and debris, is essential. Monitoring water quality and promptly addressing any unusual tastes or odors is also crucial to detect potential problems early.
Routine Maintenance Schedule
A well-structured schedule for routine maintenance tasks ensures consistency and prevents the accumulation of contaminants. A weekly schedule for checking water levels and refilling as needed, and a bi-weekly cleaning schedule are good starting points. Adjust the schedule based on usage and water quality observations.
Regular Water Cooler Maintenance Checklist
This checklist provides a structured approach to routine water cooler maintenance, helping to ensure consistent cleanliness and hygiene.
- Weekly Check:
- Check water level and refill as needed.
- Visually inspect the water cooler for any signs of leaks, spills, or debris.
- Check the filter for proper functionality and replace as necessary.
- Bi-Weekly Cleaning:
- Thoroughly clean the water reservoir, dispensing area, and exterior of the cooler.
- Clean and sanitize the water lines and components.
- Flush the system with fresh water.
- Monthly Check:
- Inspect the water cooler for any signs of wear or damage.
- Ensure proper functionality of all components.
- Check the water cooler’s electrical connections for any signs of damage.
Ending Remarks

In conclusion, maintaining a clean water cooler is essential for both health and longevity. Following the steps Artikeld in this comprehensive guide will help you effectively clean your water cooler, ensuring safe drinking water for everyone. Regular maintenance and a proactive approach to cleaning will save you time and money in the long run by preventing costly repairs and potential health issues.
So, equip yourself with the knowledge and tools, and get ready to keep your water cooler sparkling clean!