


How to clean a vacuum filter is crucial for maintaining your vacuum’s efficiency and extending its lifespan. Different vacuum types, like upright and canister models, have varying filter types (pleated, HEPA) and cleaning needs. Neglecting filter cleaning can lead to reduced suction power, increased dust buildup, and even potential damage to your vacuum. This guide will walk you through the entire process, from identifying when your filter needs cleaning to properly reinstalling it after a thorough cleaning.
We’ll also cover troubleshooting common issues and provide a handy table to help you determine the optimal cleaning frequency for your vacuum type.
Understanding the importance of regular filter cleaning and the different filter types will empower you to keep your vacuum running smoothly. We’ll explore the necessary supplies, detailed cleaning procedures, and crucial drying steps to ensure your vacuum remains a powerful cleaning companion for years to come.
Introduction to Vacuum Filter Cleaning
Keeping your vacuum cleaner running smoothly and effectively relies heavily on maintaining a clean filter. A neglected filter can lead to reduced suction power, increased wear on other components, and even potential health risks. Understanding the different types of filters and the importance of regular cleaning is key to maximizing your vacuum’s lifespan and performance.Vacuum filters act as crucial barriers, trapping dust, dirt, allergens, and other particles that can be harmful if released back into the air.
Cleaning your vacuum filter regularly is crucial for optimal performance, but did you know that a clean vacuum can also contribute to a more efficient and organized living space? Think about how a well-organized space can make your studio apartment feel bigger and more inviting, like the amazing layouts featured in articles about perfect studio apartment layouts to inspire.
perfect studio apartment layouts to inspire. For a truly effective cleaning routine, make sure to check your vacuum’s manual for the best way to clean your filter – it’s worth the effort!
Proper cleaning ensures that these particles are contained, preventing them from circulating throughout your home and potentially affecting your health, especially for those with allergies or respiratory conditions.
Common Vacuum Filter Types
Different vacuum types utilize various filter designs. Understanding these differences is crucial for effective cleaning. Pleated filters are common in upright vacuums and offer a large surface area for trapping debris. HEPA filters, on the other hand, are often found in canister vacuums. They are designed with a specialized structure that captures even the smallest particles, including allergens and bacteria.
The correct cleaning procedure for each type is essential to maintain optimal performance.
Consequences of Neglecting Filter Cleaning
Ignoring regular vacuum filter cleaning can have several negative impacts. Reduced suction power is a common symptom. Over time, a clogged filter restricts airflow, diminishing the vacuum’s ability to effectively pick up dust and debris. This can lead to a buildup of dirt and allergens, which can become airborne and contribute to health issues. Furthermore, neglecting filter cleaning can lead to premature wear and tear on other vacuum components, shortening its overall lifespan.
Recognizing When a Filter Needs Cleaning
It’s important to develop an awareness of the signs that indicate your vacuum filter needs attention. A noticeable decrease in suction power is a key indicator. If you find that the vacuum is struggling to pick up dirt or dust, the filter likely needs cleaning or replacement. Another indication is an increase in the amount of dust or debris visible in the vacuum’s dustbin after use.
This suggests the filter isn’t effectively trapping particles. Also, if you notice an unusual or unpleasant odor coming from the vacuum, it’s a sign that the filter may be saturated with dust and bacteria.
Recommended Vacuum Cleaning Frequency
Regular cleaning is crucial for maintaining optimal vacuum performance. This table provides a guideline for different vacuum types and their recommended cleaning frequency:
| Vacuum Type | Cleaning Frequency | Filter Type | Additional Notes |
|---|---|---|---|
| Upright | Weekly | Pleated | Check for clogs and visible buildup. |
| Canister | Bi-weekly | HEPA | Pay close attention to dust accumulation and potential odors. |
Gathering the Necessary Supplies
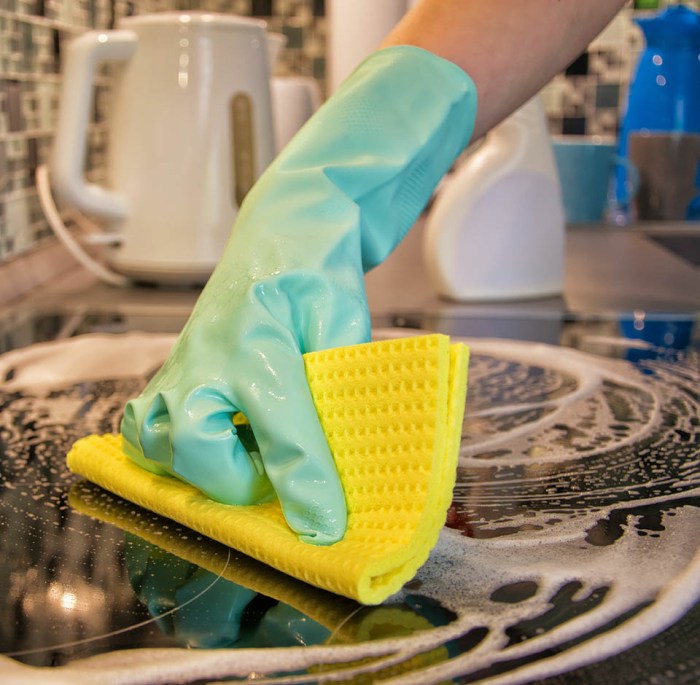
Cleaning your vacuum filter doesn’t have to be a daunting task. With the right tools and supplies, it becomes a straightforward process that extends the life of your vacuum cleaner and keeps your home cleaner. This section details the essentials for a successful filter cleaning session.
Essential Tools and Materials, How to clean a vacuum filter
Proper cleaning requires specific tools and materials. A well-stocked cleaning arsenal ensures a thorough and safe process. Here’s a breakdown of the necessary items.
- Cleaning solution(s): Different filter types respond best to specific cleaning solutions. This is crucial to avoid damaging your filter. For example, a pleated filter might require a gentler approach than a HEPA filter.
- Warm water: A gentle cleaning agent, especially for pleated filters, warm water can effectively loosen dust and debris without harsh chemicals. Using warm, not hot, water is important to avoid potentially damaging the filter material.
- Mild dish soap: A mild dish soap solution is suitable for HEPA filters, acting as a surfactant to help lift away dirt and grime without harming the filter’s structure. Use a very dilute solution to avoid residue buildup.
- Large bowl or basin: A container for soaking or rinsing the filter is essential. The size should accommodate the filter without causing it to warp or distort during cleaning.
- Soft-bristled brush or sponge: For gentle scrubbing, a soft-bristled brush or sponge can dislodge stubborn particles. Avoid abrasive materials that could damage the filter.
- Clean cloths or paper towels: For drying the filter, soft, absorbent cloths or paper towels are necessary. These prevent scratching and ensure the filter dries completely before reinstallation.
- Gloves: Protecting your hands during the cleaning process is crucial. Gloves prevent the transfer of dirt and grime to your hands, as well as protecting your hands from potential irritation from the cleaning solution.
Cleaning Solution Suitability
Choosing the right cleaning solution is vital for maintaining the filter’s effectiveness and longevity. A table showcasing suitable cleaning solutions for different filter types follows.
| Cleaning Solution | Filter Type | Instructions |
|---|---|---|
| Warm Water | Pleated | Soak for 15 minutes, gently swish, and rinse thoroughly. |
| Mild Dish Soap | HEPA | Mix a very small amount of dish soap with warm water, gently agitate, and rinse thoroughly. |
| Vacuum Cleaner-Specific Cleaning Solution (if available) | Most Filter Types | Follow the manufacturer’s instructions for best results. |
Safe Handling of Materials
Safe handling of cleaning materials is paramount to prevent accidents and ensure a clean and efficient process.
- Dilution is Key: When using cleaning solutions, always dilute them as directed. Strong concentrations can damage the filter or cause irritation. Always follow the manufacturer’s recommendations for proper dilution.
- Disposal: Dispose of used cleaning solutions responsibly, following local guidelines. This is important to avoid environmental contamination.
- Allergy Considerations: If you have any allergies, wear appropriate protective gear. Always ensure you are aware of any potential allergens in the cleaning solution.
Cleaning Procedures for Different Filter Types: How To Clean A Vacuum Filter
Vacuum filters are crucial for maintaining your vacuum cleaner’s performance and preventing the spread of allergens. Proper cleaning ensures a long lifespan for your machine and keeps your home environment healthy. Different filter types require specific cleaning techniques to maintain their effectiveness.Cleaning your vacuum filters regularly is essential for optimal performance. A clogged filter restricts airflow, reducing suction power and increasing wear on the motor.
This can lead to decreased efficiency and a shorter lifespan for your vacuum cleaner. By understanding the specific cleaning methods for each filter type, you can ensure your vacuum operates at its best.
Pleated Filter Cleaning
Pleated filters are commonly found in many vacuum models. They typically consist of multiple layers of material, creating a large surface area for trapping dust and debris. Proper cleaning of these filters is vital for maintaining their effectiveness.To clean a pleated filter, first carefully remove it from the vacuum. Gently rinse the filter with lukewarm water, ensuring no harsh scrubbing or twisting.
Avoid using hot water, as it can damage the filter material. After rinsing, thoroughly air dry the filter. Avoid direct sunlight or heat sources, as these can warp or damage the filter’s structure. Allow it to dry completely before reinstalling it in the vacuum.
HEPA Filter Cleaning
HEPA filters, known for their high-efficiency air filtration, are crucial for allergy sufferers and those with respiratory sensitivities. These filters are designed to trap microscopic particles, including pollen, dust mites, and mold spores. Regular cleaning is necessary to maintain their filtration capacity.When cleaning a HEPA filter, carefully remove it from the vacuum. Soak the filter in a mild solution of dish soap and lukewarm water.
Keeping your vacuum cleaner humming along smoothly involves regular filter maintenance. A clean filter ensures optimal performance, and you’ll find that fescue grass, surprisingly, is quite versatile, not just for shade gardens as discussed in this excellent article about fescue grass versatile not just for shade. Simply remove the filter, rinse it gently (avoid harsh scrubbing), and let it air dry completely before replacing it.
This simple step can significantly extend the life of your vacuum and keep it sucking up dirt effectively.
Avoid using harsh chemicals or abrasive materials that could damage the filter’s delicate structure. Ensure the filter is thoroughly rinsed to remove all traces of soap residue. Again, air dry completely before reinstallation. Allow ample time for drying, as the filter’s effectiveness depends on it being completely dry.
Comparison of Cleaning Methods
While both pleated and HEPA filters require removal from the vacuum, the cleaning methods differ. Pleated filters are typically rinsed and air-dried, whereas HEPA filters benefit from a soak in a mild dish soap solution. The key difference lies in the filter’s construction and the particles it’s designed to trap. Pleated filters are more robust and can handle rinsing, whereas the delicate structure of a HEPA filter necessitates a gentler approach.
Best Practices for Various Vacuum Models
Different vacuum models may have unique filter placement or specific instructions for cleaning. Consult the owner’s manual for your particular vacuum model to ensure the cleaning procedure is appropriate. Some models may require a different drying method or have specific precautions. Always follow the manufacturer’s guidelines for optimal results and to avoid damaging the vacuum or the filter.
Cleaning your vacuum filter is crucial for optimal performance, but did you know that a clean filter can also inspire your autumn decorating? Think about incorporating some of the modern fall decorating ideas, like using metallic accents or warm wood tones, to complement the fresh filter you’ve just cleaned. A clean vacuum filter means a clean home, which sets the perfect stage for embracing the beautiful hues of fall! After all, a clean filter is the first step to creating a cozy and inviting atmosphere, whether you’re inspired by modern fall decorating ideas or not.
So get those filters sparkling and your home ready for fall!
Cleaning Procedure Table
| Filter Type | Step 1 | Step 2 | Step 3 |
|---|---|---|---|
| Pleated | Remove from vacuum | Rinse with warm water | Air dry completely |
| HEPA | Remove from vacuum | Soak in mild dish soap solution | Rinse thoroughly |
Drying and Reinstalling the Vacuum Filter

Properly drying and reinstalling your vacuum filter is crucial for optimal vacuum performance and longevity. A damp filter can lead to reduced suction power, potential mold growth, and even damage to your vacuum’s internal components. Following the correct drying and reinstallation procedures ensures your vacuum is functioning at its best.Thorough drying is paramount before returning the filter to its housing.
Moisture can trap dirt and debris, hindering the filter’s ability to trap particles effectively. Reinstalling the filter without complete drying can lead to a build-up of moisture and potentially compromise the vacuum’s efficiency and overall lifespan.
Drying the Filter Thoroughly
Drying the filter is essential for preventing mold and mildew growth. A damp filter can attract and harbor these microorganisms, leading to unpleasant odors and potential health concerns. Ensure the filter is completely free of moisture before returning it to the vacuum.Methods for drying vary based on the filter type. For paper filters, air drying is generally sufficient.
Place the filter on a clean, dry surface, preferably in a well-ventilated area, and allow it to air dry completely. For HEPA filters, which are often more complex, avoid direct heat or sunlight, as these can damage the filter’s material. A clean, dry paper towel or absorbent cloth can be used to blot excess moisture.
Importance of Complete Drying
Incomplete drying can lead to various issues, impacting the vacuum’s performance. Residual moisture can trap dirt, hindering its ability to filter effectively. This can result in reduced suction power and a buildup of debris, causing the vacuum to become less efficient over time. Additionally, dampness can promote the growth of mold and mildew, potentially creating unpleasant odors and posing potential health risks.
In extreme cases, this can even damage the vacuum’s internal components.
Reinstallation Procedures
Proper reinstallation of the filter is crucial for preventing damage to the filter and the vacuum itself. A filter that is incorrectly installed might not seal properly, affecting suction power. Carefully following the steps Artikeld below can ensure a proper fit and optimal vacuum performance.
- Verify Filter Compatibility: Ensure the filter you’ve cleaned is compatible with your specific vacuum model. Mismatched filters can lead to poor performance or damage to the vacuum.
- Examine the Filter Housing: Carefully inspect the filter housing for any debris or obstructions. Clean any dirt or particles from the housing to ensure a proper seal.
- Gently Place the Filter: Place the filter into the vacuum’s filter housing, ensuring it aligns correctly with the housing’s contours. Avoid forcing the filter into place, as this can damage the filter’s structure or the vacuum’s internal components.
- Check for Proper Alignment: Confirm the filter is seated securely and aligned properly within the housing. A correctly installed filter will create a tight seal, maximizing suction power.
- Seal the Housing: Once the filter is correctly installed, ensure the filter housing is securely closed. A loose or improperly sealed housing can lead to air leakage, reducing suction and impacting the vacuum’s overall efficiency.
Avoiding Filter Damage During Reinstallation
To prevent damaging the filter during reinstallation, exercise caution and avoid rough handling. Avoid applying excessive pressure or twisting the filter, as this can cause tears or distortions that negatively impact its filtration effectiveness. Carefully examine the filter for any signs of damage before reinstalling it.Remember, handling the filter gently throughout the entire process, from cleaning to reinstallation, is essential for maintaining its integrity and functionality.
Troubleshooting Common Issues

Cleaning your vacuum filter regularly is crucial for optimal performance. However, some issues might arise during the cleaning process. Understanding these potential problems and their solutions is key to maintaining a healthy and efficient vacuum. This section will cover common problems and how to effectively address them.
Identifying Filter Damage
Vacuum filters can sustain damage during the cleaning process, ranging from minor tears to complete destruction. Identifying the extent of damage is essential to determine the appropriate course of action. If the filter is torn beyond repair, replacement is necessary. A damaged filter may no longer effectively trap dust and debris, leading to reduced suction and potential clogging of other components within the vacuum.
Addressing Filter Clogs
A clogged filter can significantly reduce your vacuum’s performance. A clogged filter restricts airflow, making it harder for the vacuum to pick up dirt and debris. The clog may be caused by excessive debris buildup or a damaged filter. If you encounter a clogged filter, thoroughly inspect the filter for any obstructions and remove them gently.
Troubleshooting Drying Issues
A filter that won’t dry properly can be a frustrating problem. This is often linked to insufficient airflow during the drying process. Ensure that the filter is placed in an area with good ventilation to allow for proper air circulation. If the filter is still not drying, consider using a fan or other drying method to accelerate the process.
Dealing with Filter Tears
Tears in the filter can compromise its integrity and impact its effectiveness. Over-soaking the filter is a common cause of tearing. To prevent this, maintain a balance between cleaning and drying. If the filter sustains damage beyond repair, replacing it is essential for maintaining optimal vacuum performance. A damaged filter is not able to perform its function as effectively as a healthy one, potentially reducing suction power and increasing the risk of clogs.
Troubleshooting Table
| Problem | Possible Cause | Solution |
|---|---|---|
| Filter won’t dry | Not enough airflow; inadequate drying environment | Ensure proper ventilation around the filter; consider using a fan to accelerate the drying process. |
| Filter tears easily | Over-soaking the filter in cleaning solution; using abrasive materials during cleaning | Reduce soaking time; use gentle cleaning methods, avoiding abrasive materials. |
| Filter clogs easily | Excessive debris buildup; damaged filter; improper filter type for the vacuum | Thoroughly inspect the filter for obstructions; replace the filter if damaged; ensure you are using the correct filter type for your vacuum. |
| Vacuum loses suction | Clogged filter; damaged filter; issues with other vacuum components | Thoroughly clean the filter; inspect the filter for tears or damage; if the problem persists, consult the vacuum manufacturer’s troubleshooting guide. |
Summary
Cleaning your vacuum filter regularly is essential for maintaining optimal performance and a clean home. By following the step-by-step procedures Artikeld in this guide, you can easily and effectively clean your vacuum filters, ensuring that your vacuum continues to operate at its peak efficiency. Remember to pay attention to the specific needs of your vacuum type and filter to achieve the best results.
A well-maintained vacuum translates to a cleaner home and a longer-lasting appliance.