


How to build a cinder block wall? This guide dives deep into the process, from meticulous planning and a strong foundation to finishing touches and safety precautions. We’ll cover everything you need to know, from choosing the right materials to ensuring a structurally sound and aesthetically pleasing wall. Get ready to transform your space with a robust cinder block masterpiece!
This comprehensive guide will walk you through the entire process, from initial planning to final touches, ensuring your cinder block wall is built to last. We’ll explore various techniques, different materials, and important safety considerations along the way. Let’s embark on this journey together and construct a sturdy and beautiful wall.
Planning and Preparation
Building a sturdy cinder block wall starts with meticulous planning and preparation. This phase sets the stage for a successful project, ensuring the wall is not only aesthetically pleasing but also structurally sound. Proper measurement, foundation work, and material selection are critical to achieving long-term stability and preventing costly repairs down the line.
Essential Tools
Careful selection and availability of the right tools are crucial for efficient and accurate construction. A comprehensive toolkit is essential to ensure the project proceeds smoothly and safely. This includes, but is not limited to, measuring tools, digging tools, leveling tools, and handling tools.
- Measuring Tools: A tape measure, level, and string line are indispensable for precise measurements and marking. Accuracy in these initial steps will translate to a more accurate and aesthetically pleasing final product.
- Digging Tools: A shovel, post hole digger, and possibly a small backhoe are necessary for excavating the foundation trench. The appropriate tool for the depth and size of the trench is essential for safety and efficiency.
- Leveling Tools: A level, both a standard bubble level and a laser level, is critical for ensuring the foundation and the wall are perfectly level. This prevents future issues like uneven settling or leaning.
- Handling Tools: Gloves, work boots, a wheelbarrow, and possibly a hand cart for moving materials will aid in efficient handling and prevent injury. Appropriate safety gear is also essential for preventing injuries during handling and transport.
Perimeter Measurement and Marking
Accurate perimeter measurement and marking are fundamental for a straight and properly sized wall. This involves carefully measuring the entire area where the wall will be built.
- Establish the starting point: Choose a reference point, such as a corner or a clearly defined edge, as the starting point for your measurements.
- Measure each side: Carefully measure each side of the wall’s perimeter, ensuring that the measurements are accurate.
- Calculate the total perimeter: Sum up all the individual measurements to determine the total perimeter of the wall.
- Mark the perimeter: Use string lines and stakes to mark the perimeter of the wall on the ground, ensuring clear visibility of the Artikel.
Foundation Preparation
A solid foundation is the bedrock of a stable cinder block wall. Insufficient preparation can lead to cracks, uneven settling, and structural problems over time.
A properly prepared foundation involves digging a trench, compacting the soil, and ensuring the base is level. The depth of the trench depends on the height of the wall, typically ranging from 12 to 18 inches.
Ground Leveling Methods
Leveling the ground ensures a consistent foundation for the cinder block wall. Various methods can be employed, depending on the terrain and the desired level of precision.
- Using a Leveler: A motorized or manual leveler can precisely adjust the ground to a consistent elevation, minimizing any unevenness.
- Compaction: Compacting the soil within the trench is crucial to ensure stability. This can be achieved using a mechanical compactor or by hand-tamping.
- Adding Fill Material: If significant leveling is required, adding fill material and compacting it to the desired elevation is a viable option.
Cinder Block Types
Different types of cinder blocks are available in the market, each with its own strengths and weaknesses. Selecting the right type ensures the wall meets specific needs and structural requirements.
| Type | Strengths | Weaknesses |
|---|---|---|
| Solid Cinder Block | High compressive strength, good thermal insulation, and cost-effective. | Heavier and more difficult to handle than other types. |
| Hollow Cinder Block | Lightweight, less expensive, and easier to handle than solid blocks. | Lower compressive strength, and less thermal insulation compared to solid blocks. |
| Cinder Concrete Block | Good strength, durability, and moisture resistance. | May be more expensive than other types. |
Laying the Foundation
A solid foundation is the bedrock of any sturdy structure, especially a cinder block wall. Properly pouring and reinforcing concrete ensures longevity and prevents future problems. This section details the crucial steps for creating a level, stable base that will support the weight of the wall and surrounding elements. Proper drainage around the foundation is essential for preventing water damage and ensuring the longevity of the entire structure.
Pouring the Concrete Foundation
To ensure a strong and durable foundation, precise concrete pouring is essential. Begin by preparing a level excavation area. This area must be the appropriate size to accommodate the wall’s dimensions and allow for proper drainage. Next, lay down a layer of compacted gravel or crushed stone to provide stability and drainage. This base layer should be compacted thoroughly.
Then, carefully mix the concrete according to the specified ratio, ensuring that all ingredients are thoroughly incorporated. Pour the concrete evenly into the prepared excavation, ensuring no voids or uneven surfaces exist. Use a vibrating tool or a trowel to consolidate the concrete and eliminate air pockets. Allow the concrete to cure completely according to manufacturer instructions before proceeding to the next step.
Reinforcing the Foundation
Reinforcement is critical to prevent cracking and ensure the longevity of the concrete foundation. Steel reinforcing bars, commonly known as rebar, are strategically placed within the concrete mix. The placement of rebar should follow specific design guidelines and specifications. These specifications ensure that the concrete and steel work in harmony, resisting tension and compression forces effectively. This reinforcement dramatically increases the foundation’s strength and resistance to various stresses, thus mitigating the potential for cracking or settling.
Creating a Level and Stable Base
Creating a level and stable base for the cinder block wall is paramount. Use a spirit level and straightedge to ensure the concrete surface is perfectly level. This levelness is crucial for ensuring that the cinder blocks are placed consistently. Any deviation from level will cause uneven stress on the wall, potentially leading to instability and cracks over time.
Using a laser level, for instance, provides accurate and quick assessment of the surface’s levelness.
Importance of Proper Drainage, How to build a cinder block wall
Proper drainage around the foundation is vital for preventing water damage and structural issues. Water accumulation around the foundation can lead to erosion, moisture damage, and ultimately, structural failure. Create a slight slope away from the foundation to allow water to drain properly. This can be achieved by grading the surrounding soil. Consider using a French drain system for added protection.
A properly sloped area prevents water from pooling around the foundation, thus mitigating the risk of water damage.
Concrete Mix Ratios
| Wall Size (Approximate) | Concrete Mix Ratio (Cement:Sand:Gravel) | Notes |
|---|---|---|
| Small (up to 10 blocks high) | 1:2:3 | Suitable for smaller walls, with less weight load. |
| Medium (10-20 blocks high) | 1:2:4 | A balanced option for medium-sized walls. |
| Large (20+ blocks high) | 1:1.5:3 | Stronger mix for walls with greater weight and potential stress. |
A 1:2:3 ratio is generally a good starting point for most residential cinder block walls.
Different concrete mixes cater to various wall sizes. The table above provides a general guideline for different wall sizes. The specific ratio might need adjustments depending on local building codes and the type of concrete used. Always consult with a local building professional or refer to local building codes for detailed guidance.
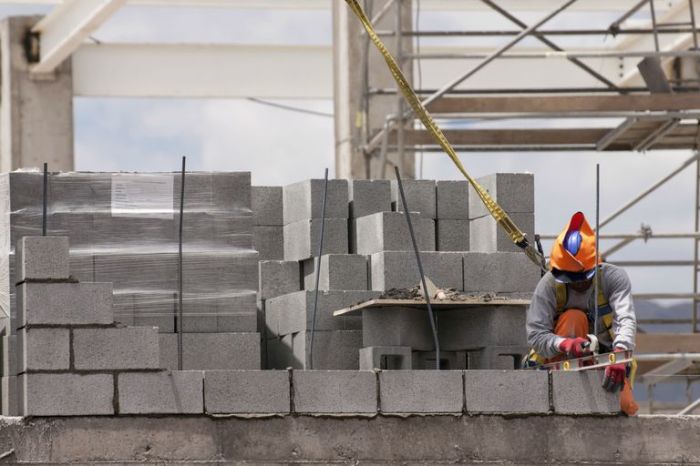
Constructing the Wall
Laying cinder blocks is a rewarding process, especially when you achieve a straight and level wall. Proper techniques, from the initial mortar application to the final curing, are crucial for a strong and aesthetically pleasing structure. This section will guide you through the meticulous steps involved in constructing the wall, focusing on precision and quality.Careful planning and preparation are essential.
Now, let’s move into the hands-on construction of the wall, ensuring each course is laid accurately.
Laying the First Course
To ensure a solid foundation for the entire wall, the first course requires particular attention. Start by carefully placing the first cinder block on the prepared foundation, ensuring it sits squarely on the mortar bed. Use a level to check its horizontal alignment and adjust as needed.
Ensuring Proper Alignment and Leveling
Maintaining precise alignment and leveling throughout each course is critical for a structurally sound and aesthetically pleasing wall. Use a level and a straightedge to verify the horizontal position of each block. Adjust the block’s position until it’s perfectly level with the previously laid blocks. Regular checks throughout the process prevent errors from accumulating. Similarly, vertical alignment is essential.
A plumb bob or a laser level can be employed to ensure vertical alignment.
Mortar Application Techniques
Applying mortar effectively is vital for a strong bond between the blocks. A notched trowel is typically used for distributing the mortar evenly onto the foundation. Ensure the mortar is spread in a consistent layer to avoid gaps and air pockets. Use the trowel to apply mortar to the block’s bed and sides.
Achieving a Straight and Plumb Wall
Using a string line stretched between two points on the foundation ensures a straight wall. Align each block with the string line as you lay them. Use a plumb bob or a laser level to check the vertical alignment of each block as you lay it.
Mortar Application Methods
Various mortar application methods exist, each with its pros and cons. The most common method is using a notched trowel to create a consistent bed of mortar. This method provides excellent adhesion and control over the mortar’s spread. Alternatively, a flat trowel can be used for a faster application, but it may require more manual adjustment to achieve an even spread.
Experiment with different methods to find what suits your workflow and preferences.
Curing Time
Proper curing time is crucial for the mortar to achieve its maximum strength. Different types of mortar require varying curing times. Following the manufacturer’s recommendations is essential for optimal results. Protecting the mortar from extreme temperatures, direct sunlight, and rain is also vital during the curing process.
Different Mortar Types
The choice of mortar depends on the specific project requirements and the desired strength.
| Mortar Type | Properties |
|---|---|
| Portland Cement Mortar | High strength, durable, and widely available. |
| Lime Mortar | Environmentally friendly, breathable, and relatively flexible. |
| Masonry Mortar | Specifically designed for masonry work, providing a strong bond and good water resistance. |
Finishing Touches
Completing a cinder block wall involves more than just laying the blocks. Finishing touches are crucial for aesthetics, durability, and preventing future issues like water damage. These final steps ensure your wall stands the test of time and enhances your property’s overall appeal.Careful attention to these details transforms a functional structure into a finished and attractive element of your landscaping or building project.
Laying cinder blocks is a rewarding DIY project, but finding the perfect finishing touches can be tricky. Once you’ve got the blocks in place, consider enhancing your new wall with some stylish home decor. Check out shop for home decor online for a wide selection of accents to match your aesthetic. Whether you’re aiming for a rustic, modern, or eclectic vibe, you’ll find the perfect pieces to complete your cinder block wall transformation.
Finishing the Wall Edges
Properly finished edges are essential for a professional look and to prevent water from seeping into the wall. A variety of methods exist to create a clean and durable edge. Using a sharp trowel, apply mortar to the top of the last row of cinder blocks, creating a consistent and smooth surface. This creates a solid foundation for any coping material that will be installed.
Installing Coping or Capping
Coping or capping is a critical step to protect the top of the wall from weather elements and to enhance its visual appeal. Different materials offer various aesthetic possibilities, and proper installation is key to prevent water penetration. Carefully position the coping pieces on top of the mortar, ensuring they are level and securely fitted.
Waterproofing the Wall
Preventing moisture damage is paramount to a wall’s longevity. Various waterproofing methods are available, each with its pros and cons. A common method involves applying a waterproof sealant to the wall’s surface after the mortar has cured. Another option is to use a membrane system applied before the coping installation. Consider the climate and expected exposure when choosing a waterproofing method.
Reinforcing Wall Corners
Wall corners are often stress points, making reinforcement essential to prevent cracking or collapse. Strengthening these vulnerable areas will enhance the wall’s structural integrity. Using corner reinforcement angles or metal bracing provides extra support, which is particularly important in high-stress areas.
Laying cinder blocks is surprisingly straightforward, but precision is key. You need a solid foundation, proper mortar mix, and level checks at each course. While we’re on the subject of home improvements, have you ever wondered if ceiling fans are becoming a thing of the past? A great resource to explore this question is this article on are ceiling fans outdated.
Regardless of your thoughts on ceiling fans, remember to maintain straight lines and accurate spacing for a sturdy and attractive cinder block wall.
Coping Materials and Visual Appeal
The choice of coping material directly impacts the wall’s appearance. Different materials evoke different styles and add unique aesthetic elements to the project.
| Coping Material | Visual Appeal |
|---|---|
| Concrete Coping | Classic, durable, and available in various colors and textures |
| Stone Coping | Natural, elegant, and provides a rustic or traditional look |
| Brick Coping | Matching brick to the wall provides a unified aesthetic |
| Slate Coping | Modern, elegant, and provides a sleek and sophisticated look |
| Metal Coping (e.g., copper, aluminum) | Adds a contemporary, bold touch, offering varying degrees of shine and durability. |
Installing Reinforcement Bars
Reinforcing the wall with metal bars is a vital step to increase its strength and durability, particularly in high-traffic areas or when the wall will support significant weight. Install these bars within the mortar, strategically placed to reinforce the corners and provide additional structural support. This process involves carefully calculating the bar placement and ensuring the bars are adequately embedded in the mortar.
The depth of embedding is critical to avoid issues with the bars pulling out during construction.
Safety Considerations

Building a cinder block wall, while rewarding, requires careful attention to safety. Proper precautions and adherence to safety guidelines are crucial to prevent injuries and ensure a smooth and successful construction process. Ignoring safety measures can lead to costly delays, serious injuries, and even fatalities.Working with heavy materials, potentially hazardous substances, and heights necessitates a proactive and cautious approach.
This section details the safety measures to take while handling cinder blocks, mortar, and associated construction tasks.
Personal Protective Equipment (PPE)
Ensuring adequate personal protective equipment (PPE) is essential for worker safety. The appropriate PPE helps mitigate risks associated with various construction activities.
- Safety glasses or goggles are mandatory to protect eyes from flying debris, mortar splashes, or accidental impacts. They should have side shields to protect the entire eye area.
- Hard hats protect the head from falling objects, impacting materials, and potential head injuries. Ensure the hard hat fits properly and is in good condition.
- Work gloves are crucial for protecting hands from cuts, abrasions, and the abrasive nature of cinder blocks and mortar. Choose gloves suitable for the task at hand.
- Steel-toe safety boots or work boots are vital to protect feet from impacts and heavy objects. Ensure the boots are in good condition and provide adequate support.
Potential Hazards and Preventative Measures
Several hazards can arise during cinder block wall construction. Identifying these hazards and implementing preventive measures is critical for minimizing risks.
- Falling Objects: Construction materials like cinder blocks, tools, and mortar can fall from higher levels. Using proper scaffolding, safety nets, and ensuring adequate support structures is paramount. Workers should be trained in safe handling and positioning of materials to prevent accidental drops.
- Mortar Splashes: Mortar can splash onto workers’ skin, eyes, or clothing. Using appropriate protective gear, like goggles, aprons, and gloves, is essential. Proper mixing and application techniques, along with careful handling of mortar containers, can significantly reduce the risk of splashes.
- Overexertion: Lifting heavy cinder blocks can lead to strains, sprains, and other musculoskeletal injuries. Using proper lifting techniques, like bending the knees and engaging core muscles, is critical to minimize risk. Employing mechanical aids like dollies and hand trucks when possible is a good practice.
Proper Lifting Techniques
Safe lifting practices are essential for avoiding back injuries and other musculoskeletal disorders.
- Assess the Load: Determine the weight of the object to be lifted. If it’s too heavy, seek assistance or use mechanical aids.
- Maintain a Neutral Spine: Keep the back straight and maintain a neutral spine posture while lifting. Avoid twisting or bending excessively.
- Use Leg Muscles: Bend your knees and use your leg muscles to lift the load, keeping the load close to the body. Avoid lifting with the back alone.
- Proper Posture: Stand with feet shoulder-width apart for stability. Maintain a balanced posture throughout the lift.
- Avoid Sudden Movements: Move gradually and smoothly while lifting and carrying the load. Sudden movements can increase the risk of injury.
Emergency Procedures
A well-defined emergency procedure plan can significantly improve outcomes in case of accidents.
- First Aid Kit: Ensure a readily accessible first aid kit is available on the construction site. The kit should contain essential supplies to address minor injuries.
- Emergency Contacts: Keep a list of emergency contacts, including paramedics, medical professionals, and site supervisors, readily available.
- Evacuation Plan: Develop an evacuation plan in case of an emergency. This plan should include clear escape routes and designated assembly points.
- Reporting Procedures: Establish clear reporting procedures for accidents and injuries. All incidents should be documented thoroughly to facilitate learning and improvement.
Safety Guidelines for Heavy Materials
Working with heavy materials demands adherence to specific guidelines to prevent accidents.
- Proper Handling Techniques: Employ appropriate lifting techniques and use mechanical aids whenever possible. Avoid lifting objects that are too heavy for a single person.
- Secure Storage: Store heavy materials in a stable and secure location to prevent them from falling or rolling.
- Clear Work Area: Maintain a clear and unobstructed work area to prevent tripping hazards and falls.
- Proper Support: Ensure adequate support structures for heavy materials, especially when working at elevated levels.
- Safety Training: Ensure all workers are adequately trained on safe handling and storage procedures for heavy materials.
Variations and Alternatives

Building a cinder block wall offers flexibility beyond the basic structure. Different approaches can significantly alter the aesthetic, functionality, and overall cost-effectiveness of the project. This section explores the various possibilities, from specialized mortars to alternative materials, helping you choose the best option for your needs.Exploring variations in cinder block construction provides a wide range of possibilities. From enhancing the wall’s durability to significantly altering its visual appeal, the options are diverse and cater to different styles and budgets.
Understanding these choices empowers you to create a wall that perfectly complements your project.
Laying cinder blocks is surprisingly straightforward. First, you need a solid foundation, then carefully arrange the blocks, ensuring proper mortar application. Knowing how to choose the right type of wood for your project is also important, like considering the weeping blue atlas cedar growing profile weeping blue atlas cedar growing profile for landscaping around the finished wall.
Finally, use a level to guarantee a straight and sturdy wall.
Mortar Types
Different types of mortar affect the wall’s strength, durability, and appearance. Portland cement-based mortar is a common choice, offering good strength and workability. Lime-based mortars, while potentially less strong, can provide superior water resistance and better breathability for the wall. Choosing the right mortar is crucial for the long-term performance of the cinder block structure.
Cinder Block Wall Types
Cinder block walls can be designed for various purposes. Retaining walls, for instance, are constructed with specific considerations for load-bearing and slope stability. Decorative walls can be built using colored or textured cinder blocks, or with intricate patterns. Understanding the intended use of the wall is paramount for proper design and construction.
Comparison with Other Masonry Walls
Comparing cinder block walls with other masonry options, like brick or stone walls, involves considering several factors. Cinder blocks are typically less expensive than brick, but their appearance may be less refined. Stone walls, while offering a distinctive aesthetic, often come with higher material costs and installation complexities. Brick walls strike a balance between aesthetic appeal and cost, but cinder blocks can be quicker to install.
Cost-Effectiveness
Cinder block construction is generally considered cost-effective, especially for larger projects. The relatively low cost of cinder blocks and the faster construction time can result in significant savings compared to more elaborate masonry options. However, specialized requirements, such as retaining walls, might increase the overall cost.
Alternative Materials
Alternative materials can be considered for various reasons, from environmental concerns to unique aesthetic preferences. Concrete blocks, stone, and even prefabricated panels offer viable alternatives to cinder blocks.
Comparison Table of Alternative Wall Materials
| Material | Pros | Cons |
|---|---|---|
| Concrete Blocks | High strength, durability, fire resistance | Can be heavier than cinder blocks, potentially higher cost |
| Stone | Aesthetic appeal, natural look, potential for high durability | Higher cost, installation complexity, varying quality of stone |
| Prefabricated Panels | Faster installation, customizable designs, potentially lower labor costs | Limited design flexibility, may not match existing aesthetic, potential for issues with waterproofing |
| Engineered Masonry | Enhanced design flexibility, higher load-bearing capacity, customizability | More expensive, complex installation process, reliance on specific expertise |
Troubleshooting and Maintenance
Building a cinder block wall is a rewarding project, but understanding potential issues and how to address them is crucial for long-term success. Proper maintenance ensures the longevity and structural integrity of your wall, preventing costly repairs down the road. This section delves into common problems, their solutions, and preventative measures to keep your cinder block wall in top condition.
Common Construction Problems and Solutions
Identifying and addressing problems early on can save significant time and money. Careful observation during construction is key to catching issues before they escalate. Common problems include improper mortar application, inadequate foundation preparation, and uneven block placement.
- Improper Mortar Application: Weak or uneven mortar can lead to cracks and gaps in the wall. Ensure proper mixing of mortar according to the manufacturer’s instructions. Use a consistent trowel technique for uniform application, ensuring proper bonding between blocks. If cracks appear, they should be filled with a suitable patching mortar and re-pointed to restore the wall’s integrity.
- Inadequate Foundation Preparation: A poorly prepared foundation can lead to settling and cracking in the wall. A level, compacted foundation is essential. Ensure proper drainage to prevent water accumulation around the base of the wall. If settling occurs, reinforce the foundation and the affected wall section.
- Uneven Block Placement: Variations in block height or misalignment can create unsightly gaps and weaken the structure. Use a level and a plumb bob to ensure precise placement of each block. Rectify any misalignment before continuing construction.
Addressing Cracks and Settling
Cracks and settling are common issues in cinder block walls, especially in areas with fluctuating moisture levels or in older structures. Prompt action is key to preventing further damage.
- Cracks: Small cracks can often be addressed with patching mortar. For larger cracks, consider reinforcing the wall with steel rods or mesh, especially if the crack is significant enough to compromise the structural integrity of the wall. Determine the cause of the crack to prevent future occurrences. Regular inspection is crucial to identify early signs of cracking.
- Settling: Settling, often due to uneven soil compaction, can cause the wall to lean or shift. Assess the foundation for stability and address any underlying issues. If settling is moderate, a professional structural engineer might recommend reinforcing the foundation or wall with additional supports.
Preventive Maintenance Tips
Regular maintenance is crucial for extending the lifespan of your cinder block wall. A proactive approach prevents minor issues from becoming major problems.
- Regular Inspections: Inspect the wall periodically for any signs of damage, such as cracks, moisture intrusion, or uneven settling. Pay close attention to areas where the wall meets the ground, as these are vulnerable points.
- Protecting from Moisture: Prevent water from accumulating around the base of the wall. Use appropriate drainage systems and ensure the ground slopes away from the structure. Apply a waterproof sealant to the exterior of the wall if necessary. Addressing moisture issues promptly is vital to prevent deterioration of the blocks.
- Maintaining Mortar: Regularly inspect and maintain the mortar joints. If mortar becomes deteriorated or loose, repoint the sections to prevent further damage and maintain the structural integrity of the wall.
Repairing Damaged Areas
Repairing damaged areas is essential to maintaining the structural integrity of the wall. Follow these steps to effectively repair damaged sections.
- Assess the Damage: Thoroughly examine the damage to determine the extent of the repair needed. Identify the cause of the damage.
- Prepare the Area: Clean the affected area to remove loose debris or mortar. Ensure the surface is dry and ready for the repair.
- Apply Repair Mortar: Use a suitable patching mortar and apply it according to the manufacturer’s instructions. Ensure a solid bond with the surrounding mortar.
- Finishing Touches: Once the repair is complete, ensure the repaired area is flush with the rest of the wall and properly finished.
Importance of Regular Inspections
Regular inspections are critical for early detection of problems. Early intervention can save time, money, and effort in the long run.
- Preventative Maintenance: Early detection of minor issues like hairline cracks or slight settling allows for timely and cost-effective repairs, preventing them from escalating into major structural problems.
- Proactive Approach: Regular inspections enable a proactive approach to maintenance, ensuring the structural integrity and longevity of the wall.
Troubleshooting Table
| Problem | Solution |
|---|---|
| Cracks in the wall | Patch with suitable mortar, reinforce with steel if needed. |
| Settling of the wall | Assess foundation, add supports if necessary, ensure proper drainage. |
| Deteriorated mortar | Repoint the affected areas with fresh mortar. |
| Moisture intrusion | Improve drainage around the foundation, apply waterproofing. |
Last Recap: How To Build A Cinder Block Wall
In conclusion, building a cinder block wall is a rewarding project that requires careful planning and execution. This guide has provided a detailed overview of the process, from foundation to finishing touches and safety. Remember to prioritize safety, choose the right materials, and follow the steps meticulously. With this knowledge, you’re well-equipped to build a durable and impressive cinder block wall that will stand the test of time.