


How to apply polyurethane for floors? This comprehensive guide takes you through the entire process, from initial preparation to finishing touches. We’ll explore various polyurethane flooring types, their properties, and suitability for different applications, from residential to commercial settings. Learn the crucial steps in surface preparation, mixing, application techniques (roller, trowel), curing, and maintenance. This guide provides everything you need to achieve a professional-looking polyurethane floor in your project.
We’ll delve into essential safety precautions, troubleshoot potential problems, and discuss the specific needs of different floor types. The guide includes tables comparing flooring types, outlining preparation methods, and detailing safety equipment. By the end, you’ll be equipped with the knowledge and confidence to tackle your polyurethane flooring project successfully.
Introduction to Polyurethane Flooring
Polyurethane flooring has become a popular choice for both residential and commercial spaces due to its exceptional durability and aesthetic appeal. Its versatility extends from simple residential projects to complex industrial settings, making it a highly sought-after material in various applications. This comprehensive guide will explore the different types of polyurethane flooring, their key properties, and their diverse applications.Polyurethane, a synthetic polymer, offers a range of finishes and properties, catering to various needs and preferences.
Applying polyurethane to floors is all about meticulous preparation and even coats. Proper surface cleaning and priming are key, and using a high-quality polyurethane is essential for a durable finish. Speaking of durable finishes, designers are moving away from some old-fashioned curtain styles, like heavy, bulky drapes that can make a room feel cramped, which is similar to the meticulous prep work required for polyurethane.
So, whether you’re tackling a DIY flooring project or just want a beautiful, long-lasting finish, remember to follow the steps carefully for the best results. For more interior design inspiration, check out outdated curtain styles designers are leaving behind. A smooth, even application of polyurethane is the key to a beautiful and durable floor.
Understanding these nuances is crucial for selecting the appropriate type of polyurethane flooring for a specific project.
Polyurethane Flooring Types
Different polyurethane flooring types cater to diverse requirements, each with its unique characteristics and advantages. The primary distinction lies in the application method. Self-leveling polyurethane is a popular choice for creating seamless, smooth surfaces, while trowel-applied polyurethane offers a more textured or customized finish. Other types, like spray-applied, are often used for industrial settings requiring specific thicknesses or complex designs.
Polyurethane Flooring Properties
Polyurethane flooring excels in several crucial properties that contribute to its widespread use. Durability is a key advantage, with polyurethane surfaces typically exhibiting high resistance to wear and tear. Stain resistance is another notable characteristic, making polyurethane a practical choice for high-traffic areas prone to spills and marks. Slip resistance is also a significant consideration, with certain polyurethane formulations providing a safe and secure surface, especially in wet areas.
Polyurethane Flooring Applications
The applications of polyurethane flooring extend across various sectors. Residential use includes creating durable and attractive flooring in kitchens, bathrooms, and entryways. Commercial spaces, such as retail stores and offices, benefit from the durability and aesthetic appeal of polyurethane flooring. Industrial settings often leverage the high-impact resistance and stain-resistance properties of polyurethane for demanding environments.
Comparison of Polyurethane Flooring Types
| Flooring Type | Pros | Cons |
|---|---|---|
| Self-Leveling | Seamless finish, good for uneven subfloors, relatively quick installation. | Can be more expensive than other types, requires precise application for best results. |
| Trowel-Applied | Offers a wider range of textures and finishes, customization options. | Requires more labor, may not be as seamless as self-leveling. |
| Spray-Applied | Ideal for large areas, complex designs, and thick coatings. | Requires specialized equipment and expertise, potentially higher cost for larger projects. |
The table above provides a concise overview of the advantages and disadvantages of different polyurethane flooring types. Choosing the right type depends on the specific needs and circumstances of the project.
Preparation for Applying Polyurethane

A flawless polyurethane finish hinges critically on the quality of the surface preparation. A properly prepared surface ensures even coverage, optimal adhesion, and a long-lasting, beautiful floor. Neglecting this crucial step can lead to issues like bubbling, peeling, or uneven wear, drastically reducing the lifespan and aesthetic appeal of your finished floor.Thorough preparation goes beyond simply cleaning; it involves meticulously addressing any imperfections in the substrate to provide a strong and stable foundation for the polyurethane.
This careful attention to detail will translate into a superior final product.
Importance of Surface Preparation
Proper surface preparation is paramount for achieving a durable and aesthetically pleasing polyurethane finish. A clean, smooth, and stable substrate ensures the polyurethane adheres strongly and evenly, preventing issues like cracking, bubbling, or peeling. This ultimately translates to a longer lifespan for your floor, reducing the need for costly repairs and maintenance.
Cleaning the Floor Surface
Thorough cleaning is the first step in preparing the floor. This involves removing all traces of dirt, debris, dust, old sealant, and any other contaminants. Use appropriate cleaning solutions for the existing floor type to avoid damage or discoloration. For example, harsh chemicals can damage wood floors, so a specialized wood cleaner should be used.
- Dust and Debris Removal: Carefully sweep and vacuum the entire area to remove loose dust, dirt, and debris. Pay close attention to corners and crevices, where dirt often accumulates. For extra thoroughness, use a damp mop to remove any remaining fine particles.
- Cleaning Solutions: Select appropriate cleaning solutions based on the floor type. Avoid using harsh chemicals that might damage the floor’s finish or the polyurethane itself. Always test cleaning solutions in an inconspicuous area first to verify their compatibility with the floor’s surface.
- Residual Remover: If the floor has a previous sealant or coating, use a suitable remover to eliminate it completely. Follow the manufacturer’s instructions carefully to avoid damage to the substrate.
Substrate Issues Affecting Polyurethane Application
Several substrate issues can hinder polyurethane application. These include uneven surfaces, loose or flaking materials, moisture problems, and the presence of incompatible substances. Addressing these issues before applying polyurethane is critical for a successful outcome.
- Uneven Surfaces: Significant irregularities in the floor surface need to be leveled. This may involve sanding, patching, or using a self-leveling compound. Using a spirit level or similar tools to identify and correct any dips or bumps is crucial.
- Loose or Flaking Materials: Any loose or flaking material must be removed to prevent these particles from embedding in the polyurethane and compromising its adhesion.
- Moisture Problems: Excessive moisture in the substrate can lead to blistering or warping of the polyurethane. Moisture-proofing measures must be taken to ensure the floor is completely dry before application.
- Incompatible Substances: Certain substances, like oil or wax residue, can interfere with polyurethane adhesion. Thoroughly remove these substances to ensure proper bonding.
Tools and Materials Needed
The tools and materials needed for surface preparation will vary depending on the floor type and the extent of preparation required. However, some common essentials include:
- Cleaning Supplies: Vacuum cleaner, broom, mop, cleaning solutions, and appropriate cleaning cloths or pads.
- Protective Gear: Gloves, safety glasses, and a dust mask to protect yourself from harmful dust and chemicals.
- Sanding Tools: Sandpaper, sanding machine (if necessary), sanding blocks.
- Patching Materials: Wood filler, epoxy putty, or other appropriate patching materials for repairing damaged areas.
- Leveling Compounds: Self-leveling compounds for uneven floors.
Step-by-Step Surface Preparation Procedure
A systematic approach to surface preparation is key. This sequence ensures that no crucial step is overlooked.
- Inspection: Carefully inspect the floor for any imperfections, damage, or contamination. Note the type of floor and any existing issues.
- Cleaning: Thoroughly clean the floor using appropriate cleaning solutions and methods.
- Removal of Existing Coatings: If necessary, remove any existing coatings or sealants using a suitable remover.
- Repairing Damaged Areas: Repair any cracks, holes, or damaged areas using appropriate patching materials.
- Leveling: Level any uneven surfaces using self-leveling compounds or sanding, ensuring a smooth surface.
- Final Cleaning: Clean the floor thoroughly again to ensure a spotless surface free of debris.
Different Floor Types and Surface Preparation Methods
| Floor Type | Surface Preparation Method |
|---|---|
| Wood | Sanding, cleaning, patching, moisture check |
| Concrete | Cleaning, patching, leveling, moisture check |
| Tile | Cleaning, grout cleaning, patching, moisture check |
| Laminate | Cleaning, inspecting for damage, patching |
Mixing and Applying Polyurethane
Getting your polyurethane floor looking perfect involves more than just pouring it on. Accurate mixing and careful application are crucial for a smooth, durable, and aesthetically pleasing finish. Understanding the nuances of these steps ensures a professional-looking result that will stand the test of time.Precise mixing and application techniques are essential for achieving the desired finish. The right procedures and safety measures will lead to a superior, long-lasting floor that’s both beautiful and functional.
This section will detail the necessary steps, from mixing ratios to application methods, to ensure you get the best results.
Mixing Ratios and Procedures
Understanding the correct mixing ratio is critical for achieving the desired consistency and performance of the polyurethane. Different types of polyurethane require specific mixing ratios, which are typically provided in the product instructions. Always follow the manufacturer’s instructions for your specific polyurethane product. These instructions often include precise measurements, such as the ratio of hardener to base resin, and specify the necessary mixing tools.
Incorrect ratios can affect the final product’s strength, durability, and appearance.
Application Methods
Various application methods exist for polyurethane, each with its own advantages and disadvantages. The choice of method depends on factors like the size of the area, the desired finish, and the user’s experience.
- Roller Application: Ideal for larger areas, roller application is a common method. It provides a relatively even coat and is often preferred by DIY enthusiasts. The texture and coverage can be tailored depending on the roller’s nap.
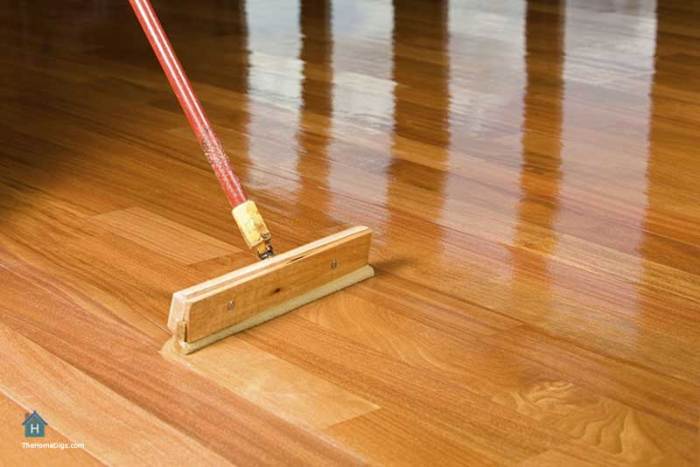
- Trowel Application: For specific applications, a trowel can be used. It allows for greater control over the thickness and consistency of the polyurethane layer. This method is often used in more intricate or specialized flooring projects.
- Spray Application: Spraying polyurethane is a fast and efficient method, ideal for large projects. This method requires specialized equipment and experience to avoid uneven coats and overspray. Proper ventilation is crucial when using this technique.
Applying Polyurethane to a Floor
Achieving a flawless polyurethane finish requires a systematic approach. The following steps Artikel a typical process for applying polyurethane using a roller.
- Thoroughly clean and prepare the floor according to the steps discussed in the previous section. This ensures proper adhesion and prevents imperfections.
- Mix the polyurethane according to the manufacturer’s instructions. Carefully follow the specified mixing ratios and times to avoid potential issues.
- Apply the first coat evenly with a roller. Use long, overlapping strokes to cover the entire surface without gaps or uneven thicknesses. The first coat serves as a foundation for subsequent coats.
- Allow the first coat to dry completely. The drying time is specified in the product instructions and is crucial for the subsequent coats to adhere properly.
- Repeat the application process for the remaining coats, ensuring each coat is applied and dried completely according to the manufacturer’s instructions. Multiple coats build durability and protect the floor.
Safety Precautions, How to apply polyurethane for floors
Polyurethane application involves certain safety measures. Proper precautions are essential to protect yourself and others from potential hazards.
- Ventilation: Adequate ventilation is crucial. Use fans or open windows to ensure proper airflow, especially during spraying.
- Personal Protective Equipment (PPE): Wear appropriate PPE, such as gloves, eye protection, and a respirator, to avoid skin, eye, and respiratory irritation.
- Proper Storage: Store unused polyurethane in its original container, properly sealed and away from direct sunlight.
- Disposal: Dispose of used polyurethane and any contaminated materials according to local regulations.
Recommended Temperatures and Humidity Levels
Maintaining optimal temperatures and humidity levels during polyurethane application is vital for achieving a high-quality finish. The specific temperature and humidity ranges are dependent on the type of polyurethane.
| Parameter | Range |
|---|---|
| Temperature (°C) | 15-30 |
| Humidity (%) | 30-60 |
Step-by-Step Guide for Roller Application
This detailed guide provides a step-by-step process for applying polyurethane with a roller.
- Preparation: Ensure the floor is clean, dry, and free of any debris.
- Mixing: Mix the polyurethane according to the manufacturer’s instructions.
- Application: Apply the first coat evenly with a roller in overlapping strokes. Allow the first coat to dry completely before applying subsequent coats.
- Subsequent Coats: Repeat steps 2 and 3 for subsequent coats.
Curing and Finishing
Polyurethane flooring offers a durable and aesthetically pleasing surface, but its transformation from a liquid to a hard, protective layer requires careful attention to the curing process. Understanding the nuances of curing, drying, and finishing is crucial for achieving a professional-grade result and avoiding potential issues. This section delves into the specifics of each stage, highlighting the importance of proper ventilation and providing a guide for achieving a flawless polyurethane floor.The curing process is a critical phase in polyurethane flooring, where the liquid resin hardens and forms a robust, protective surface.
Proper curing ensures the longevity and performance of the floor, while improper curing can lead to issues such as unevenness, discoloration, or premature wear. The following sections Artikel the steps involved in the curing process, potential problems, and essential finishing touches for a superior polyurethane floor.
Curing Process Overview
The curing process of polyurethane involves a chemical reaction between the resin and hardener components. This reaction typically takes place in several stages, requiring a specific amount of time and controlled conditions for completion. The time required depends heavily on the specific type of polyurethane used, the ambient temperature, and the thickness of the applied coat.
Steps for Proper Curing and Drying
Proper curing is achieved through a combination of factors. Following these steps ensures a robust and durable floor:
- Allow ample time for the polyurethane to cure according to the manufacturer’s instructions. Over-hasty attempts to rush the curing process can lead to inferior results.
- Maintain a stable ambient temperature and humidity level throughout the curing period. Fluctuations in these factors can affect the curing process.
- Ensure adequate ventilation during the curing process to facilitate the release of any volatile organic compounds (VOCs). Poor ventilation can result in off-gassing, which can impact the final finish.
- Avoid walking or placing heavy objects on the floor until it has fully cured. Premature stress can lead to damage or imperfections.
Potential Issues During Curing and Solutions
Several issues can arise during the curing process. Addressing these problems promptly can save the project and the final result.
- Uneven Curing: Uneven curing can lead to surface inconsistencies. This can be caused by temperature fluctuations or inadequate mixing. Ensure uniform application and temperature control throughout the curing period.
- Discoloration: Discoloration can be a result of improper mixing or exposure to direct sunlight. Check the manufacturer’s guidelines for recommended storage and application conditions.
- Bubbles: Bubbles in the polyurethane can create imperfections in the final finish. Proper mixing, application technique, and adequate ventilation can minimize this problem.
Finishing Touches for a Professional Polyurethane Floor
The finishing touches play a significant role in achieving a professional and durable polyurethane floor.
- Buffing or Polishing: Buffing or polishing the cured floor can enhance its shine and overall appearance. Use appropriate polishing compounds and techniques to maintain the quality of the finish.
- Sealing: Applying a sealant layer can add an extra layer of protection and enhance the durability of the polyurethane floor. This step is particularly important for high-traffic areas.
- Inspection: Thoroughly inspect the finished floor for any imperfections. Addressing minor issues immediately will prevent larger problems from developing later.
Importance of Ventilation During Curing
Adequate ventilation is critical during the curing process to remove volatile organic compounds (VOCs). Poor ventilation can lead to unpleasant odors and potentially harmful health effects. Ensure proper airflow throughout the area to prevent any issues.
Proper ventilation is essential for a safe and successful polyurethane application.
Curing Times for Various Polyurethane Types
The curing time varies significantly depending on the type of polyurethane. Here’s a summary table for different types:
| Polyurethane Type | Typical Curing Time (Hours) |
|---|---|
| 2-component epoxy polyurethane | 24-72 |
| 2-component aliphatic polyurethane | 12-48 |
| 1-component polyurethane | 6-24 |
Troubleshooting and Maintenance
Polishing off your polyurethane floor project requires more than just application. Proper maintenance is key to ensuring its longevity and preserving its stunning appearance. This section dives into common issues that can arise, solutions for fixing them, and crucial maintenance steps to keep your polyurethane floor looking its best for years to come.Troubleshooting problems in polyurethane flooring is a critical aspect of ensuring a long-lasting and aesthetically pleasing surface.
Understanding the potential issues and their remedies can save time and money in the long run. Effective maintenance practices are vital for preserving the integrity of polyurethane floors, protecting the investment made in the materials and labor, and avoiding costly repairs or replacements.
Common Polyurethane Flooring Problems
Addressing potential problems promptly is vital to prevent further damage and maintain the floor’s quality. Identifying the source of the issue early on can significantly influence the efficiency and cost-effectiveness of the solution. Common problems include discoloration, scratches, and damage from spills or impacts.
- Discoloration: Discoloration can stem from various factors, including exposure to sunlight, chemical spills, or improper cleaning. Addressing the cause of discoloration is crucial to restoring the floor’s original appearance. For example, if the discoloration is from a chemical spill, the affected area should be cleaned immediately with a suitable cleaner. If it’s from excessive sunlight, consider applying a protective sealant or reducing direct sunlight exposure.
- Scratches: Scratches are a common occurrence in high-traffic areas. Light scratches can often be repaired with touch-up paint or a specialized polyurethane filler. Deep scratches might necessitate more extensive repairs, potentially involving sanding and reapplying the polyurethane finish. Careful handling and use of protective mats in high-traffic areas can help prevent scratching.
- Spills and Impacts: Spills of liquids or impacts from heavy objects can cause damage to the polyurethane finish. Prompt action is essential. For spills, blot up the liquid immediately with a clean cloth, and then apply a suitable cleaning solution. For impacts, assess the damage and decide whether touch-up or more extensive repair is needed. Consider using protective pads under furniture to prevent potential damage.
Applying polyurethane to floors is a straightforward process, involving meticulous preparation and careful application. First, you need to thoroughly clean and prep the surface. Then, consider the current kitchen trends, like the shift away from certain styles, such as some of the ornate, fussy kitchens that are no longer popular, as discussed in this article on kitchen styles that are no longer trendy.
After that, you can apply the polyurethane in thin, even coats, allowing each coat to dry completely before applying the next. Following these steps will ensure a durable and beautiful finish for your floor.
Cleaning Methods for Polyurethane Floors
Proper cleaning techniques are crucial for maintaining the integrity and aesthetic appeal of polyurethane floors. Different cleaning methods are suitable for different levels of soiling and types of polyurethane finishes.
- Daily Maintenance: Regular sweeping or vacuuming is vital for removing dust, dirt, and debris. Damp mopping with a mild detergent solution is appropriate for removing minor spills or stains. Use a microfiber mop to avoid scratching the surface. Avoid harsh chemicals or abrasive cleaners that can damage the polyurethane finish.
- Deep Cleaning: For heavier soiling, consider using a specialized polyurethane floor cleaner. Follow the manufacturer’s instructions carefully. If the floor has stubborn stains or discoloration, professional cleaning services may be necessary.
- Specialized Cleaning for Specific Stains: Different stains require different solutions. For example, grease stains might require a degreaser, while water-based stains can often be removed with a damp cloth. Always test a cleaning solution in an inconspicuous area first to ensure it doesn’t damage the polyurethane finish.
Troubleshooting Table
| Problem | Solution |
|---|---|
| Discoloration | Identify the cause (sunlight, chemicals). Clean immediately, consider protective sealant. |
| Scratches (light) | Touch-up paint or polyurethane filler. |
| Scratches (deep) | Sanding and reapplication of polyurethane. |
| Spills/Impacts | Blot up liquid immediately. Assess damage; consider touch-up or repair. |
| Heavy Soiling | Specialized polyurethane floor cleaner. |
Safety Considerations
Applying polyurethane flooring, while rewarding, requires careful attention to safety protocols. Improper handling can lead to health issues and potential accidents. Understanding the hazards and taking appropriate precautions is paramount to a successful and safe project.Proper safety measures not only protect you but also prevent damage to the environment and ensure the longevity of the finished floor. Adhering to these precautions minimizes risks and contributes to a more enjoyable and risk-free application process.
Safety Precautions for Handling Polyurethane Materials
Polyurethane materials, in their various forms, can pose health risks if not handled with care. Exposure to certain components can lead to respiratory problems, skin irritation, and allergic reactions. These hazards are minimized by following proper safety procedures and using appropriate personal protective equipment.
Applying polyurethane to floors is all about precision and patience. First, you need a clean, dry surface. Then, you’ll want to consider when azaleas bloom, because if you’re working outside, those beautiful blooms might be a distraction! Following the manufacturer’s instructions carefully is key to achieving a smooth, durable finish. Proper preparation and application will ensure a long-lasting result.
For more detailed guidance on the ideal time to apply polyurethane to your floors, refer to when do azaleas bloom. This will help you choose the right time to work and ensure a beautiful, protected surface.
Importance of Wearing Appropriate Personal Protective Equipment (PPE)
Personal Protective Equipment (PPE) forms the first line of defense against potential hazards. Choosing and using the correct PPE significantly reduces the risk of exposure to harmful substances.
- Protective eyewear should shield the eyes from splashes or dust.
- Gloves protect hands from direct contact with the polyurethane materials.
- A respirator filters out harmful fumes and dust particles from the air.
- Protective clothing (aprons or coveralls) prevents skin contact and contamination.
Potential Health Hazards Associated with Polyurethane
Several health hazards are associated with polyurethane, ranging from minor skin irritations to more severe respiratory issues. These hazards depend on the specific type of polyurethane and the concentration of its components.
- Skin irritation: Direct contact can cause redness, itching, or rash.
- Respiratory problems: Inhalation of polyurethane fumes can trigger coughing, shortness of breath, or asthma attacks in sensitive individuals.
- Allergic reactions: Some individuals may develop allergic reactions to polyurethane components, manifesting as skin rashes, hives, or difficulty breathing.
- Eye irritation: Exposure to polyurethane mists or splashes can cause eye irritation, redness, and blurred vision.
Ventilation Requirements for Polyurethane Application
Adequate ventilation is crucial during polyurethane application to remove potentially harmful fumes and vapors. Poor ventilation can lead to significant health risks.
- Ensure proper ventilation in the work area to minimize the concentration of fumes.
- Open windows and doors to promote air circulation, if possible and safe.
- Use exhaust fans or ventilation systems to remove fumes and dust particles from the air.
- Consider a temporary tent or structure to confine the work area and improve ventilation if necessary.
Safety Procedures for Polyurethane Application
A comprehensive set of safety procedures should be followed for each polyurethane application. These procedures will vary depending on the specific type of polyurethane being used and the application method.
- Always read and understand the Material Safety Data Sheet (MSDS) for the specific polyurethane product.
- Ensure adequate ventilation is in place before and during the application process.
- Wear appropriate personal protective equipment (PPE), including gloves, eye protection, and a respirator if necessary.
- Work in a well-lit area and take breaks to avoid fatigue and maintain alertness.
- Store unused polyurethane materials in a secure, well-ventilated area.
- Clean up any spills or splashes immediately.
- Follow manufacturer instructions for mixing and application.
Safety Equipment Required for Different Polyurethane Applications
The necessary safety equipment varies based on the type of polyurethane and the application method.
| Polyurethane Application | Required Safety Equipment |
|---|---|
| Small-scale projects (e.g., DIY floor coating) | Gloves, safety glasses, respirator (if necessary), dust mask, work apron |
| Large-scale projects (e.g., commercial floor coating) | Gloves, safety glasses, respirator (mandatory), protective clothing, hard hat, safety boots, full-face shield, ventilation system |
| Outdoor applications | All the above plus weather-resistant clothing, eye protection, and possibly a face shield |
Examples and Case Studies: How To Apply Polyurethane For Floors
Polyurethane flooring offers a wide range of applications, from residential kitchens to industrial warehouses. Understanding successful projects and the various project types where polyurethane shines can significantly aid in making informed decisions about its use. This section delves into real-world examples and provides insights into the diverse applications of this durable flooring solution.Successful polyurethane flooring projects often highlight its exceptional durability and aesthetic versatility.
From high-traffic commercial spaces to elegant residential settings, polyurethane flooring has proven its worth in providing long-lasting beauty and resilience.
Successful Polyurethane Flooring Projects
Various projects have successfully utilized polyurethane flooring, showcasing its adaptability. These range from simple residential applications to complex industrial setups. Examples include a modern kitchen remodel using a high-gloss polyurethane, a garage conversion with a robust, slip-resistant polyurethane, and a commercial gym featuring a vibrant, impact-resistant polyurethane floor.
Types of Projects Using Polyurethane Flooring
Polyurethane flooring finds application in diverse environments. Its exceptional durability and customizable properties make it suitable for a wide range of projects.
- Residential Projects: From kitchens and bathrooms to living rooms and bedrooms, polyurethane offers a durable and attractive flooring solution. Its aesthetic appeal and resistance to moisture make it an ideal choice for high-traffic areas within homes.
- Commercial Projects: High-traffic areas like retail stores, restaurants, and offices benefit from polyurethane’s ability to withstand heavy use and resist stains. Its resilience makes it suitable for demanding environments.
- Industrial Projects: Warehouses, factories, and manufacturing facilities frequently employ polyurethane flooring for its exceptional durability, resistance to chemicals, and ability to withstand heavy machinery and equipment.
- Healthcare Facilities: Hospitals and clinics often select polyurethane flooring due to its ease of cleaning, resistance to pathogens, and non-slip properties. This is critical for maintaining a sanitary environment.
Detailed Case Study: A High-Traffic Retail Store
A prominent retail store, experiencing significant wear and tear in its main sales floor, opted for a polyurethane flooring solution. The store’s existing linoleum flooring was unable to withstand the high volume of customers and product movement. The polyurethane floor, chosen for its high-impact resistance and scratch-resistance, was installed in a seamless, epoxy-based system. The installation process was meticulously planned to minimize disruption to business operations.
Post-installation, the store experienced a substantial reduction in maintenance costs and an increase in customer satisfaction. The seamless surface also made cleaning significantly easier.
Cost Comparison of Polyurethane Flooring Types
The cost of polyurethane flooring can vary depending on the specific type, finish, and application requirements. A table below illustrates the approximate cost differences:
| Type of Polyurethane | Approximate Cost per Square Foot ($) | Notes |
|---|---|---|
| Standard Polyurethane | $5-$10 | Basic, suitable for residential use. |
| High-Gloss Polyurethane | $8-$15 | Enhanced aesthetic appeal, suitable for high-traffic areas. |
| Epoxy-Based Polyurethane | $10-$20 | Superior durability, chemical resistance, and high-impact resistance. Ideal for industrial and commercial applications. |
| Custom Polyurethane | Variable | Tailored to specific needs and specifications. |
Design Considerations for Different Rooms
The design considerations for applying polyurethane in various rooms are crucial for achieving a visually appealing and functional outcome. These considerations vary depending on the room’s intended use and aesthetic preferences.
- Kitchens: Consider a slip-resistant polyurethane in high-traffic areas, like near the sink and stove. A durable, easy-to-clean finish is essential for this high-moisture area.
- Bathrooms: A moisture-resistant and non-slip polyurethane is critical to prevent accidents. The choice of color and pattern can create a visually appealing space.
- Living Rooms: A polyurethane floor can add a touch of elegance and sophistication. Consider the color and sheen to complement the room’s overall design.
- Commercial Spaces: Prioritize durability, slip resistance, and ease of cleaning in commercial spaces. Consider the specific needs of the environment, like chemical resistance in a lab setting.
Summary

In conclusion, applying polyurethane for floors is a multi-step process requiring careful planning and execution. This guide provided a comprehensive overview, from initial preparation to finishing touches, and emphasized the importance of safety precautions throughout the entire procedure. Understanding the different types of polyurethane, their properties, and the specific needs of your project is crucial for success. By following the detailed steps and safety guidelines, you can confidently achieve a beautiful and durable polyurethane floor.