


Growing and caring for cherry tomatoes is a rewarding experience, leading to delicious, vibrant fruits. This guide dives deep into the process, from selecting the perfect varieties to harvesting and storing your bountiful crop. We’ll explore everything from seed starting to pest control, ensuring a successful and enjoyable journey.
Choosing the right cherry tomato variety is crucial. Consider factors like taste, size, and growth habit. Some varieties thrive in full sun, while others prefer partial shade. Understanding these differences will significantly impact your success. This guide includes a table comparing five popular types, highlighting key characteristics.
Choosing Cherry Tomato Varieties: Growing And Caring For Cherry Tomatoes
Picking the right cherry tomato variety is crucial for a successful harvest. Different types offer varying characteristics in taste, size, and growth habits. Understanding these differences allows you to select tomatoes that best suit your garden’s conditions and your personal preferences. This selection process ensures a bountiful and satisfying harvest, from the first juicy bite to the last.
Popular Cherry Tomato Varieties
A wide array of cherry tomato varieties exists, each with its own unique qualities. Knowing these qualities can significantly impact your garden’s success. Some popular choices include:
- Sungold: Known for its bright orange color and sweet flavor. These tomatoes are generally a popular choice for home gardeners. The small size makes them a great choice for salads or snacks.
- Sweet 100: A prolific producer, Sweet 100 cherry tomatoes boast a sweet and juicy flavor. They come in a classic red color and are a good option for those seeking high yields.
- Brandywine: While not strictly a cherry tomato, the Brandywine offers a large, juicy fruit that has a unique, rich flavor, often described as complex and sweet. This variety, while larger than typical cherry tomatoes, can still be used in the same ways.
- Tumbling Tom: This variety is renowned for its compact growth habit, making it ideal for containers or smaller gardens. The tomatoes are typically a deep red color, with a satisfying flavor.
- Black Cherry: As the name suggests, these tomatoes are a deep, almost black, color. They boast a rich flavor, sometimes described as slightly smoky. Their unique color adds a visually appealing element to any garden or dish.
Comparing Varieties Based on Growing Conditions
The suitability of a variety depends significantly on the growing environment. Different varieties thrive under varying sun exposure and soil types.
- Sun Exposure: Some varieties, like Sweet 100, are more tolerant of partial shade, while others, like Sungold, may require full sun for optimal production. Consider the amount of sunlight your garden receives when making your selection. Too little sun might reduce the size and quantity of tomatoes.
- Soil Type: Well-drained soil is crucial for most cherry tomato varieties. Heavy clay soils can lead to waterlogging and root rot. Amend your soil with organic matter to improve drainage and fertility.
Heirloom vs. Hybrid Cherry Tomatoes
Heirloom and hybrid cherry tomato varieties differ in their genetic makeup and characteristics.
- Heirloom: These varieties are open-pollinated, meaning they retain their characteristics over generations. Heirloom tomatoes often have unique flavors and colors, but their yields might be lower compared to hybrids. They’re favored by many gardeners for their distinctive flavors and are more susceptible to environmental variations.
- Hybrid: These varieties are bred to combine desirable traits, often resulting in higher yields and greater disease resistance. Hybrid tomatoes tend to be more uniform in size and shape and more reliable in producing a yield. However, they might not maintain the same flavor or color characteristics across generations.
Comparison Table of Cherry Tomato Varieties
The table below summarizes five cherry tomato varieties, highlighting their key characteristics.
| Name | Description | Average Size (cm) | Ideal Climate | Expected Yield |
|---|---|---|---|---|
| Sungold | Sweet, bright orange cherry tomato | 2-3 | Warm, sunny climates | High |
| Sweet 100 | Sweet, classic red cherry tomato; high yield | 2-3 | Warm, sunny climates | Very High |
| Black Cherry | Deep, almost black cherry tomato; rich flavor | 2-3 | Warm, sunny climates | Medium |
| Tumbling Tom | Compact growth habit, ideal for containers | 2-3 | Warm, sunny climates | Medium |
| Brandywine | Large, juicy, complex flavor | 4-5 | Warm, sunny climates | Medium |
Sowing and Germination
Getting your cherry tomato plants started indoors is a rewarding experience. It allows you to get a head start on the growing season and gives you more control over the environment, leading to healthier, more productive plants. Starting seeds indoors also helps you select the best plants for your garden. This section details the process from seed to seedling.
Preparing the Seed Starting Mix
A well-draining seed starting mix is crucial for healthy germination and seedling development. The mix should be light, airy, and retain just enough moisture to support germination. Avoid using garden soil directly, as it often compacts and can harbor diseases.
- Components: A good seed starting mix typically combines peat moss, vermiculite, perlite, and sometimes coco coir. These components provide excellent aeration and drainage while retaining moisture. A simple blend of equal parts peat moss and perlite works well.
- Mixing: Thoroughly mix the components until they are evenly distributed. Avoid clumps of peat moss or other components, as these can affect drainage.
- Sterilization (Optional but Recommended): Sterilizing the mix helps prevent fungal diseases. You can do this by heating the mix in a low oven for 30 minutes or by using a seed starting mix that has been sterilized.
Ideal Temperature and Light Conditions for Germination
Cherry tomato seeds germinate best in warm, consistently moist conditions. A temperature range of 70-75°F (21-24°C) is ideal. Light is also essential for germination, though direct sunlight can damage the seedlings.
- Temperature: Maintaining a consistent temperature is key. Use a heating mat if needed to ensure the soil temperature remains optimal.
- Light: Provide a source of light once seedlings emerge. A grow light, positioned about 6-8 inches from the seedlings, is sufficient. Avoid direct sunlight, as it can scorch the delicate seedlings. Consider a grow light with adjustable height, which will help as the plants grow.
Maintaining Consistent Moisture During Germination
Keeping the seed starting mix consistently moist is critical for successful germination. Overwatering or underwatering can hinder the process. Use a spray bottle or a mister to gently water the mix to prevent disturbing the seeds.
- Watering Method: Use a spray bottle to gently water the mix. This prevents dislodging the seeds and maintains consistent moisture throughout the mix. Avoid using a watering can or pouring water directly on the seeds, as this can wash them away.
- Monitoring Moisture: Regularly check the moisture level of the mix. If the mix feels dry to the touch, it’s time to water. Avoid letting the mix dry out completely.
Starting Seeds in Individual Containers: A Step-by-Step Procedure
Starting cherry tomato seeds in individual containers ensures that each seedling has its own space to grow. This prevents overcrowding and promotes healthy root development.
My cherry tomatoes are thriving! I’ve been meticulously tending to them, ensuring plenty of sunlight and regular watering. Learning how to wash delicate fabrics like wool is also important; knowing how to wash a wool coat at home here is a helpful skill for any gardener who wants to protect their outdoor gear. Now back to the tomatoes – I’m hoping for a bumper crop this season!
- Prepare the Containers: Use small, individual pots or seed starting trays. Ensure the pots have drainage holes to prevent waterlogging.
- Fill the Containers: Fill each container with the prepared seed starting mix. Don’t overfill; leave about a half-inch of space at the top.

- Sow the Seeds: Gently place one or two seeds into each container, ensuring the seeds are not packed too tightly. A good rule of thumb is to space seeds 1/2 inch apart.

- Cover the Seeds: Lightly cover the seeds with a thin layer of seed starting mix, about 1/4 inch deep.

- Water Gently: Use a spray bottle to gently water the seeds, ensuring that the soil is consistently moist but not waterlogged.

- Place in a Warm Location: Place the containers in a warm, well-lit location, such as a sunny windowsill or under a grow light.

- Monitor Germination: Keep a close eye on the seeds. They should germinate within 7-14 days. If there’s no sign of germination after two weeks, it might be a sign that the conditions aren’t optimal.
Planting Outdoors
Getting your cherry tomato seedlings ready for their permanent outdoor home is an exciting step. Proper transplanting is crucial for healthy growth and bountiful harvests. Choosing the right time, location, and planting method will determine the success of your tomato plants.Transplanting seedlings outdoors requires careful consideration of environmental conditions and soil preparation. The goal is to create an environment that allows the seedlings to quickly adapt and thrive in their new location.
Optimal Transplanting Time
The best time to transplant cherry tomato seedlings outdoors is after the last expected frost has passed. This ensures the plants are not exposed to freezing temperatures, which can damage or kill them. Local weather patterns and frost dates vary, so consulting your local agricultural extension office or a reliable gardening resource is recommended. For example, in zones with a late spring frost, transplanting may need to wait until mid-May.
This crucial timing allows the plants to establish themselves before the heat of summer arrives.
Ideal Spacing and Sunny Location
Optimal growth of cherry tomato plants requires adequate space for their roots to spread and for sunlight to reach all parts of the plant. Spacing between plants should be sufficient to allow for air circulation and reduce the risk of diseases. The ideal spacing for cherry tomatoes is typically 18-24 inches apart, depending on the variety. This allows for good air circulation, which helps prevent fungal diseases.
Enjoying the sweet taste of homegrown cherry tomatoes is rewarding. Proper sunlight and consistent watering are key to success, but did you know that some of the most beautiful trees in your garden, like the twelve species cultivars of birch trees here , can also provide shade and support for your tomato plants? Just remember to keep those cherry tomatoes well-fed for the best flavor and yield.
A sunny location is essential for cherry tomatoes to thrive. A minimum of 6-8 hours of direct sunlight per day is recommended. A south-facing location is often ideal in the northern hemisphere, as it receives the most direct sunlight.
Soil Preparation
Preparing the soil before planting is crucial for healthy root development and overall plant health. Well-drained soil is essential for cherry tomatoes. Adding organic matter like compost or aged manure to the soil can significantly improve its structure and drainage. This also increases the soil’s ability to retain moisture, which is vital for the plants’ growth. The addition of organic matter enhances the soil’s water-holding capacity and nutrient content.
For example, adding a layer of well-rotted compost to the soil before planting can greatly improve its quality.
Planting Guidelines
| Method | Steps | Advantages | Disadvantages |
|---|---|---|---|
| Direct Sowing | Sow seeds directly into the prepared soil. | Avoids the need for transplanting, potentially saving time and effort. | Can be challenging to manage seedlings in a large area, especially if the weather is unpredictable. |
| Transplanting Seedlings | Carefully remove seedlings from their containers, plant them in prepared soil, and water thoroughly. | Provides better control over the growth and development of plants. | Requires more effort in handling the seedlings and transplanting them. |
| Starting in Pots and Transplanting | Start seedlings in pots or containers, then transplant to the garden once they are established. | Allows for starting seedlings earlier, and enables you to adjust the plants to a new location gradually. | Potted seedlings may be more sensitive to transplanting shock, and can be more costly to prepare compared to direct sowing. |
Watering and Fertilizing

Keeping your cherry tomatoes happy and productive requires consistent attention to watering and fertilization. Proper hydration and nutrient supply are crucial for healthy growth and bountiful harvests. Ignoring these essential elements can lead to stunted plants, reduced fruit production, and overall weaker plants. Understanding the specific needs of your cherry tomato plants at different stages of growth is key to achieving optimal results.Cherry tomatoes thrive in consistently moist soil, but overwatering can be just as detrimental as underwatering.
Fertilizers provide the essential nutrients that cherry tomato plants need to flourish, but the right type and amount are critical to avoid nutrient burn. Choosing the right fertilizer and adjusting its application based on the plant’s stage of growth will significantly impact the yield.
Watering Frequency and Amount
Consistent moisture is vital for cherry tomato plants. They require consistent watering, but not waterlogging. The frequency and amount of water depend on various factors, including the climate, soil type, and pot size. Heavily potted cherry tomatoes will need more frequent watering than those in the ground. Regularly checking the moisture level of the soil is the best way to determine the appropriate watering schedule.
Stick your finger into the soil a few inches deep; if it feels dry, it’s time to water.
Growing cherry tomatoes is a rewarding hobby, but a cluttered kitchen can quickly derail your efforts. To maximize your success, you need a well-organized space, and mastering how to keep kitchen decluttered is key. Keeping your tools and supplies readily available makes watering and tending your little plants so much easier. Proper organization is essential for a happy harvest, so get started today!
Importance of Consistent Moisture Levels
Maintaining consistent soil moisture is crucial for optimal growth. Fluctuations in moisture levels can stress the plants, hindering their ability to absorb nutrients and impacting their overall health. This can lead to uneven growth and potentially lower yields. By ensuring consistent soil moisture, you promote a healthy root system, which is essential for nutrient uptake and overall plant vigor.
A well-hydrated plant is more resilient to pests and diseases.
Role of Fertilizers in Growth and Fruit Production
Fertilizers supply the essential nutrients that cherry tomatoes need to grow strong and produce abundant fruit. Different fertilizers contain varying ratios of nitrogen, phosphorus, and potassium, each playing a specific role in the plant’s development. Nitrogen promotes leaf growth, phosphorus aids in root development and fruit production, and potassium enhances overall plant health. Choosing the right fertilizer can significantly impact the yield and quality of your cherry tomatoes.
Different Types of Fertilizers for Cherry Tomatoes
Several types of fertilizers are suitable for cherry tomatoes, each with its own benefits and drawbacks. Organic fertilizers, such as compost and manure, are excellent choices for their slow-release nutrients and positive impact on soil health. However, they might not provide the immediate nutrient boost needed for fast-growing varieties. Commercial fertilizers are often formulated with precise nutrient ratios, making them easy to apply and adjust according to the plant’s needs.
For example, balanced fertilizers provide an equal ratio of nitrogen, phosphorus, and potassium. A high-phosphorus fertilizer can be beneficial during the fruiting stage to encourage larger and more abundant tomatoes.
Summary of Water and Fertilizer Requirements, Growing and caring for cherry tomatoes
| Stage | Water Frequency | Fertilizer Type | Amount |
|---|---|---|---|
| Seedling | Daily, as needed, checking soil moisture | Diluted liquid fertilizer (1/4 strength) | 1 teaspoon per gallon of water |
| Vegetative Growth | Every 2-3 days, depending on climate | Balanced liquid fertilizer | 1/2 teaspoon per gallon of water |
| Fruiting | Every 2-4 days, depending on climate | High-phosphorus liquid fertilizer | 1 teaspoon per gallon of water |
Supporting and Training
Cherry tomatoes, with their delicate stems and sprawling growth habits, often require support to thrive. Proper support prevents the plants from collapsing under their own weight, increasing airflow, and allowing for better sunlight penetration, ultimately leading to increased yields and healthier fruit. This crucial aspect of cultivation deserves careful consideration to maximize your harvest.
The Necessity of Support Structures
Cherry tomato plants, especially determinate varieties that tend to grow bushier, need support to prevent their stems from breaking under the weight of the developing fruit. This support also helps improve air circulation around the plants, reducing the risk of fungal diseases. Proper support allows for easier access to the plants for harvesting and maintenance tasks. Without adequate support, the plants can become tangled and difficult to manage, potentially hindering their overall health and productivity.
Different Support Methods
Various methods are available for supporting cherry tomato plants. Each method has its own advantages and disadvantages, making careful consideration of the specific needs of your plants and growing environment essential.
- Cages: Cages provide a structured enclosure for the plants, guiding their growth and offering protection against wind damage. They are particularly well-suited for determinate varieties due to their controlled growth pattern. The height and width of the cage should be chosen to match the expected size of the plant. Cages are relatively inexpensive and readily available at most garden centers.
- Stakes: Stakes are simple, affordable supports ideal for individual plants or small groups. A sturdy stake provides a point of attachment for the plant’s stem, allowing for vertical growth and preventing sprawling. Multiple stakes can be used for larger plants or those growing in clusters. The height of the stake should be sufficient to support the plant’s expected height.
- Trellises: Trellises offer a more elaborate support system, especially beneficial for larger plants and those that are prone to extensive growth. Trellises allow for better air circulation and sunlight penetration, promoting healthier plant growth and potentially higher yields. The design and materials of the trellis should align with the plant’s growth characteristics. More complex designs can be created using various materials, from simple wood frames to elaborate metal structures.
Comparison of Support Systems
The effectiveness of each support system depends on factors such as the size of the plants, the growing environment, and the specific variety. Cages are suitable for contained spaces and generally offer good protection, while stakes are a simpler, cost-effective option. Trellises, while potentially more expensive and complex to install, are ideal for larger plants or those requiring significant support.
| System | Materials | Pros | Cons | Cost |
|---|---|---|---|---|
| Cages | Metal, plastic | Easy to install, protects from wind, good for determinate varieties | May restrict airflow if too dense, may not suit indeterminate varieties | Medium |
| Stakes | Wood, metal | Simple, inexpensive, good for individual plants | Requires more frequent tying, may not support large plants | Low |
| Trellises | Wood, metal, PVC | Supports larger plants, maximizes space, promotes airflow | More complex to install, potentially higher cost | High |
Training Techniques for Maximum Yield
Proper training techniques are essential for maximizing the yield of cherry tomato plants. Consistent tying of the plant’s stems to the support structure is crucial for guiding growth and preventing sprawling. Regular pruning of suckers and lateral growth helps direct energy towards fruit production, reducing competition and promoting higher yields. The technique and frequency of training will depend on the variety and growth habit of the plant.
Pest and Disease Management
Keeping your cherry tomato plants healthy requires vigilance against pests and diseases. Early detection and proactive management are crucial for preventing significant damage and ensuring a bountiful harvest. Addressing these issues promptly will minimize the impact on your plants’ overall health and productivity.
Common Pests
Understanding the common pests that target cherry tomatoes allows for more effective preventative measures. Identifying the specific pest helps tailor your approach for optimal results.
- Aphids: These tiny insects feed on plant sap, causing stunted growth and deformed leaves. They often appear in clusters on new growth and stems. Overcrowding can lead to rapid population increases.
- Spider mites: These microscopic pests create a fine webbing on the leaves, particularly on the undersides. They suck plant juices, causing yellowing and stippling on the leaves. Dry conditions often exacerbate spider mite infestations.
- Tomato hornworms: These large caterpillars feed voraciously on the leaves, stems, and fruit. Their distinctive horn-shaped protuberance is a tell-tale sign. They can quickly defoliate plants if not controlled.
- Whiteflies: These tiny insects feed on the underside of leaves, causing yellowing and stippling. They can also transmit diseases. Their presence is often marked by a white, powdery substance on the leaves.
Preventative Measures and Control Strategies
Implementing preventative measures can significantly reduce the likelihood of pest infestations. These strategies include creating an environment less favorable for pests.
- Cultural Practices: Proper plant spacing allows for better air circulation, reducing humidity, a breeding ground for many pests. Regularly removing weeds minimizes hiding places for pests. Companion planting with certain herbs or flowers can deter some pests.
- Physical Control: Handpicking pests, especially small ones like aphids, can be an effective method. Use a strong stream of water to dislodge pests from leaves and stems. Yellow sticky traps can catch flying insects like whiteflies.
- Biological Control: Introduce beneficial insects, like ladybugs, which prey on aphids and other pests. Encourage natural predators through appropriate companion planting. Avoid harsh chemical treatments whenever possible.
- Chemical Control (Last Resort): If pest infestations become severe, consider using insecticidal soaps or neem oil as a targeted approach. Follow product instructions carefully and use them as a last resort to avoid harming beneficial insects.
Common Diseases
Recognizing common diseases is crucial for effective management. Different diseases manifest in unique ways on the plants.
- Early blight: This fungal disease appears as dark, irregular spots on leaves, stems, and fruit. It often spreads quickly in humid conditions.
- Late blight: Another fungal disease characterized by a distinctive pattern of water-soaked lesions on leaves, stems, and fruit. It is often associated with cool, wet conditions.
- Fusarium wilt: This soil-borne fungal disease blocks the vascular system of the plant, causing wilting and yellowing. It can persist in the soil for extended periods.
- Septoria leaf spot: This fungal disease causes small, circular spots on the leaves, often with a reddish-brown border. The spots can grow together, causing significant leaf loss.
Disease Management Strategies
Implementing appropriate strategies can prevent or limit the impact of diseases. These strategies often focus on creating a healthy plant environment.
- Sanitation: Remove and destroy infected plant debris promptly. This helps prevent the spread of fungal pathogens.
- Proper Spacing: Ensuring adequate spacing promotes better air circulation, reducing humidity, which is often crucial in preventing fungal diseases.
- Resistant Varieties: Select cherry tomato varieties known for their resistance to common diseases. This is a key preventative measure.
- Crop Rotation: Rotating your crops helps break the cycle of soil-borne diseases. This is a long-term approach to disease prevention.
Summary Table
| Pest/Disease | Description | Prevention | Treatment |
|---|---|---|---|
| Aphids | Small insects sucking plant sap | Proper spacing, companion planting, handpicking | Insecticidal soap, neem oil |
| Spider mites | Microscopic pests creating webbing | Maintain adequate moisture, introduce beneficial insects | Insecticidal soap, neem oil |
| Early blight | Fungal spots on leaves, stems, fruit | Sanitation, resistant varieties, good air circulation | Fungicides (as a last resort) |
| Late blight | Water-soaked lesions on leaves, stems, fruit | Sanitation, crop rotation, resistant varieties | Fungicides (as a last resort) |
Harvesting and Storage

Picking your ripe cherry tomatoes is a rewarding part of the gardening journey. Knowing when and how to harvest them directly impacts their taste and shelf life. Proper storage methods will ensure you can enjoy these sweet treats for longer.
Signs of Ripeness
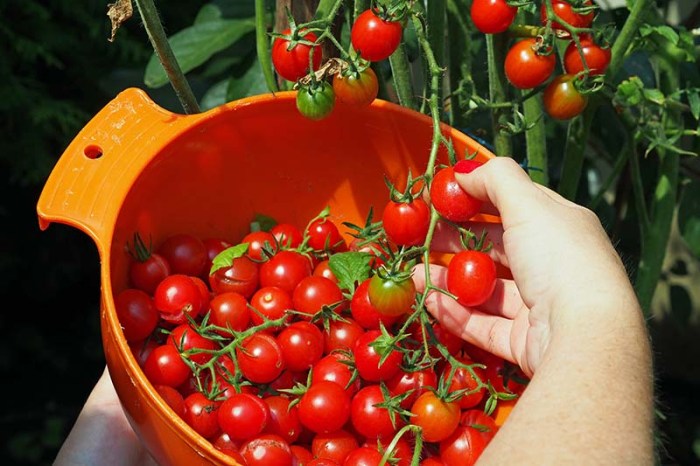
Cherry tomatoes exhibit distinct signs of ripeness, which are key indicators for optimal flavour and quality. The color of the tomato is a primary sign. Fully ripe cherry tomatoes typically display a deep, vibrant red hue, though some varieties might show other colours like yellow, orange, or pink. Furthermore, the firmness of the tomato is important. A firm, yet slightly yielding, tomato is ready for picking.
Avoid tomatoes that feel soft, mushy, or have any blemishes. A gentle squeeze should provide a satisfying but not overly firm resistance.
Harvesting Technique
Harvesting cherry tomatoes requires a gentle touch to prevent damage. Use a clean, sharp pair of pruning shears or scissors to cut the stems, ensuring not to bruise the tomatoes. Avoid pulling the tomatoes from the vine, as this can damage the plant and the fruit. Harvesting in the morning when the tomatoes are firm and the plant is fully hydrated is recommended.
This minimizes the risk of bruising and allows the fruit to ripen further on the vine if left a few more days.
Extending Shelf Life
Several methods can help extend the shelf life of harvested cherry tomatoes. Proper handling and storage conditions are paramount to maintaining quality and flavour. Picking tomatoes at the optimal stage of ripeness is critical. Overly ripe tomatoes will spoil faster. A quick and simple method is to store them in a cool, dry, and well-ventilated area.
Using the appropriate storage method will ensure your tomatoes maintain their flavour and freshness.
Storage Methods
- Refrigeration: Refrigeration is a common and effective method for storing cherry tomatoes. Place the tomatoes in a single layer on a perforated container or a breathable produce bag in the crisper drawer of your refrigerator. This allows for air circulation, preventing moisture build-up, which is crucial for preventing spoilage. This method will extend the shelf life of your tomatoes to 7-10 days, maintaining their quality and preventing decay.
Maintaining a temperature between 32°F and 40°F is ideal.
- Airtight Container: For a shorter-term storage solution, an airtight container can work. Ensure the container has proper ventilation to prevent moisture buildup, as this can accelerate spoilage. Airtight containers help keep the tomatoes from drying out. This method is ideal for keeping tomatoes fresh for up to 3-5 days.
- Paper Towel Storage: To extend the life of tomatoes in the fridge, wrap them in paper towels to absorb any excess moisture. This prevents the growth of mold and bacteria, which can lead to faster spoilage. This method is effective for keeping tomatoes fresh for 4-6 days in the refrigerator.
Storage Table
| Storage Method | Duration (Days) | Temperature (°F) | Tips |
|---|---|---|---|
| Refrigeration (crisper drawer) | 7-10 | 32-40 | Store in a single layer, use breathable produce bags or perforated containers. |
| Airtight Container (ventilated) | 3-5 | Room Temperature (60-70) | Ensure good ventilation to prevent moisture build-up. |
| Paper Towel Storage (in fridge) | 4-6 | 32-40 | Wrap individual tomatoes in paper towels to absorb moisture. |
Troubleshooting Common Issues
Nurturing your cherry tomato plants to vibrant health requires vigilance and understanding. Common problems can arise, but with the right knowledge and actions, you can quickly identify and address issues, preventing further damage and ensuring a bountiful harvest. Identifying the root causes of these problems is key to successful resolution.Troubleshooting common issues in your cherry tomato plants is crucial for maintaining their health and productivity.
Early detection and prompt action are essential for preventing widespread problems. Understanding the causes and solutions for various issues allows you to tailor your care to the specific needs of your plants, maximizing their potential.
Yellowing Leaves
Yellowing leaves can indicate several issues, ranging from nutrient deficiencies to environmental stresses. A comprehensive approach to identifying the cause and implementing appropriate solutions is crucial for successful recovery.
- Nutrient deficiency: Lack of essential nutrients like nitrogen, potassium, or magnesium can lead to yellowing leaves. A balanced fertilizer application can often rectify this issue.
- Overwatering or underwatering: Excessive or insufficient watering can disrupt nutrient uptake, causing yellowing. Monitoring soil moisture is essential to maintain the ideal balance.
- Environmental stress: Extreme temperatures, pests, or diseases can also contribute to yellowing leaves. Protecting plants from harsh conditions and addressing potential infestations or infections is important for recovery.
Blossom End Rot
Blossom end rot, a common problem in cherry tomatoes, manifests as a dark, sunken area at the blossom end of the fruit. Understanding the causes and implementing preventative measures is essential for mitigating this issue.
- Calcium deficiency: Calcium is crucial for strong cell walls. Inadequate calcium in the soil, especially during periods of rapid growth or fluctuations in moisture, can result in blossom end rot.
- Watering issues: Water stress, particularly sudden fluctuations in soil moisture, can disrupt calcium uptake and contribute to the development of blossom end rot.
- Nutrient imbalances: Nutrient imbalances, especially high nitrogen levels, can also lead to this issue. Maintaining a balanced nutrient profile is crucial.
Other Common Problems and Solutions
| Problem | Cause | Solution | Prevention |
|---|---|---|---|
| Leaf Spots | Fungal infections or bacteria | Remove affected leaves. Improve air circulation around plants. Use fungicides (if necessary). | Maintain adequate spacing between plants. Avoid overhead watering. |
| Fruit Cracking | Rapid growth, water stress, or sunscald | Gradually increase watering. Provide shade during intense sunlight. | Consistent watering schedule. Proper staking and support for plants. |
| Poor Growth | Nutrient deficiency, pests, diseases, or inadequate sunlight | Apply balanced fertilizer. Inspect for pests. Treat with appropriate pesticides or insecticides. Ensure sufficient sunlight exposure. | Regular monitoring. Proper fertilization. Appropriate spacing between plants. |
Proper plant care, including consistent watering, balanced fertilization, and pest and disease management, is essential to avoid these issues. Maintaining a healthy and supportive environment for your cherry tomato plants will significantly reduce the likelihood of encountering problems.
Closing Summary
From selecting the ideal variety to mastering harvesting techniques, this comprehensive guide provides a roadmap to success in growing your own cherry tomatoes. By understanding the nuances of sowing, planting, watering, and pest control, you’ll be well-equipped to cultivate a thriving crop. Remember, consistent care throughout the growing season is key to maximizing your yield and enjoying delicious homegrown tomatoes.
Enjoy the process and the delicious results!