


Fixing eyesores in home is crucial for creating a harmonious and aesthetically pleasing living space. This guide dives deep into identifying, assessing, and resolving those nagging imperfections that detract from your home’s overall appeal. We’ll explore a variety of solutions, from budget-friendly fixes to more substantial renovations, ensuring you’re well-equipped to tackle any home improvement project.
We’ll cover everything from visual inspection and homeowner feedback to creating a budget for repairs. Expect detailed breakdowns of common eyesores in each room, including their visual and functional issues, along with cost and time estimates for solutions. This isn’t just about aesthetics; it’s about optimizing your living space for comfort and function.
Identifying Eyesores
Home improvement often hinges on identifying and addressing those visual and functional flaws that diminish the overall appeal and livability of a space. These “eyesores,” though sometimes subtle, can significantly impact a home’s aesthetic and practicality. This exploration delves into common eyesores, their impact, and actionable solutions.Identifying these issues is crucial, as neglecting them can lead to accumulating problems, impacting both the value and comfort of your home.
Addressing these issues proactively is often more economical and less disruptive than dealing with them later.
Common Eyesores by Room
Understanding the types of eyesores prevalent in different rooms helps prioritize improvements and tailor solutions. The following table provides a comprehensive overview of common eyesores across various home areas, detailing their visual and functional drawbacks, and potential remedies.
| Room | Eyesore Type | Visual Issue | Functional Issue | Potential Solutions |
|---|---|---|---|---|
| Kitchen | Outdated Appliances | Dated appearance, mismatched colors, and potentially poor energy efficiency. | Reduced efficiency, potentially higher energy bills, and limited functionality. | Replacing appliances with newer models, or updating the cabinetry or countertops. |
| Kitchen | Cluttered Counters | Visual clutter, lack of organization, and a feeling of chaos. | Limited workspace, difficulty finding items, and increased risk of accidents. | Installing storage solutions, implementing organizational systems, and regularly decluttering. |
| Bathroom | Mold and Mildew | Unsightly discoloration, unpleasant odors, and potential health concerns. | Compromised hygiene, potential for health issues, and reduced appeal. | Cleaning and sealing affected areas, addressing moisture issues, and implementing proper ventilation. |
| Bathroom | Outdated Fixtures | Dated appearance, potentially low water efficiency, and limited functionality. | Potential for leaks, poor water pressure, and decreased comfort. | Replacing showerheads, faucets, or toilets with more modern fixtures. |
| Living Room | Damaged or Worn Furniture | Visual imperfections, such as scratches, tears, or stains. | Reduced comfort, potential safety concerns, and decreased aesthetic appeal. | Repairing or replacing damaged furniture, reupholstering, or using decorative coverings. |
| Living Room | Poor Lighting | Dark or uneven lighting, making the room feel cramped or uninviting. | Difficulty seeing tasks, potential safety concerns, and decreased ambiance. | Installing new light fixtures, strategically placing lamps, or adjusting window coverings. |
Cost and Time Estimates for Fixing Eyesores
Determining the cost and time associated with fixing eyesores helps homeowners create realistic budgets and timelines. A general guideline for estimates is provided below. Remember, these are just approximations and actual costs may vary significantly depending on the specific project.
| Eyesore Type | Approximate Cost (USD) | Approximate Time (Days) |
|---|---|---|
| Replacing outdated kitchen appliances | $500 – $2,000+ | 2 – 5 |
| Installing new bathroom fixtures | $200 – $1,500+ | 1 – 3 |
| Repainting a room | $100 – $500+ | 1 – 2 |
| Repairing or replacing damaged furniture | $50 – $500+ | 1 – 7 |
Assessing the Scope of the Problem
Identifying eyesores is only the first step. Next, we need to understandwhy* these issues exist and how significant they are. A thorough assessment of the problem’s scope allows for a more effective and targeted approach to fixing them, maximizing the return on investment and ensuring long-term satisfaction.A comprehensive understanding of the factors contributing to eyesores in a home allows for proactive strategies to prevent future problems.
This proactive approach will also minimize the likelihood of recurring issues. This includes considering the interplay of factors like maintenance history, aesthetic preferences, and the impact of environmental elements.
Factors Contributing to Eyesores
Factors contributing to eyesores in a home can stem from various sources. Poor maintenance, such as neglected landscaping, damaged siding, or clogged gutters, often creates eyesores. Outdated or incompatible design elements can also contribute. Examples include mismatched paint colors, outdated appliances, or improperly placed furniture. Finally, the accumulation of clutter and lack of organization can create a sense of visual disorder, diminishing the overall aesthetic appeal of a space.
Approaches to Identifying Eyesores
Multiple approaches can be used to identify eyesores. Visual inspection, a crucial step, involves a thorough walkthrough of the home, noting areas that detract from the overall appearance. Homeowner feedback is also vital. Asking for the homeowner’s opinion on what they perceive as eyesores provides insight into personal preferences and areas that need immediate attention. This approach acknowledges that personal aesthetics play a significant role.
Prioritizing Eyesores
Prioritizing eyesores is crucial for efficient and effective home improvement projects. Severity, cost, and impact on daily living are essential factors to consider when prioritizing fixes. For instance, a leaky roof, causing significant water damage, should take precedence over a chipped paint job, which could be addressed later. Cost estimates should also be factored in. Fixing a damaged roof, even if it seems urgent, could involve significant financial outlay.
Fixing those pesky eyesores in your new home can be a game-changer, but it’s crucial to approach these projects with a bit of knowledge. Learning how to tackle these renovations effectively, especially as a first-time homeowner, is key. First time homeowner renovation lessons offer valuable insights into smart strategies for every project, from minor updates to major overhauls.
Ultimately, understanding these fundamentals will help you tackle those eyesores with confidence and avoid costly mistakes.
Budgeting for Multiple Eyesores
Creating a budget for fixing multiple eyesores requires careful consideration of materials, labor, and potential unforeseen costs. A detailed list of necessary materials, along with quotes from contractors, will help in establishing a realistic budget. For example, replacing a damaged roof will necessitate hiring a contractor and buying specialized materials. Unexpected issues during the repair process may arise.
Therefore, incorporating a contingency fund for unforeseen costs is recommended. This fund will help to mitigate the impact of any unexpected expenses. A 10-15% buffer is a common practice in home renovation. For instance, if the estimated cost is $10,000, allocating an additional $1,000 to $1,500 for unforeseen circumstances is prudent. A well-prepared budget will contribute to the successful completion of home improvement projects.
Choosing Solutions
Now that we’ve identified the eyesores and assessed their impact, it’s time to brainstorm solutions. This crucial step involves considering various approaches, from simple touch-ups to more extensive renovations. Finding the right balance between cost-effectiveness, aesthetics, and durability is key to a successful outcome. A well-considered plan will transform those unsightly features into assets.
Cost-Effective Solutions for Common Eyesores
Addressing eyesores doesn’t always require a significant investment. Many simple fixes can breathe new life into a space without breaking the bank. These solutions often involve readily available materials and straightforward techniques, making them ideal for homeowners looking to make improvements on a budget.
- Painting: A fresh coat of paint can dramatically alter the appearance of a room or exterior. Choosing the right color and finish is crucial. For example, a muted, neutral color can make a room feel larger, while a bold accent color can add personality. Materials needed include paint, brushes, rollers, drop cloths, and possibly primer depending on the existing surface.
- Replacing Hardware: Outdated doorknobs, hinges, or light fixtures can instantly make a room feel dated. Modernizing these elements can be surprisingly affordable and create a significant impact. Examples include updating kitchen cabinet knobs, replacing worn-out door handles, or installing energy-efficient LED light bulbs. Materials vary depending on the hardware type.
- Repairing Cracks and Holes: Small cracks in walls or ceilings, or holes from nails or screws, can be easily repaired with spackle, drywall compound, and paint. This solution is often effective for minor imperfections and can significantly improve the overall look of the area. Materials needed include spackle or drywall compound, sandpaper, putty knife, and paint.
Elaborating on Repair Methods
Understanding the pros and cons of different repair methods is vital for selecting the optimal solution. Consider factors like the extent of damage, the desired aesthetic outcome, and the time and resources available.
- Painting: Painting is a quick and relatively inexpensive way to refresh a room or exterior. Pros include affordability, speed, and wide range of colors and finishes. Cons include the need for proper preparation and potential for uneven results if not done carefully. Proper surface preparation and multiple coats are vital for a long-lasting finish.
- Hardware Replacement: Replacing hardware is a cost-effective way to update a space’s look. Pros include a noticeable visual upgrade, and often the replacement is more durable than the original. Cons include the need to match the existing style of the space, and the potential for compatibility issues with existing fixtures.
- Crack and Hole Repair: Repairing cracks and holes is a simple yet effective method to improve the appearance of walls and ceilings. Pros include affordability, ease of implementation, and the ability to address small imperfections quickly. Cons include the need for careful application to avoid visible patching, and the need for a durable finish to prevent future problems.
Materials Needed for Each Solution
The materials required for each solution will vary. A clear understanding of the materials is essential to execute the project effectively.
Tackling those unsightly bits around the house? Sometimes, the best way to spruce up your home is to get rid of unwanted plants. One common question when dealing with pesky weeds is whether bleach will do the trick. To find out if bleach is an effective weed killer, check out this helpful resource on does bleach kill weeds.
Once you’ve tackled the weeds, you’ll be well on your way to a more attractive and inviting home environment.
- Painting: Paint, brushes, rollers, drop cloths, primer (if necessary), and possibly a paint sprayer for larger surfaces.
- Hardware Replacement: New doorknobs, hinges, light fixtures, screws, and mounting hardware.
- Crack and Hole Repair: Spackle or drywall compound, putty knife, sandpaper, and paint.
Comparison of Solutions
The following table provides a comparative overview of the different solutions based on cost, time, and aesthetic appeal.
| Solution | Cost | Time | Aesthetic Appeal |
|---|---|---|---|
| Painting | Low to Medium | Low to Medium | High |
| Hardware Replacement | Low to Medium | Low | Medium to High |
| Crack and Hole Repair | Low | Low | Medium |
Implementing Solutions

Transforming eyesores into aesthetically pleasing spaces requires a methodical approach. This involves careful planning, the right tools, and adherence to safety protocols. Each step, from assessing the problem to executing the solution, is crucial for a successful outcome. Understanding the nuances of each repair task is essential for a job well done.Implementing solutions for home improvement requires a meticulous approach.
A clear understanding of the task, the selection of appropriate tools, and adherence to safety precautions are vital for a successful and safe project. Thorough preparation is paramount, ensuring a smooth execution and minimizing potential issues.
Fixing a Damaged Wall
Addressing a damaged wall involves a systematic process, from initial assessment to final cleanup. This process demands careful consideration of safety and the selection of the correct tools.
Safety Precautions
Prioritizing safety is paramount during any home repair project. Before starting any work, assess the area for potential hazards, such as exposed wires, loose tiles, or unstable structures. Ensure proper ventilation, especially when working with potentially harmful substances like paint or solvents. Always wear appropriate safety gear, including gloves, eye protection, and a dust mask, to safeguard yourself from potential injuries or health issues.
Use caution when handling power tools, adhering to manufacturer instructions for safe operation.
Choosing the Right Tools
Selecting the appropriate tools is essential for efficiency and accuracy. For repairing a damaged wall, consider the type of damage. Minor cracks might require a patching compound and putty knife, while larger holes or gaps necessitate drywall repair tools. A stud finder will aid in identifying structural supports, which is critical for ensuring the repair’s stability. The selection of tools should align with the scope of the repair to maximize efficiency and minimize waste.
Preparing the Area for Repairs
Thorough preparation is vital for a successful repair. This includes clearing the area of any obstructions and securing loose items. Covering surrounding surfaces with drop cloths or plastic sheeting will protect them from dust and debris. Properly masking off areas to be preserved from accidental damage is important. Identifying and securing any electrical components or pipes in the vicinity of the repair area is critical to ensure safety.
Step-by-Step Guide
- Assessment and Planning: Carefully evaluate the damage to the wall. Determine the extent of the damage and the necessary materials. Create a detailed plan outlining the steps involved in the repair.
- Safety First: Ensure the area is well-ventilated and that all necessary safety precautions are taken. Wear appropriate safety gear and use caution when handling tools.
- Preparing the Wall: Clean the affected area thoroughly to remove loose debris and dust. Repair any loose or damaged drywall sections using the appropriate patching compound.
- Applying the Patch: Apply the chosen patching compound to the damaged area. Smooth out the compound using a putty knife to create a seamless surface.
- Finishing Touches: Allow the compound to dry completely according to manufacturer instructions. Sand the area to create a smooth surface. If needed, prime and paint the area to match the existing wall.
- Cleanup: Clean up any remaining debris or dust. Dispose of waste materials responsibly. Ensure that the area is left in a tidy and safe condition.
Maintaining a Beautiful Home
Transforming your home from a collection of eyesores to a haven of beauty requires a proactive approach that goes beyond just fixing the obvious problems. It’s about cultivating a lifestyle that prioritizes upkeep and prevents future issues. This involves a comprehensive strategy that encompasses regular maintenance, careful planning, and a commitment to preserving the aesthetic appeal of your space.This section delves into preventative measures to avoid future eyesores, offering practical tips for regular maintenance and highlighting the long-term benefits of a clean and well-maintained home.
Fixing those unsightly stains on your favorite throw blankets can be tricky, but knowing how to wash blankets properly is key. For example, a dingy, stained blanket can really detract from the overall aesthetic of a room. Luckily, a thorough cleaning, like following the steps in this guide on how to wash blankets , can completely transform the look and feel of your space.
Once your blankets are sparkling clean, you’ll be well on your way to a more polished and inviting home, and those eyesores will be a thing of the past!
A proactive approach will ensure that your home remains beautiful and enjoyable for years to come.
Preventative Measures to Avoid Future Eyesores
Addressing potential problems before they arise is a cornerstone of maintaining a beautiful home. Proactive measures can often prevent small issues from escalating into major eyesores. This requires understanding the common causes of aesthetic problems and implementing strategies to mitigate them.
- Regular Inspections: Routine checks of your home’s exterior and interior can help identify potential issues early on. This includes checking for cracks in walls, peeling paint, loose or damaged fixtures, and signs of water damage. Early detection and addressing these issues can prevent larger, more costly problems in the future.
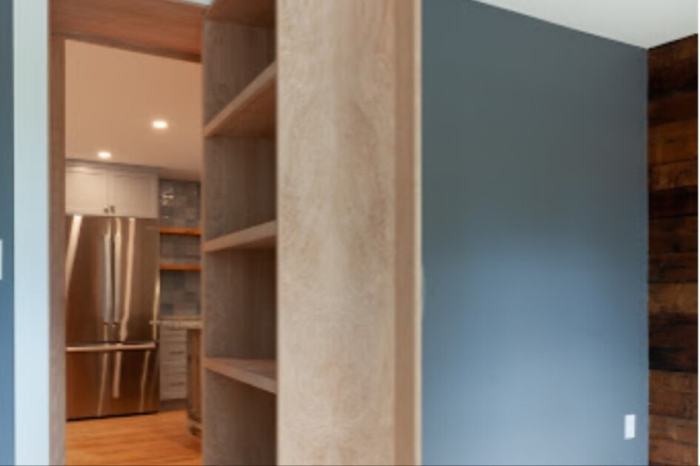
- Proper Storage Solutions: Organized storage minimizes clutter and prevents items from becoming eyesores. Implementing appropriate storage solutions for various items, such as shelves, cabinets, and drawers, keeps your home neat and tidy, creating a visually appealing environment.
- Addressing Water Damage Quickly: Prompt attention to water leaks or spills can prevent mold, mildew, and structural damage. Fixing these issues quickly is crucial for maintaining the integrity of your home and its aesthetic appeal.
- Maintaining Landscaping: Regular trimming, weeding, and pruning of plants and trees ensures a well-maintained landscape. Properly planned and maintained landscaping enhances the curb appeal of your home, improving the overall aesthetic.
- Preventing Pest Infestations: Maintaining cleanliness and sealing potential entry points prevents pests from entering your home. This helps maintain the interior and exterior beauty of your house.
Regular Maintenance to Prevent Recurring Eyesores
Implementing a consistent maintenance schedule is vital for preventing the recurrence of eyesores. A planned approach minimizes the need for major repairs and keeps your home looking its best.
- Regular Cleaning Schedule: A consistent cleaning schedule helps maintain cleanliness and prevent dust buildup, grime, and other issues. This includes daily dusting, weekly vacuuming/mopping, and monthly deep cleaning.
- Addressing Small Issues Promptly: Fixing minor problems like loose doorknobs, leaky faucets, or damaged screens immediately can prevent them from becoming significant eyesores. This proactive approach ensures a beautiful and functional home.
- Regular Painting: Regular painting of walls and trim, especially in high-traffic areas, can help maintain the aesthetic appeal of your home. Maintaining paint ensures a fresh and appealing look.
- Exterior Maintenance: Regular inspection and maintenance of your home’s exterior, such as gutters, siding, and roof, prevents damage and water issues. Proper exterior maintenance helps your home maintain its value and aesthetic appeal.
- Checking Appliances: Routine checks of appliances can help identify potential problems early on. Addressing issues like malfunctioning lights, faulty switches, or malfunctioning appliances prevent further damage and maintenance costs.
Benefits of Regular Cleaning and Upkeep
Regular cleaning and upkeep not only improve the aesthetic appeal of your home but also provide numerous benefits. A clean and well-maintained home can boost your mood, increase the value of your property, and enhance your overall quality of life.
- Increased Property Value: A well-maintained home often commands a higher price when sold or rented, demonstrating value and appealing to potential buyers or renters.
- Improved Mood and Well-being: A clean and organized space creates a more positive and peaceful environment, which in turn can boost your mood and overall well-being.
- Reduced Maintenance Costs: Addressing minor issues promptly can often prevent them from escalating into major repairs, reducing long-term maintenance costs.
- Enhanced Curb Appeal: Regular exterior maintenance, such as landscaping and gutter cleaning, enhances the curb appeal of your home, creating a welcoming and aesthetically pleasing environment.
- Prolonging the Lifespan of Fixtures and Appliances: Proper maintenance ensures that fixtures and appliances are functioning correctly, extending their lifespan and reducing the need for replacements.
Homeowners’ Checklist for Preventative Measures
This checklist provides a structured approach to maintaining a beautiful home. By implementing these steps, you can proactively address potential eyesores and maintain a visually appealing space.
| Task | Frequency | Description |
|---|---|---|
| Inspect Exterior (walls, fixtures, roof) | Monthly | Check for cracks, damage, water stains, or signs of deterioration. |
| Inspect Interior (walls, fixtures, appliances) | Monthly | Look for signs of wear and tear, water damage, or malfunctioning appliances. |
| Clean and Organize Storage Spaces | Weekly | Keep storage areas tidy and free of clutter. |
| Landscape Maintenance | Bi-weekly | Trim shrubs, mow lawn, remove weeds, and maintain plants. |
| Pest Control Measures | Monthly | Inspect for signs of pests and take preventative measures. |
Visualizing Solutions

Transforming an eyesore into a visually appealing space is a journey of creative problem-solving. It’s about understanding the current aesthetic flaws, identifying potential solutions, and meticulously planning the steps to achieve the desired transformation. This visualization phase is crucial; it allows you to mentally “see” the outcome before starting any physical work, minimizing surprises and maximizing the chances of a successful project.Careful planning and design are essential for any home improvement project.
This process allows for the creation of a cohesive vision, guiding every decision from material selection to color palettes, ensuring the final result aligns with your overall design goals and preferences.
Transforming a Dated Front Porch
A tired, outdated front porch can significantly impact a home’s curb appeal. The key to transforming it lies in understanding the specific elements that make it an eyesore and designing a solution that addresses these issues while complementing the existing architectural style.
- Assessing the Problem: Identify the specific elements that contribute to the porch’s dated appearance. Is it the worn paint, the mismatched furniture, the lack of lighting, or the overall design aesthetic? Careful observation and documentation are key to understanding the problem.
- Designing a Fresh Look: A new paint job in a modern, inviting color scheme (e.g., a warm gray, a soft blue-green, or a bold terracotta) can drastically improve the porch’s visual appeal. Consider replacing outdated railings with more contemporary designs using materials like wrought iron or composite materials for durability. Fresh landscaping with colorful flowers and shrubs can add vibrancy.
Strategic lighting, like outdoor sconces or string lights, can enhance the ambiance, making the space more inviting and functional.
- Visual Representation: Imagine a front porch with fresh, vibrant paint in a warm gray. The railings are updated with sleek, dark gray wrought iron. Potted flowering plants in terracotta pots create pops of color. String lights strung along the railing create a warm, inviting glow. This visual representation helps to anticipate the final result.
- Design Options:
Option Materials Colors Style Traditional Revival Wood, wrought iron, stone Warm neutrals, earth tones Classic, timeless Modern Minimalist Composite materials, concrete, glass Gray, white, black Clean lines, modern elements Coastal Farmhouse Painted wood, natural fibers, wicker Blues, whites, creams, natural wood tones Rustic, relaxed elegance
Budgeting and Cost Estimation
Planning for home repairs requires careful budgeting and cost estimation. A well-defined budget prevents surprises and ensures that the project stays within your financial limits. This process involves researching potential costs, comparing quotes, and creating a realistic plan for allocating funds. Thorough preparation is key to a successful and stress-free renovation.
Estimating Repair Costs
Accurately estimating costs is crucial for effective budgeting. This involves considering various factors, including material prices, labor rates, and potential unforeseen expenses. Researching current market rates for materials and labor in your area is essential for creating a realistic budget. For instance, comparing prices for different types of paint or flooring can significantly impact the overall project cost.
Furthermore, unexpected issues during the repair process, such as structural damage requiring additional work, can also affect the final cost. Therefore, having a contingency fund for unforeseen circumstances is essential.
Estimating Costs for Different Repairs, Fixing eyesores in home
A preliminary understanding of potential costs for different types of repairs can aid in budget planning. This table offers a general guideline; specific costs may vary based on location, materials, and labor rates.
| Type of Repair | Estimated Cost Range (USD) |
|---|---|
| Painting a room | $200 – $1000 |
| Replacing a leaky faucet | $100 – $500 |
| Repairing a cracked window | $150 – $800 |
| Installing new flooring | $500 – $5000+ |
| Replacing a roof | $5000 – $20000+ |
Getting Multiple Quotes
Seeking multiple quotes from different contractors or repair professionals is essential for informed decision-making. Comparing quotes allows you to identify fair pricing and potential value differences in services offered. Different contractors may use various materials, have varying labor rates, or offer different warranties. By obtaining multiple quotes, you gain a broader understanding of the market and ensure you are receiving the best possible value for your money.
Allocating Funds for Repair Projects
Allocating funds for different repair projects requires a strategic approach. A breakdown of the estimated costs for each repair can help prioritize projects. For example, if a leaky faucet is causing significant water damage, it might be a higher priority than painting a room. Consider creating a budget spreadsheet that Artikels each repair, its estimated cost, and the allocated funds.
This structured approach allows for a clear understanding of the financial commitment for each project. For instance, you might allocate 10% of your total repair budget for unexpected expenses. This approach ensures a contingency for potential additional costs or unforeseen issues.
Closing Summary: Fixing Eyesores In Home
In conclusion, tackling eyesores in your home is a rewarding journey. By understanding the various issues, assessing your needs, and implementing effective solutions, you can transform your home into a beautiful and functional space. From damaged walls to outdated fixtures, this comprehensive guide empowers you with the knowledge and tools to tackle any project, creating a home that you love and that reflects your unique style.