


Different ways to dry flowers opens up a world of creative possibilities for preserving nature’s beauty. From delicate roses to vibrant sunflowers, understanding the ideal methods for each type ensures stunning results. This comprehensive guide explores various techniques, from the classic air drying method to using a food dehydrator, providing detailed steps and insights to help you create beautiful, long-lasting floral displays.
This article delves into the art of flower preservation, offering practical advice and step-by-step instructions to help you master the craft of drying flowers. We’ll explore the best methods for different types of flowers, highlighting their unique drying needs and potential challenges.
Introduction to Flower Drying
Preserving the beauty of flowers for extended periods is a rewarding pursuit, and there are several methods to achieve this. From the delicate charm of a single rose to the vibrant hues of a bouquet, drying techniques offer a way to appreciate these fleeting moments. This exploration delves into the world of flower preservation, highlighting the essential steps and considerations involved in the process.The art of flower drying goes beyond simply preserving a flower’s form; it’s about capturing its essence and allowing it to be enjoyed long after its natural lifespan.
A crucial aspect of this endeavor is selecting flowers that are ideally suited for the drying process, as not all flowers respond equally well to various techniques. Knowing the best flowers for drying can significantly impact the success of your project.
Choosing the Right Flowers for Drying
The success of your dried flower project hinges on the selection of appropriate flowers. Consider the structure and texture of the flower, as well as its water content. Flowers with dense structures and fewer water-rich parts tend to dry better.
Types of Flowers Suitable for Drying
Certain flower types exhibit greater resilience and beauty when dried. Flowers with sturdy petals, such as roses and daisies, often thrive in the drying process. Conversely, delicate flowers like hydrangeas might require more careful attention during the drying procedure.
Comparing Flower Types and Drying Needs
| Flower Type | Drying Method Recommendations | Drying Time Estimate | Potential Challenges |
|---|---|---|---|
| Roses | Air drying, silica gel | 7-14 days | Can be fragile, susceptible to breakage during handling |
| Hydrangeas | Air drying | 7-14 days | Can wilt or lose their vibrant color if not dried properly |
| Daisies | Air drying, silica gel | 5-7 days | Generally robust and easy to dry |
This table provides a concise overview of different flower types and their suitability for various drying methods. It also includes an estimate of drying time and potential challenges that might arise during the process. Careful consideration of these factors will significantly improve the outcome of your dried flower arrangements.
Air Drying Methods: Different Ways To Dry Flowers
Air drying is a popular and gentle method for preserving the beauty of flowers. It’s a cost-effective approach, requiring minimal equipment and yielding stunning results for a wide range of flower types. This method is ideal for beginners and experienced florists alike, providing a natural way to enjoy floral arrangements year-round.Air drying is a relatively straightforward process, but optimizing the conditions for the best results is crucial.
Understanding the specific needs of the flowers you’re working with and maintaining the correct environment will ensure beautiful, long-lasting dried specimens.
Procedure for Air Drying Flowers
Proper preparation is key to successful air drying. Begin by carefully selecting flowers that are in peak condition. Avoid any that are already showing signs of damage or decay. Remove any leaves or stems that would be submerged in the drying medium. The goal is to maximize the surface area available for drying.
Best Conditions for Air Drying
Optimal conditions for air drying involve a cool, dark, and well-ventilated area. Temperatures between 50-70°F (10-21°C) are ideal. Direct sunlight should be avoided, as it can cause discoloration and fading. High humidity levels can lead to mold and mildew, so ensure adequate airflow to prevent moisture buildup. A consistent temperature and humidity level are important for preventing unwanted issues.
Step-by-Step Guide for Air Drying Flowers
- Preparation: Carefully trim the stems of the flowers, leaving about 2 inches of stem intact. Remove any leaves that would touch the drying surface. Arrange the flowers on a drying surface.
- Drying Surface: Use a clean, flat surface such as a screen, mesh, or wire rack. This allows for excellent air circulation, preventing moisture buildup and promoting even drying. Ensure the surface is placed in a well-ventilated area.
- Arrangement: Arrange the flowers on the drying surface, ensuring they are not touching each other. This is important for even drying and preventing mold. A common arrangement technique is to use a floral drying mat or paper towel to separate flowers.
- Placement: Place the drying surface in a cool, dark area with good air circulation. Avoid direct sunlight, which can damage the flower’s color and texture. A basement or an attic, depending on the ambient temperature, are ideal options.
- Drying Time: The drying time varies depending on the flower type and thickness. Some flowers, like roses, may take several weeks to completely dry. Regularly check on the flowers and rotate them to ensure even drying. Monitor the flowers carefully to check for any discoloration, mold, or unwanted changes in color and texture.
- Monitoring: Periodically check the flowers for dryness. If they’re still too moist, increase air circulation or adjust the drying location.
Common Mistakes to Avoid While Air Drying Flowers
| Mistake | Explanation | Solution |
|---|---|---|
| Leaving flowers in direct sunlight | Sunlight can fade colors and damage the petals’ structure, leading to a less appealing final product. | Dry in a shaded area, ideally with indirect light, to maintain the natural color and vibrancy of the flowers. |
| Using too much moisture | Flowers can mold and rot, leading to the deterioration of the flowers and an unpleasant odor. | Ensure good airflow by placing the drying surface in a well-ventilated area. Avoid placing the flowers in areas with high humidity. |
| Not removing leaves | Leaves can rot and cause mold. | Thoroughly remove all leaves before drying to prevent any unwanted deterioration. |
| Overcrowding | Flowers touching each other can lead to uneven drying and mold growth. | Ensure proper spacing between flowers to allow for adequate air circulation. |
Silica Gel Drying

Silica gel, a desiccant commonly used in moisture-sensitive products, offers a unique approach to flower drying. It’s a granular substance that absorbs moisture from the surrounding environment, making it ideal for preserving flowers with minimal structural change. This method provides a controlled, predictable environment, crucial for achieving consistent results.This method, while effective, does require careful planning and execution to avoid potential issues.
It’s essential to understand the principles of silica gel absorption and how to optimize the drying process for specific flower types. Properly prepared silica gel can result in well-preserved flowers with minimal damage.
Silica Gel Drying Process
Silica gel’s effectiveness stems from its porous structure. The tiny pores within the gel attract and trap water molecules, effectively removing moisture from the flowers. This process occurs passively, meaning the flowers are not directly exposed to high heat or harsh chemicals. This passive approach minimizes the risk of damage to delicate flower structures.
Benefits of Silica Gel Drying
- Preservation of delicate structures: Silica gel’s gentle approach helps maintain the original shape and texture of flowers, preserving intricate details. This is particularly beneficial for flowers with delicate petals or intricate patterns.
- Controlled environment: The method offers precise control over the moisture content, ensuring consistent results. This is advantageous for creating consistent floral arrangements or displays.
- Faster drying time: Compared to air drying, silica gel can significantly accelerate the drying process. This is beneficial for situations where a rapid turnaround is desired.
- Reduced risk of mold and mildew: By removing moisture, silica gel helps prevent the growth of mold and mildew, a common concern with traditional drying methods. This preservation method ensures a longer lifespan for the dried flowers.
Drawbacks of Silica Gel Drying
- Cost of silica gel: Silica gel can be a more expensive drying method compared to air drying. The cost of the material needs to be factored into the overall cost.
- Potential for uneven drying: While silica gel effectively removes moisture, it can occasionally lead to uneven drying if not properly managed. This unevenness can affect the appearance of the flowers, leading to inconsistencies in the final product.
- Time commitment: The process of preparing the silica gel drying setup and monitoring the flowers requires some time and attention. The process of actively preparing the environment takes more time than simply leaving flowers in a cool, dry place.
- Limited suitability for certain flowers: Certain flowers, especially those with very high water content, may not dry as effectively with silica gel. Some flower varieties may be better suited for alternative drying methods.
Comparison with Other Drying Methods
| Drying Method | Silica Gel | Air Drying | Pressing |
|---|---|---|---|
| Moisture Removal | Passive absorption | Natural evaporation | Compression and controlled environment |
| Speed | Faster than air drying | Slowest | Variable, depends on pressure |
| Cost | Higher initial cost | Lowest | Moderate |
| Control | High | Low | High |
The table highlights the comparative advantages and disadvantages of various drying methods, including silica gel. Factors like speed, cost, and control over the drying process should be considered when selecting the most suitable method.
Creating a Silica Gel Drying Setup
- Materials: Silica gel (desiccant), airtight containers (e.g., jars, boxes), flower specimens, and a desiccant drying tray or a suitable container to hold the silica gel.
- Procedure: Place a layer of silica gel in the container. Arrange the flowers carefully on top of the silica gel, ensuring good air circulation around each specimen. Cover the container to maintain a sealed environment, and ensure the silica gel can effectively absorb the moisture. Regularly check the flowers and replace the silica gel when necessary.
Monitor the flowers for proper drying.
Dehydrator Drying
Using a food dehydrator is a quick and effective method for preserving the beauty of flowers. This method offers precise control over the drying process, allowing for consistent results and minimal damage to the petals. The consistent temperature and airflow create a stable environment for flower preservation, crucial for maintaining their natural form and color.The process involves carefully arranging the flowers on the dehydrator trays, ensuring they’re not overcrowded.
Proper spacing allows for even air circulation, critical for uniform drying. The dehydrator’s controlled environment minimizes the risk of mold or discoloration, resulting in a pristine, long-lasting display.
Dehydrator Settings
The ideal settings for drying flowers in a food dehydrator are crucial for achieving optimal results. Temperature and time are key factors in maintaining the flower’s natural beauty and preventing damage. Adjustments in these settings can significantly impact the final product, impacting both appearance and longevity.
Recommended Settings
The table below provides a guideline for recommended dehydrator settings for various flower types. These settings are based on typical results and may need adjustment based on individual dehydrators and flower varieties.
Drying flowers opens up a whole world of possibilities! From pressing them in books to using silica gel, there are various methods. Candace, our associate visual director at homecares.net , has some truly unique perspectives on crafting with dried botanicals. Ultimately, the best approach depends on the flower type and desired aesthetic, but the options are endless for creating beautiful displays!
| Flower Type | Temperature (°F) | Time (hours) | Additional Notes |
|---|---|---|---|
| Carnations | 100-110 | 4-6 | Keep a watchful eye; carnations can dry quickly and unevenly. |
| Sunflowers | 110-120 | 6-8 | Ensure complete dryness; sunflowers are more robust and can withstand slightly higher temperatures. |
| Roses | 90-100 | 6-8 | Roses are delicate; lower temperatures and longer drying times are essential to prevent damage. |
| Hydrangeas | 95-105 | 8-10 | Hydrangeas can be prone to discoloration; careful monitoring is vital. |
Benefits of Using a Dehydrator
Using a food dehydrator for flower drying offers several advantages. Consistent temperatures and controlled airflow contribute to a more even drying process. This leads to minimal damage to the flower’s structure and color, preserving their natural beauty. This method also significantly reduces the risk of mold or other fungal growth, ensuring long-lasting preservation.
Drawbacks of Using a Dehydrator
While dehydrator drying is effective, it does have some drawbacks. The process requires careful monitoring of temperature and time, especially for delicate flower varieties. Overdrying can lead to brittle flowers, impacting their visual appeal and longevity. Additionally, the initial setup and arrangement of flowers on the trays can be time-consuming.
Other Drying Techniques

Beyond the common methods of air drying, silica gel drying, and dehydrator drying, several other techniques can be employed to preserve the beauty of flowers. These methods offer unique advantages and drawbacks, catering to specific preferences and desired outcomes. Understanding these alternatives can lead to a more comprehensive approach to flower preservation.
Ever wondered how to preserve those beautiful blooms? There are tons of methods for drying flowers, from the classic silica gel method to air-drying and even pressing. To get started, you’ll need some amazing flower bulbs! Check out best places to buy flower bulbs online for a huge selection of bulbs to grow vibrant flowers you can later dry.
No matter your chosen method, you’ll be amazed at how long your beautiful flowers last.
Glycerin Preservation
Glycerin, a viscous liquid, acts as a natural preservative. It creates a moisture-resistant barrier around the flower, preventing dehydration and maintaining its original shape and color. This method is particularly well-suited for delicate flowers that might not survive air drying.
- Benefits: Preserves color and shape remarkably well. Minimizes shrinkage compared to air drying. Suitable for delicate flowers that are prone to damage during other drying methods.
- Drawbacks: Can be a more involved process than other methods. Requires specific materials and a more precise technique to prevent undesirable discoloration or damage to the flower structure.
- Materials Needed: Glycerin, clean glass jars or containers, small paintbrushes, water, flower specimens.
Step-by-Step Guide:
- Preparation: Carefully select flowers in peak condition. Trim any damaged or wilted parts.
- Glycerin Solution: Mix glycerin and water according to a 1:1 ratio in a glass container. The exact ratio can be adjusted depending on the flower type.
- Immersion: Gently immerse the flower in the solution, ensuring all parts are submerged. Use a paintbrush to carefully guide the flower into the solution, avoiding any trapping of air bubbles.
- Placement: Place the immersed flowers in the prepared glass containers. Ensure they are completely submerged and are not touching each other.
- Observation: Monitor the flowers closely. Regular checks for any discoloration or structural damage are crucial.
- Storage: Store in a cool, dark place to maintain the quality of the preserved flowers.
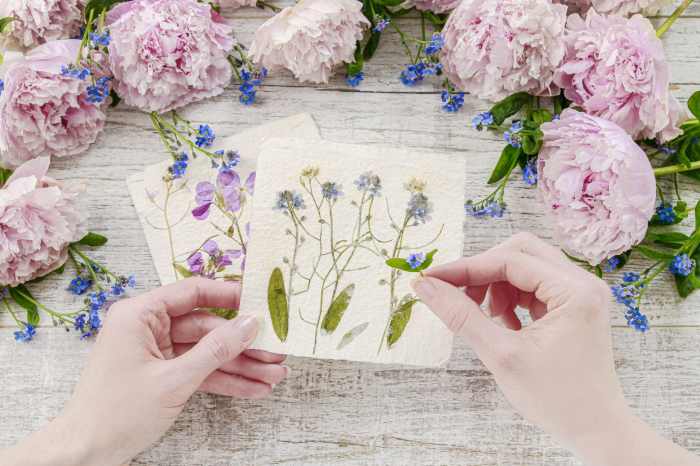
Flower Pressing
Flower pressing is a popular technique for preserving the intricate details of flowers, especially those with delicate petals. It’s ideal for creating beautiful decorative pieces and keepsakes.
- Benefits: Preserves the original shape and color of the flower, providing a flat, decorative piece. Relatively inexpensive and simple to execute.
- Drawbacks: Takes longer than other methods to dry the flower. Can distort the shape slightly. Not ideal for flowers with a lot of volume or intricate details.
- Materials Needed: Heavy books, absorbent paper (newspaper or blotter paper), flower specimens, tissue paper.
Step-by-Step Guide:
- Preparation: Carefully select flowers that are in peak condition. Remove any insects or debris.
- Layering: Place absorbent paper on a flat surface. Place the flower on the paper, gently pressing it down. Layer more absorbent paper on top of the flower.
- Weight: Place a heavy book on top of the layered paper to apply even pressure. Several books can be stacked for increased weight.
- Time: Allow the flowers to press for several days or weeks, depending on the thickness of the flower and the desired level of dryness.
- Removal: Carefully remove the flower from the paper after the drying period. If necessary, gently remove any excess paper.
- Storage: Store in a cool, dry place to maintain the preservation.
Post-Drying Care
Preserving the beauty and longevity of your dried flowers requires careful attention after the drying process is complete. Proper storage and handling are crucial to prevent moisture damage, maintain color vibrancy, and ensure your floral creations last for years to come. This section details the steps for maintaining dried flowers, emphasizing storage techniques and preventative measures.
Ever wondered how to preserve those beautiful blooms? There are tons of ways to dry flowers, from the classic air-drying method to using silica gel. Thinking about creating a beautiful, lasting display? Building an inexpensive raised garden bed, like the ones detailed in inexpensive raised garden bed ideas , can give you the perfect place to cultivate gorgeous flowers, ready for your drying techniques! Once you’ve got your plants, there’s a whole array of methods to get the best results from your dried botanicals.
Maintaining Dried Flowers
Dried flowers, unlike fresh ones, don’t require constant hydration. However, they’re still susceptible to moisture damage if not stored properly. Maintaining their quality involves a combination of environmental control and appropriate storage. Maintaining a consistent environment minimizes fluctuations in humidity and temperature, which can cause warping, discoloration, and mold growth.
Storing Dried Flowers Properly, Different ways to dry flowers
Proper storage is essential for preserving the beauty and longevity of your dried blooms. This involves choosing the right containers and environments to safeguard them from damaging elements. Understanding the specific needs of each drying method and the individual flower types can greatly enhance the life of your dried flowers.
Preventing Moisture Damage
Moisture is the enemy of dried flowers. It can cause them to mold, rot, and lose their vibrant color. To prevent moisture damage, maintain a dry and stable environment. This involves using proper storage solutions and regularly checking for signs of moisture. Periodic inspection and prompt addressing of any moisture issues will help prevent deterioration and maintain the aesthetic appeal of your dried flowers.
Common Storage Solutions
Several methods are available for storing dried flowers, each with its own advantages and considerations. The best approach depends on the amount of dried flowers, the type of flower, and the storage space available.
- Airtight Containers: Glass jars, airtight boxes, and decorative tins provide excellent protection from dust, pests, and fluctuating humidity levels. Ensure the containers are clean and dry before placing the flowers inside. Consider using silica gel packs within the containers to absorb any residual moisture. Examples include clear glass jars, decorative tins, or sturdy cardboard boxes with airtight lids.
- Cardboard Boxes: Sturdy cardboard boxes offer a cost-effective solution for storing larger quantities of dried flowers. Line the boxes with acid-free tissue paper or archival-quality paper to protect the flowers from scratching and damage. Adding silica gel packs inside the boxes can further reduce the risk of moisture damage. These are particularly useful for storing a larger number of dried flowers, especially when arranging or displaying them in decorative ways.
- Fabric-lined Boxes: This method is suitable for storing dried flowers that require more padding and protection. A fabric lining prevents the flowers from rubbing against each other, reducing the risk of damage. Use archival-quality acid-free tissue paper for this lining. This type of storage is particularly beneficial for preserving delicate dried flowers or those that are prone to bending or breaking.
- Dry Storage Areas: Choose a cool, dry, and dark location to store your dried flower arrangements. Avoid areas prone to high humidity, such as bathrooms or kitchens. A designated storage space, such as a closet or attic, will help maintain the ideal conditions for your dried flowers. The key is to keep the environment stable to avoid any unwanted changes in moisture or temperature.
Troubleshooting and Common Problems
Flower drying, while rewarding, can sometimes encounter unexpected challenges. Understanding potential problems and their solutions is crucial for achieving beautiful, long-lasting dried blooms. This section delves into common issues, their causes, and how to address them effectively.Troubleshooting dried flower projects is part of the learning process. It’s a way to gain a deeper understanding of the environmental factors that affect the drying process.
Addressing these issues early can save time, materials, and prevent disappointment.
Mold Growth
Mold is a common issue, particularly with air-drying methods. High humidity and poor air circulation are the primary culprits. Mold thrives in damp environments where moisture collects on the flowers. This can happen if the flowers are not adequately prepared for drying or if the drying environment isn’t well-maintained.
- Prevention: Ensure flowers are thoroughly cleaned and dried before placing them in the drying area. Proper ventilation and airflow are essential to prevent moisture buildup. A well-ventilated area with low humidity is key to preventing mold.
- Solution: If mold appears, carefully remove affected flowers from the drying area. Treat the remaining flowers with a solution of diluted bleach (1 tablespoon bleach per gallon of water). Air-dry completely before resuming the drying process. If the problem persists, consider using a different drying method. Also, check the humidity levels in your drying area.
Discoloration
Discoloration during the drying process can stem from various factors, including exposure to direct sunlight, improper drying techniques, and the flowers’ inherent sensitivity to specific conditions.
- Cause: Sunlight, particularly strong UV rays, can fade or bleach flowers. Improper drying methods, such as inadequate airflow or high heat, can also lead to discoloration. Some flowers are naturally more prone to discoloration than others.
- Solutions: Place flowers in a shady or low-light area. Use appropriate drying methods suited for the flower type. Avoid exposure to direct sunlight. Consider using a drying method that involves less heat, such as air drying or silica gel drying.
Incomplete Drying
Incomplete drying can lead to issues with structural integrity and longevity of the dried flowers. This is often caused by improper drying techniques or inadequate time.
- Cause: Inadequate drying time, particularly for thicker flower parts, can result in soft, mushy, and unpreserved flowers. Using improper drying methods for certain flowers will also cause issues with the quality of the dried product.
- Solutions: Adjust drying times depending on the flower type and thickness. Ensure proper airflow and temperature control in the drying area. For air-drying, consider using multiple layers or spacing flowers out. Also, check the flower’s internal moisture content to know when to stop the drying process.
Insect Infestation
Insect infestations are a possibility if the drying area is not regularly cleaned or if the flowers aren’t prepared thoroughly.
- Cause: Improper storage or lack of hygiene in the drying environment can attract insects. Insects like moths can be attracted to flower parts that have not been completely dried.
- Solutions: Maintain a clean and dry environment. Inspect flowers thoroughly for signs of insects before storing them. Consider using pest control measures if necessary. Freezing or using other preservation methods will also help in preventing insects.
Ending Remarks
In conclusion, drying flowers is a rewarding process that allows you to capture the beauty of nature for years to come. By understanding the various drying methods and considering the specific needs of each flower type, you can achieve stunning results. Remember to pay attention to details like sunlight exposure, humidity levels, and the right drying times to ensure your flowers remain vibrant and intact.
This comprehensive guide equips you with the knowledge to preserve your favorite blooms, transforming them into lasting works of art.