


Cuisinart coffee maker how to clean sets the stage for a comprehensive guide to maintaining your coffee maker’s pristine condition. A clean coffee maker ensures consistently delicious brews and a longer lifespan for your appliance. Neglecting cleaning can lead to unpleasant flavors, clogs, and premature wear. This guide provides a step-by-step approach, from simple daily maintenance to deep cleaning and descaling, allowing you to keep your Cuisinart machine in top shape.
We’ll explore everything from disassembling the coffee maker for thorough cleaning to understanding the different cleaning solutions and their optimal application. We’ll also discuss preventative maintenance to avoid future problems and provide troubleshooting tips for common issues.
Introduction to Cleaning a Cuisinart Coffee Maker: Cuisinart Coffee Maker How To Clean
Keeping your Cuisinart coffee maker clean is crucial for maintaining its optimal performance and preventing unpleasant tastes in your morning brew. A neglected coffee maker can harbor bacteria, mold, and lingering coffee oils, leading to a less enjoyable experience and potential health concerns. Regular cleaning ensures consistent flavor and a healthy environment for your coffee brewing process.Neglecting regular cleaning can result in a buildup of coffee grounds, oils, and minerals.
This buildup can lead to a variety of issues. Over time, this residue can affect the taste of your coffee, potentially making it bitter, sour, or unpleasant. Furthermore, it can clog the machine’s internal components, hindering proper water flow and potentially leading to malfunctions. Ultimately, inconsistent cleaning can decrease the longevity of your coffee maker.
Establishing a Regular Cleaning Schedule
Maintaining a consistent cleaning schedule is vital for preventing issues and extending the life of your coffee maker. A regular routine helps maintain optimal performance and minimizes the risk of unwanted buildup. Implementing a scheduled cleaning regimen ensures consistent flavor and a healthy environment for your coffee brewing process.
- Weekly Cleaning: A quick wipe-down of the exterior surfaces and a rinsing of the carafe are recommended weekly to prevent spills and accumulation of residue. This prevents the build-up of stains and keeps your appliance looking fresh. This simple task helps prevent a more extensive clean from being necessary.
- Monthly Deep Clean: Once a month, a thorough cleaning of the coffee maker’s internal components is recommended. This process includes removing the filter basket, carafe, and other removable parts for a comprehensive cleaning, effectively removing any remaining residue from the previous week’s cleaning.
- Quarterly Disassembly: Every three months, a thorough disassembly and cleaning of all internal parts is essential. This deep clean ensures that the machine functions optimally and eliminates the risk of bacterial buildup. This helps maintain the cleanliness and functionality of the coffee maker for optimal performance.
Understanding Common Cleaning Issues
Proper cleaning techniques can help you avoid potential issues associated with neglected coffee maker cleaning. Understanding these issues can help you maintain a cleaner and more functional coffee maker. This proactive approach will prevent potential problems and maintain your appliance’s lifespan.
Cleaning my Cuisinart coffee maker is always a bit of a chore, but it’s crucial for optimal performance. Honestly, I think we all have things we accumulate – like a surprising number of coffee mugs and filters – that we could probably live without! That’s a common problem, isn’t it? Perhaps checking out this list of things you have too many of will inspire me to declutter and finally get that coffee maker sparkling.
So, back to the cleaning, the right method is key to keeping your Cuisinart in top condition.
- Water Spots and Mineral Buildup: Hard water can leave unsightly water spots on the carafe and internal components. This buildup can also affect the taste of your coffee, making it less enjoyable. Regular cleaning helps prevent the accumulation of these spots.
- Coffee Residue Buildup: If coffee grounds are not properly cleaned from the filter basket, carafe, and other components, residue can accumulate and affect the taste and quality of your coffee. This buildup can lead to unpleasant odors and potentially impact the flavor profile of the coffee.
- Bacterial Growth: If cleaning is infrequent, bacteria can grow within the coffee maker, especially in the reservoir and carafe. This can lead to health risks. Frequent cleaning is crucial to avoid this problem.
Disassembling the Coffee Maker for Cleaning

Taking apart your Cuisinart coffee maker for a thorough cleaning is a crucial step for optimal performance and longevity. A clean machine ensures consistently delicious coffee and prevents unpleasant odors or buildup that can affect taste. This process, while seemingly daunting, is straightforward once you understand the steps.
Safe Disassembly Steps
Properly disassembling your coffee maker is essential to avoid damaging any parts. Following these steps carefully will ensure a thorough cleaning without causing harm to the appliance.
- Unplug the Coffee Maker: Before beginning any disassembly, unplug the coffee maker from the power outlet. This is a fundamental safety precaution to prevent electrical shock. This step is paramount to avoiding any electrical hazard.
- Empty the Carafe: Carefully pour out any remaining coffee from the carafe. This prevents spills and ensures the carafe is clean for subsequent cleaning steps. Always handle the carafe with care to avoid breakage.
- Remove the Carafe: Locate the carafe’s release mechanism (often a lever or latch). Gently press or pull to release the carafe from the coffee maker’s base. Carefully lift the carafe and set it aside for cleaning.
- Remove the Filter Basket: Locate the filter basket release mechanism. It may be a simple push-button or a lever. Press or pull to release the filter basket from the coffee maker’s brewing unit. Remove the filter basket and set it aside for cleaning.
- Detach the Water Reservoir: Locate the water reservoir release mechanism. Carefully lift and remove the water reservoir. Set it aside for cleaning. Make sure you’ve emptied any remaining water from the reservoir.
- Inspect Removable Parts: Examine all the removed parts for any obvious debris or buildup. This allows you to assess the level of cleaning needed. Be aware of potential clogs or residue on any part.
Disassembly Table
This table Artikels the steps for disassembling a typical Cuisinart coffee maker, emphasizing safety and efficiency.
Keeping my Cuisinart coffee maker sparkling clean is a must, but sometimes I need a little extra help. Cleaning those stubborn coffee grounds can be tricky, but luckily, there are tons of great resources online. Similar to how you’d clean your white Converse sneakers (a great guide is how to clean white converse sneakers ), using a gentle scrub and a bit of dish soap can work wonders.
Proper cleaning is key to maintaining the perfect brew, so I always follow a thorough routine, and I’m sure you’ll find the same results with your Cuisinart!
| Step | Action | Description |
|---|---|---|
| 1 | Unplug the Coffee Maker | Remove the power cord from the outlet to prevent electric shock. |
| 2 | Empty the Carafe | Pour out any remaining coffee into a waste container. |
| 3 | Remove the Carafe | Locate and release the carafe’s locking mechanism to remove it from the machine. |
| 4 | Remove the Filter Basket | Locate and release the filter basket’s locking mechanism to remove it. |
| 5 | Detach the Water Reservoir | Identify and release the water reservoir’s locking mechanism to remove it. |
| 6 | Inspect Removable Parts | Visually inspect each removed component for any significant buildup. |
Cleaning the Removable Parts
Taking apart your Cuisinart coffee maker for a thorough cleaning is a crucial step to maintaining its optimal performance and extending its lifespan. Proper cleaning of the removable parts, including the carafe, filter basket, and water reservoir, prevents the buildup of coffee residue, mineral deposits, and unpleasant odors. This ensures a consistently fresh and delicious cup of coffee every time.
Cleaning the Carafe
The carafe is where your delicious coffee resides, and keeping it clean is paramount. First, rinse the carafe thoroughly with warm water. If there are stubborn coffee stains, a mixture of warm water and a mild dish soap can be effective. Be sure to rinse the carafe thoroughly after using the cleaning solution. For more stubborn stains, consider a gentle scrub with a soft sponge or brush.
Always dry the carafe completely before placing it back on the coffee maker.
Cleaning the Filter Basket, Cuisinart coffee maker how to clean
The filter basket is the heart of your coffee brewing process, so maintaining its cleanliness is critical. Remove the basket and rinse it thoroughly under warm running water. A gentle scrub with a soft brush or sponge can help remove any coffee grounds or residue. If the basket is particularly stained, a mixture of warm water and a mild dish soap can be used.
Again, rinse the basket thoroughly before placing it back in the coffee maker.
Cleaning the Water Reservoir
The water reservoir plays a vital role in delivering fresh, filtered water for your coffee. Cleaning the water reservoir prevents mineral buildup, which can affect the taste of your coffee and potentially harm your coffee maker over time. First, empty the reservoir completely. Then, fill it with a mixture of equal parts white vinegar and water. Let it sit for 30 minutes to allow the vinegar to dissolve any mineral deposits.
After 30 minutes, pour out the vinegar solution and rinse the reservoir thoroughly with clean water.
Cleaning Solutions Comparison
Different cleaning solutions can be used to achieve optimal results. White vinegar is effective at dissolving mineral deposits, but it can leave a slight vinegar taste in the coffee if not rinsed thoroughly. Baking soda is a gentler alternative that can help remove odors and stains. A mild dish soap is often sufficient for everyday cleaning. The choice of cleaning solution depends on the severity of the stains and buildup.
Preventing Mineral Buildup
Mineral buildup in the water reservoir is a common problem for coffee makers. To prevent this, use filtered water. Filtered water contains fewer minerals than tap water, minimizing the chances of buildup. Also, consider using a water softener if you live in an area with hard water. Regular cleaning, as described in the previous sections, is also crucial in preventing buildup.
Cleaning Solution Application Guide
| Cleaning Solution | Application Method | Parts to Use On |
|---|---|---|
| Warm Water | Rinse thoroughly | Carafe, Filter Basket, Water Reservoir |
| Mild Dish Soap + Warm Water | Mix and gently scrub | Carafe, Filter Basket |
| White Vinegar + Water (Equal Parts) | Fill reservoir, let sit 30 minutes, then rinse thoroughly | Water Reservoir |
| Baking Soda + Warm Water (Optional) | Mix and scrub gently | Carafe, Filter Basket |
Cleaning the Coffee Maker’s Internal Components
Deep cleaning your Cuisinart coffee maker goes beyond just the visible parts. Thorough cleaning of the internal components is crucial for optimal performance and prevents unpleasant tastes in your brew. This section dives into the inner workings of your coffee maker, providing detailed instructions for cleaning the heating element and brew basket, ensuring years of delicious coffee.
Identifying Internal Components
The internal components of your coffee maker, while often hidden, are vital to the brewing process. These include the heating element, the brew basket, and the water reservoir. The heating element heats the water, the brew basket filters the grounds, and the water reservoir stores the water. Proper care for each is essential for maintaining a clean and functioning coffee maker.
Cleaning the Heating Element
The heating element is responsible for heating the water to the proper temperature for brewing. Mineral deposits, like limescale, can accumulate over time, reducing efficiency and potentially causing damage. Disassembling the heating element for thorough cleaning is generally not recommended. Instead, use a specialized descaling solution to safely remove mineral buildup. This solution will effectively dissolve the limescale without harming the heating element.
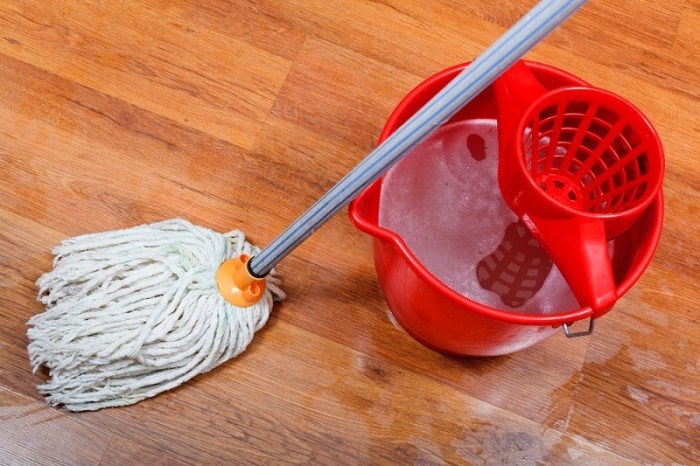
Keeping your Cuisinart coffee maker sparkling clean is key to enjoying your morning brew. One thing I’ve learned is that proper cleaning isn’t just about the coffee maker itself, but also the cleaning tools you use. For instance, when comparing cleaning methods for your kitchen floors, choosing the right mop can make a big difference, just like selecting the right cleaning method for your coffee maker.
For a detailed comparison of mopping options, check out this helpful guide on swiffer vs microfiber mop. Ultimately, the best approach for your Cuisinart coffee maker depends on your specific needs and preferences.
Be sure to follow the manufacturer’s instructions for the descaling solution you choose.
Cleaning the Brew Basket
The brew basket, where the coffee grounds reside during brewing, needs regular cleaning. Coffee oils and grounds can clog the basket over time, impacting the quality of your coffee. A thorough cleaning is necessary to maintain proper filtration. Use warm, soapy water and a soft brush to remove any residue or buildup. Rinse thoroughly to remove all traces of soap.
Cleaning the Water Reservoir
The water reservoir is another critical component. If not cleaned regularly, mineral deposits and sediment can accumulate, affecting water quality and taste. Use a mixture of warm water and white vinegar to clean the reservoir. This helps remove buildup and keep the reservoir fresh. Follow the manufacturer’s guidelines for optimal cleaning.
Detailed Procedure for Cleaning the Interior
- Turn off the coffee maker and unplug it from the power outlet.
- Remove any remaining coffee grounds from the brew basket and discard them.
- Fill the water reservoir with a solution of equal parts water and white vinegar.
- Run a full brewing cycle with this solution to help dissolve mineral deposits.
- Empty the reservoir and rinse thoroughly with fresh water.
- Use warm, soapy water and a soft brush to clean the brew basket.
- Thoroughly rinse all components with clean water.
- Allow all parts to air dry completely before reassembling the coffee maker.
Safety Precautions for Cleaning
| Component | Cleaning Method | Safety Precautions |
|---|---|---|
| Heating Element | Descaling solution | Follow manufacturer’s instructions. Do not attempt to disassemble the heating element. |
| Brew Basket | Warm, soapy water | Use a soft brush. Do not use abrasive cleaners. |
| Water Reservoir | Water and white vinegar | Do not use harsh chemicals. Follow manufacturer’s instructions. |
Preventing Future Issues and Maintenance
Keeping your Cuisinart coffee maker in tip-top shape isn’t just about a sparkling clean machine; it’s about enjoying delicious, consistent coffee for years to come. Preventive maintenance is key to avoiding costly repairs and ensuring your coffee maker performs at its best. Simple steps, like regular cleaning and descaling, can significantly extend its lifespan.Proper maintenance minimizes the risk of mineral buildup, which can lead to performance issues and a reduced lifespan.
It also helps prevent burnt coffee, a common problem stemming from inadequate cleaning. By following these guidelines, you can enjoy perfectly brewed coffee, free from frustrating malfunctions.
Preventive Maintenance Tips
Regular cleaning and maintenance are crucial for extending the life of your Cuisinart coffee maker. Consistent care prevents issues like mineral buildup and burnt coffee, ensuring consistent performance.
- Regular Cleaning: Cleaning the coffee maker after each use, or at least every few days, removes coffee grounds and any lingering residue. This simple act prevents the buildup of bacteria and unpleasant odors, improving the taste and freshness of your brewed coffee. Thorough cleaning is key to preventing the build-up of coffee oils that contribute to a burnt taste in the long run.
- Descaling: Mineral buildup, a common problem in hard water areas, can hinder the coffee maker’s efficiency. Descaling helps remove these minerals, restoring optimal performance and preventing the machine from overheating. Descaling regularly can also improve the taste of your coffee by removing any mineral-related flavors. A simple descaling process will also extend the lifespan of the coffee maker.
- Proper Water Quality: Using filtered water significantly reduces mineral buildup. This will improve the taste of your coffee and prolong the lifespan of your coffee maker. Filtered water will also improve the efficiency of the brewing process. You can use either bottled or filtered water to minimize the buildup of minerals in your coffee maker.
Regular Cleaning Schedule
Establishing a routine for cleaning and descaling helps prevent problems. This table provides a suggested schedule to maintain optimal performance.
| Task | Frequency |
|---|---|
| Clean drip tray and filter holder | After each use |
| Clean removable parts (carafe, filter basket, etc.) | Weekly |
| Descale | Every 2-3 months (or as needed, depending on water hardness) |
Cleaning the Drip Tray and Filter Holder
Regular cleaning of the drip tray and filter holder is crucial for maintaining the coffee maker’s cleanliness and preventing the build-up of coffee grounds and debris. This simple step prevents unpleasant odors and keeps the machine running smoothly.
- Drip Tray: Empty the drip tray after each use. Wash it with warm soapy water, rinse thoroughly, and allow it to air dry completely before replacing it in the coffee maker. Ensure to wipe any spills or residue from the drip tray immediately after brewing to prevent coffee grounds and oils from building up.
- Filter Holder: Rinse the filter holder thoroughly after each use. Clean any coffee grounds or debris with warm, soapy water. Allow it to air dry completely before storing it. Regular cleaning of the filter holder is essential to prevent the build-up of coffee oils that contribute to the burnt taste in the coffee.
Troubleshooting and Common Problems
Cleaning your Cuisinart coffee maker should be a straightforward process, but occasionally, issues can arise. Understanding potential problems and their solutions can save you time and frustration. This section details common problems encountered during the cleaning process and provides effective troubleshooting steps.Troubleshooting is crucial for maintaining optimal coffee maker performance and extending its lifespan. By addressing problems promptly, you prevent potential damage and ensure a consistent, enjoyable coffee brewing experience.
Potential Cleaning Process Problems
Common problems during the cleaning process often stem from improper handling or a lack of attention to detail. These issues can range from minor inconveniences to more significant concerns.
| Problem | Cause | Solution |
|---|---|---|
| Coffee Maker Won’t Turn On After Cleaning | A loose electrical connection or a damaged internal component, potentially from dropping or mishandling during cleaning. | First, ensure all components are securely reassembled. Check for any visible damage. If the problem persists, unplug the coffee maker, wait a few minutes, and plug it back in. If the issue persists, contact Cuisinart customer support or a qualified appliance repair technician. |
| Water Leaks During or After Cleaning | Incorrect reassembly of parts, particularly the water reservoir or the filter basket. A damaged gasket or seal also contributes. | Carefully reassemble all components, ensuring they are properly aligned and seated. Inspect all gaskets and seals for damage or wear. Replace any damaged parts. If leaks persist, contact Cuisinart customer service or a qualified appliance technician. |
| Strange Odors After Cleaning | Incomplete cleaning of the internal components or improper use of cleaning agents. A build-up of mineral deposits might remain. | Thoroughly clean all internal parts, including the water reservoir, filter basket, and the brewing chamber. Use a suitable cleaning solution as recommended by Cuisinart or a mild, non-abrasive cleaner. Rinse thoroughly and allow to air dry completely. If the odor persists, consider a descaling solution. |
| Difficulty in Disassembling Parts | Parts are stuck or corroded, possibly from mineral buildup. Overuse of harsh chemicals might also cause this. | Use warm, soapy water to soak stubborn parts. Avoid harsh scrubbing. If parts remain stuck, consult Cuisinart’s website for detailed instructions or contact a qualified appliance technician. |
Preventing Future Cleaning Issues
Regular maintenance is key to preventing future problems. Following a cleaning routine and taking preventative measures will prolong the life of your coffee maker and reduce the likelihood of issues during the cleaning process.Regular cleaning, as described in the previous sections, is crucial for preventing the build-up of mineral deposits, which can lead to clogs, leaks, and other problems.
Thorough rinsing and drying of components after each cleaning will also significantly reduce the risk of odors and issues related to residue.
Deep Cleaning and Descaling

Keeping your Cuisinart coffee maker in tip-top shape involves more than just a quick rinse. Regular deep cleaning and descaling are essential for maintaining optimal performance and extending the lifespan of your appliance. This process tackles stubborn mineral deposits and lingering stains, ensuring a consistently delicious cup of coffee.Deep cleaning and descaling go beyond routine maintenance. Mineral buildup, often invisible to the naked eye, can affect the taste and quality of your coffee, potentially reducing its extraction and causing problems with the machine’s operation over time.
This thorough cleaning process removes these deposits, restoring optimal performance and preventing future issues.
Deep Cleaning Procedures
Deep cleaning involves disassembling the coffee maker and meticulously cleaning all parts, including the carafe, filter basket, and internal components. This step is crucial for removing hard-water deposits and ensuring a thorough removal of any lingering residue. By meticulously cleaning each part, you’re not only removing visible dirt but also preventing future issues, ensuring the best possible experience with your coffee maker.
Descaling Methods
Descaling is a crucial part of deep cleaning, targeting mineral deposits that accumulate over time. These deposits, often caused by hard water, can affect the taste and quality of your coffee, as well as the longevity of the machine. Effective descaling is essential to maintain optimal performance and a consistent coffee experience.
Descaling with White Vinegar
A common and effective descaling method involves using white vinegar. Vinegar’s acidity helps dissolve mineral deposits, restoring the coffee maker’s efficiency.
“White vinegar is a safe and affordable descaling agent.”
Follow the manufacturer’s instructions for the specific amount of vinegar to use. Ensure that the vinegar solution is thoroughly rinsed from all parts to prevent any residual taste.
Choosing a Descaling Method
Different descaling methods offer varying degrees of effectiveness and safety. Consider the following table comparing common descaling agents:
| Descaling Method | Effectiveness | Safety | Cost |
|---|---|---|---|
| White Vinegar | Good | Generally safe | Low |
| Commercial Descaling Solutions | Excellent | Usually safe, check label | Medium |
| Lemon Juice | Moderate | Generally safe | Low |
This table provides a comparative overview of descaling methods, highlighting their effectiveness, safety profiles, and cost implications. Choose the method that best suits your needs and preferences.
When Deep Cleaning is Necessary
Deep cleaning and descaling are not necessarily required every month, but rather based on your water quality and usage frequency. If your coffee tastes off, if there’s a noticeable buildup of mineral deposits, or if your coffee maker is exhibiting performance issues, deep cleaning might be necessary. Pay attention to these signs as they signal the need for more thorough cleaning and descaling.
Final Wrap-Up
Maintaining a clean Cuisinart coffee maker is essential for optimal performance and a long-lasting appliance. By following the comprehensive cleaning and maintenance steps Artikeld in this guide, you can keep your coffee maker in pristine condition, ensuring consistently delicious coffee. Remember, regular cleaning prevents buildup and extends the life of your machine, ensuring a smooth brewing experience every time.
From simple daily routines to deep cleaning and descaling, this guide provides all the tools you need to keep your coffee maker in tip-top shape!