


Paint bubbling on wall is a common problem that can be frustrating and unsightly. This guide dives deep into the causes, diagnosis, and repair of bubbling paint, equipping you with the knowledge to tackle this issue effectively. From understanding the environmental factors that contribute to the problem to learning practical repair methods, we’ll explore every aspect of this common paint dilemma.
We’ll explore the various causes of bubbling paint, ranging from moisture issues to improper surface preparation. We’ll also cover how to effectively diagnose the problem, including visual inspection techniques and moisture testing. Finally, we’ll provide detailed repair strategies, highlighting the importance of proper surface preparation and paint selection to ensure long-lasting results.
Causes of Bubbling Paint

Paint bubbling on walls is a common problem that can be frustrating and unsightly. It often indicates underlying issues that need addressing before the painting process can be successfully completed. This article dives into the various causes of paint bubbling, ranging from environmental factors to improper preparation. Understanding these factors can help prevent this problem in the future and ensure a smooth, long-lasting paint job.Understanding the reasons behind paint bubbling is crucial for effective solutions.
Bubbling, rather than just a cosmetic concern, can be a symptom of a deeper problem. This often manifests as small bubbles that disrupt the paint’s smooth finish, and if left unaddressed, can lead to peeling or further damage.
Common Causes of Paint Bubbling
Numerous factors can contribute to paint bubbling, and they often intertwine. Poor preparation, environmental conditions, and underlying issues in the wall structure can all play a role.
Moisture Issues
High humidity and moisture are significant contributors to paint bubbling. Moisture trapped within the wall can cause the paint to separate, creating bubbles as it expands and contracts. This is particularly true in areas prone to condensation or with inadequate ventilation. For example, bathrooms, basements, and areas with high levels of humidity frequently experience this issue. Water damage from leaks, whether from plumbing or roof issues, can also create pockets of moisture and lead to paint problems.
Temperature Fluctuations
Extreme temperature changes can also cause problems. If the temperature fluctuates significantly, the paint can expand and contract, creating stress on the surface and leading to bubbles. This is often a concern in areas with significant temperature variations or exposure to direct sunlight. In a building with inconsistent heating and cooling systems, this problem can be more prominent.
Improper Surface Preparation
Insufficient surface preparation is a common cause of paint bubbling. A poorly prepared surface, including the presence of dust, dirt, mildew, or loose old paint, can create a poor base for the new paint. This reduces adhesion, making the paint more prone to detaching and bubbling.
Underlying Issues, Paint bubbling on wall
Faulty insulation, plumbing leaks, and poor ventilation can all contribute to paint bubbling by creating moisture problems. Insulation problems may result in moisture trapped in the wall, while plumbing leaks can create damp spots. Poor ventilation exacerbates humidity, further increasing the chances of paint failure. For instance, a leaky pipe in a wall can cause significant paint bubbling in the surrounding area, demonstrating the effect of underlying problems.
Types of Paint Prone to Bubbling
Certain types of paint are more susceptible to bubbling than others. Latex paints, particularly those with lower-quality formulations, may have difficulty adhering to surfaces under unfavorable conditions. Oil-based paints, while generally more durable, can be affected by moisture issues, especially in environments with high humidity.
Importance of Surface Preparation
Proper surface preparation is crucial for achieving long-lasting paint adhesion. This involves thoroughly cleaning the surface, removing any loose or flaking paint, and patching any holes or cracks. The surface must be completely dry and free from any contaminants to ensure a strong bond between the paint and the wall.
Environmental Conditions and Paint Adhesion
| Environmental Condition | Effect on Paint Adhesion | Possible Solutions |
|---|---|---|
| High Humidity | Reduced adhesion, increased moisture in the wall | Improve ventilation, use moisture-resistant paint |
| Low Temperature | Slow drying time, possible cracking | Wait for ideal temperature before painting |
| High Temperature | Rapid drying, potential for uneven finish | Paint in cooler temperatures, use a thinner paint |
| Drafts | Uneven drying, potential for bubbling | Seal air leaks, wait for ideal conditions |
| Direct Sunlight | Faster drying, uneven heating | Paint in shaded areas, use a suitable paint |
Diagnosing the Problem
Pinpointing the exact cause of bubbling paint is crucial for effective repair. A thorough visual inspection, combined with targeted testing, allows you to identify the root of the problem, whether it’s moisture intrusion, settling, or a different underlying issue. This systematic approach will save you time and money in the long run by ensuring the correct solution is implemented.Understanding the potential sources of the problem is the first step.
By examining the paint’s condition and the surrounding area, you can determine the nature of the moisture or other issues causing the unsightly bubbles. A comprehensive approach includes a detailed visual inspection, moisture content testing, and consideration of the building’s structure and history.
Visual Inspection Techniques
Careful observation of the bubbling paint and the surrounding areas is essential. Look for signs of dampness, such as discoloration, mold growth, or water stains. Inspect the wall’s surface for any cracks, gaps, or loose areas that might indicate a structural issue. Pay attention to the paint’s texture; unevenness or sagging could suggest underlying problems. Examine the paint’s adhesion to the wall, searching for areas where the paint seems to be lifting or peeling away from the substrate.
Note the location and extent of the bubbling; is it concentrated in a specific area or spread across the entire surface? These observations provide valuable clues about the source of the issue.
Determining the Source of Moisture
Identifying the source of moisture is critical. Is the moisture coming from a leak in a pipe or roof? Is it a result of condensation? Or is the issue related to the building’s structure or drainage? Examine the wall framing and insulation for signs of water damage.
Look for signs of water intrusion in the area surrounding the bubbling paint, such as water stains on the ceiling or other surfaces. Pay attention to the building’s history, including any recent renovations, plumbing work, or weather events that might have contributed to the problem.
Testing Wall Moisture Content
Measuring the moisture content of the wall is a critical step in diagnosing the issue. Moisture meters provide a non-destructive way to measure moisture levels within the wall’s structure. These devices utilize electrical conductivity to determine the water content in the wall’s materials. Insert the moisture meter’s probe into the wall at various points within the affected area and note the readings.
Comparing readings with the expected moisture levels for the wall’s materials and climate will aid in diagnosis. If the moisture level is excessively high, it suggests a problem requiring professional assessment. A moisture meter should be used with caution and the user should consult the manufacturer’s instructions.
Tools and Techniques for Pinpointing the Problem
A variety of tools can be used to pinpoint the source of the bubbling paint problem. Moisture meters, as mentioned above, are crucial for determining moisture content. A flashlight can aid in detecting hidden moisture issues, such as damp spots behind drywall or in framing. A magnifying glass can help you see details in areas with small bubbling or signs of mold.
A visual inspection of the wall framing and any insulation materials is essential to identify potential structural issues. Use these tools in combination with your observations to build a comprehensive understanding of the problem.
Potential Causes and Visual Cues
| Potential Cause | Visual Cues | Diagnostic Steps |
|---|---|---|
| Moisture | Dampness, mold growth, discoloration, water stains, soft spots on the wall | Moisture meter readings, visual inspection of framing and insulation, checking for leaks in pipes or roofs. |
| Poor paint adhesion | Uneven paint texture, paint lifting or peeling, paint cracking or flaking | Visual inspection of paint’s adhesion to the wall, checking the surface preparation before painting. |
| Settlement or movement of the building | Cracks in the wall, uneven paint surface, bubbling paint concentrated along a particular area | Checking the building’s history for any previous settlement or structural issues, consultation with a structural engineer. |
| Improper surface preparation | Uneven paint texture, areas of paint lifting, peeling or flaking | Review the paint preparation process, ensuring the wall was properly cleaned and primed. |
Repairing Bubbling Paint

Fixing bubbling paint involves more than just slapping on a fresh coat. Understanding the root cause, as discussed earlier, is crucial. A proper repair addresses the underlying issue, preventing future problems and ensuring a lasting, aesthetically pleasing finish. This section provides a step-by-step guide to effectively repair bubbling paint, along with important considerations for choosing the right materials and techniques.The repair process hinges on meticulous preparation and the selection of appropriate materials.
Ugh, paint bubbling on my wall! It’s driving me crazy. I’ve got a whole project planned for my mantel, though, and I need to get that garland hung perfectly for the holidays, which involves learning how to hang garland on mantel here. Maybe once I tackle that, I can focus on figuring out what caused the bubbling paint and get back to decorating!
Ignoring these aspects can lead to a recurrence of the problem, wasting time and resources. Careful attention to detail throughout the repair process is key to a successful outcome.
Ugh, paint bubbling on my walls. It’s driving me crazy! I’ve got to tackle this soon. Sometimes, dealing with a problem like this can be a lot like trying to improve a patchy lawn. You might consider methods like how to plant grass seed on existing lawn , where you’re not starting from scratch, but trying to thicken and improve what’s already there.
Hopefully, fixing the paint will be easier than tackling that overgrown patch in my backyard!
Preparing the Affected Area
Thorough preparation is essential for a successful paint repair. This involves removing loose, blistered paint and ensuring a clean, stable surface for the new paint to adhere to. Begin by gently scraping off the loose paint with a putty knife or scraper. Be cautious not to damage the underlying wall surface. Next, use a wire brush or sandpaper to remove any remaining loose particles or debris.
Cleaning the area with a damp cloth ensures a dust-free surface. Finally, fill any gaps or holes with appropriate patching compound.
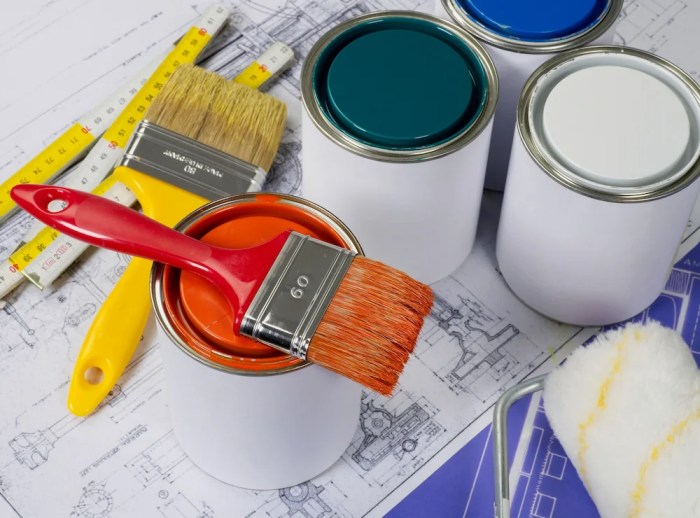
Repair Methods
Different repair methods cater to various causes and degrees of damage. The choice of method should align with the extent of the bubbling and the underlying cause.
| Repair Method | Materials | Suitability | Procedure |
|---|---|---|---|
| Patching | Putty, paint | Small bubbles, minor damage | Mix putty according to instructions. Fill the bubble and surrounding area. Smooth the putty to match the wall surface. Allow the putty to dry completely before painting the area with matching paint. |
| Priming | Appropriate primer | Significant bubbling, moisture issues | Apply a suitable primer specifically designed to address moisture or other underlying problems. Allow the primer to dry completely before applying new paint. |
| Sanding and Repainting | Sandpaper, paint, primer (if needed) | Extensive bubbling, significant damage | Thoroughly sand the affected area to create a smooth surface. Apply primer to the sanded area if necessary, focusing on areas where moisture penetration is suspected. Allow the primer to dry completely. Apply new paint in thin, even coats. |
| Caulking | Caulk, paint | Bubbles around windows or doors | Apply caulk to seal any gaps or cracks around windows or doors. Allow the caulk to dry. Once dry, paint the caulked area. |
Applying New Paint Correctly
Applying new paint correctly is vital to prevent future bubbling. Using the right paint type and primer is crucial. Choose a paint designed for the specific wall surface (e.g., interior latex paint for interior walls). If the wall has moisture problems, use a moisture-resistant paint. Always follow the manufacturer’s instructions for application.
Apply the paint in thin, even coats, allowing each coat to dry completely before applying the next. This prevents the paint from peeling or cracking.
Ugh, paint bubbling on my wall. It’s driving me crazy! I’m seriously considering if I can use my steam cleaner to tackle this problem. I’ve heard mixed reviews, so I did some digging and found a helpful article on whether or not a steam cleaner can remove paint, which might be a viable option. can i use my steam cleaner to remove paint Hopefully, it’ll help me get this bubbling paint under control without causing more damage.
We’ll see if it works! Fingers crossed!
Importance of Paint Type and Primers
Using the correct paint type and primer is critical. The choice depends on the wall material and the underlying cause of the bubbling. For example, using a paint designed for exterior use on an interior wall can lead to premature failure. Primer creates a smooth surface for the paint and improves adhesion, preventing future problems. It also seals the surface, providing a barrier against moisture.
Select a primer that is compatible with the chosen paint and addresses any specific issues, such as moisture or mold.
Preventing Future Issues
Preventing paint bubbling is not just about fixing the problem; it’s about understanding the root causes and implementing proactive measures to avoid future issues. A well-maintained wall, with proper preparation and the right materials, is less prone to paint failures. This involves careful consideration of moisture control, surface preparation, and paint selection.Addressing the underlying causes of paint bubbling is crucial to ensure a lasting, beautiful finish.
This involves more than just patching; it requires a deep understanding of why the bubbling occurred in the first place. By implementing preventive measures, homeowners can save time, money, and effort in the long run.
Moisture Control
Proper moisture control is paramount for preventing paint bubbling. High humidity or water penetration can lead to moisture trapped beneath the paint, causing it to lift and blister. Addressing existing moisture issues, such as leaks or excessive humidity, is essential. Installing effective ventilation systems and using moisture-resistant paints can significantly reduce the risk of paint problems.
- Regularly inspect your home for signs of leaks. Even small leaks can cause significant moisture damage over time. This includes checking for leaks in pipes, roofs, and windows.
- Increase ventilation in areas prone to moisture buildup, such as bathrooms and kitchens. Use exhaust fans, dehumidifiers, or strategically placed vents to reduce humidity levels.
- Use moisture-resistant paints specifically formulated for high-humidity or exterior applications. These paints have ingredients that help resist moisture penetration and prevent the formation of blisters.
Surface Preparation
Proper surface preparation is another key aspect of preventing paint bubbling. A smooth, clean, and stable surface ensures optimal paint adhesion. This includes addressing imperfections, ensuring the wall is completely dry, and using appropriate primers.
- Thoroughly clean the wall surface to remove any dirt, dust, loose paint, or debris. Use appropriate cleaning solutions and techniques to effectively remove contaminants.
- Ensure the wall is completely dry before applying any paint or primer. Moisture trapped beneath the paint can lead to blistering and peeling.
- Use a suitable primer to fill in any holes, cracks, or imperfections. Primers create a uniform surface that promotes better paint adhesion.
Paint Selection
Choosing the right paint for your specific wall conditions is crucial. Different types of paint have varying levels of moisture resistance, durability, and adhesion. Consider the wall’s environment and the type of paint that is most appropriate.
- Select paints specifically designed for exterior use or high-moisture environments (like bathrooms or kitchens) if applicable. These paints are formulated to withstand the challenges posed by moisture and temperature fluctuations.
- Choose paints that are compatible with the existing wall surface and the surrounding environment. Consider the type of wall material (e.g., drywall, plaster, stucco) and the surrounding conditions.
- Refer to the manufacturer’s instructions and recommendations for proper application and drying times for optimal adhesion and to avoid potential issues.
Summary of Preventive Measures
| Cause | Preventive Measure |
|---|---|
| Moisture | Use moisture-resistant paint, improve ventilation, address leaks, use dehumidifiers, ensure proper drying times |
| Poor Surface Preparation | Thoroughly clean the surface, repair cracks and holes, use appropriate primer, ensure the surface is completely dry |
| Incorrect Paint Selection | Choose paints suitable for the specific wall conditions, consider exterior or high-moisture formulations, check compatibility |
| Improper Application | Follow manufacturer’s instructions, apply multiple thin coats, use appropriate tools, ensure adequate drying time between coats |
Conclusion: Paint Bubbling On Wall
In conclusion, dealing with bubbling paint on your walls doesn’t have to be a daunting task. By understanding the root causes, employing proper diagnostic techniques, and implementing effective repair strategies, you can restore your walls to their former glory. Remember, prevention is key, so we’ll also cover preventive measures to keep your walls looking their best and avoid future bubbling issues.
Hopefully, this guide provides you with the knowledge and tools to tackle this paint problem head-on.