


How to clean dryer? This isn’t just about a quick wipe-down; it’s about maintaining your appliance’s efficiency, longevity, and preventing potential hazards. A clean dryer not only saves energy but also helps avoid costly repairs and potentially dangerous situations, like fires. This guide takes you through the entire process, from cleaning the drum and vent to the housing, ensuring your dryer remains a reliable and safe part of your laundry routine.
This detailed guide breaks down the process into manageable steps, covering everything from the tools you’ll need to the safety precautions to take. We’ll tackle common dryer issues, and explore troubleshooting tips, so you can keep your dryer running smoothly for years to come.
Introduction to Dryer Cleaning
Keeping your clothes dryer clean is more than just a chore; it’s an investment in the longevity of your appliance and your overall comfort. A clean dryer operates more efficiently, saving you money on energy bills and extending its lifespan significantly. Neglecting regular maintenance can lead to a cascade of problems, from reduced drying performance to potential fire hazards.
This guide will equip you with the knowledge and tools to maintain a clean, efficient, and safe dryer.Regular dryer cleaning is crucial for maintaining optimal performance and preventing potential issues. Ignoring cleaning can result in a buildup of lint, dust, and debris, which can obstruct airflow, reduce drying capacity, and increase energy consumption. Over time, this accumulation can lead to overheating, causing potential fire hazards.
Keeping your dryer clean is crucial for efficiency and preventing fires. Regular cleaning, like removing lint and cleaning the lint trap, is essential. And just like a healthy lawn needs care, a well-maintained dryer needs attention too. Learning how to overseed a lawn, for example, requires careful preparation, just as a clean dryer requires meticulous care. Proper maintenance extends the life of your appliance, just as proper lawn care promotes healthy growth.
Remember, a clean dryer is a safe dryer. Refer to this guide for detailed instructions on how to overseed a lawn how to overseed a lawn to better understand the importance of meticulous care for things that need it.
Conversely, a well-maintained dryer operates smoothly, dries clothes effectively, and extends its useful life, leading to significant cost savings over time.
Importance of Dryer Cleaning
Regular dryer cleaning is vital for maintaining a safe and efficient appliance. The accumulation of lint and debris in a dryer can cause significant problems. These issues include reduced drying performance, increased energy consumption, and potential fire hazards.
Cleaning your dryer is essential for efficiency and preventing lint buildup. A clean dryer works better, and it’s a good idea to also declutter the front of your fridge, as it can significantly impact your kitchen’s overall cleanliness and organization. This, in turn, contributes to a more effective cleaning routine, which is a core part of dryer maintenance.
For more on the benefits of a clear fridge front, check out this helpful article: why you should declutter front of fridge. Finally, remember to regularly clean your dryer vents to ensure a safe and optimal drying experience.
Common Dryer Issues and Solutions
A clean dryer is a happy dryer. Addressing common issues related to dryer cleaning can keep your clothes dry and your home safe. The following table Artikels common problems, their causes, and solutions focusing on cleaning:
| Problem | Cause | Solution |
|---|---|---|
| Reduced drying capacity | Buildup of lint and debris obstructing airflow | Regularly clean the lint trap and the dryer vent. Consider a deep clean every few months, depending on usage. |
| Increased energy consumption | Insulation loss due to lint and debris buildup; reduced airflow | Clean the lint trap after each use and the dryer vent regularly. Consider checking the dryer vent for obstructions. |
| Overheating | Excessive lint buildup restricting airflow, causing dryer to work harder | Thoroughly clean the lint trap after each load. Clean the dryer vent and the inside of the dryer every few months. |
| Unpleasant odors | Accumulation of lint and debris, creating a breeding ground for bacteria and mold | Thoroughly clean the lint trap after each use. Clean the inside of the dryer and the vent regularly. Use dryer sheets with odor-absorbing properties or run a cycle with white vinegar to neutralize odors. |
Tools and Materials Needed
Cleaning your dryer isn’t rocket science, but having the right tools and materials makes the job easier and safer. Proper preparation is key to a thorough and efficient cleaning process. This section details the essential equipment and supplies you’ll need, from simple cleaning solutions to specialized tools.
Essential Tools
The tools you need for dryer cleaning are straightforward and generally readily available. Having the right tools ensures a safe and effective cleaning experience.
- Screwdrivers (Phillips and Flathead): These are crucial for removing panels and accessing internal components. Different types of screws might be used, so having both Phillips and flathead screwdrivers is essential. Be sure to check the screw types on your dryer model beforehand.
- Gloves: Protecting your hands from harsh cleaning solutions is paramount. Rubber or nitrile gloves will safeguard your skin from chemicals and prevent potential irritation.
- Cleaning cloths or sponges: Soft cloths or sponges are used for wiping down surfaces and collecting debris. Microfiber cloths are highly effective for picking up dust and grime, and can be reused multiple times.
- Vacuum cleaner (with attachments): Removing dust and lint from hard-to-reach areas, including vents and the interior of the dryer, is essential. A vacuum cleaner with crevice tools and upholstery attachments can make this task much easier.
- Utility knife or razor blade (optional): A utility knife or razor blade can be helpful for scraping away stubborn residue or cutting through tangled lint. Caution is crucial when using sharp objects, and this should be done with extreme care.
Cleaning Solutions
A variety of cleaning solutions can effectively clean your dryer. Choose the appropriate solution based on the type of dirt or grime present.
- Baking soda: Baking soda is a versatile cleaning agent, excellent for neutralizing odors and absorbing moisture. It can be used on its own or mixed with other cleaning solutions.
- White vinegar: Vinegar is a natural disinfectant and can help to remove mineral deposits and odors. It can also be used to clean the dryer vent.
- Mild dish soap: Dish soap is effective at cutting through grease and grime on external surfaces.
- Water: Water is essential for rinsing surfaces and diluting cleaning solutions.
Safety Precautions
Safety is paramount when using cleaning solutions. Proper precautions minimize the risk of injury or damage.
- Ventilation: Ensure adequate ventilation when using cleaning solutions to avoid inhaling harmful fumes. Open windows or use a fan to improve air circulation.
- Proper handling: Follow the instructions on the cleaning solution labels for proper use and disposal. Always dilute cleaning solutions as directed.
- Avoid contact: Protect your skin and eyes by wearing gloves and safety glasses when handling cleaning solutions. Avoid contact with eyes and skin.
- Electrical safety: Always unplug the dryer before starting any cleaning process to avoid electrical hazards.
- Child safety: Keep cleaning solutions out of reach of children. Store cleaning supplies safely and properly.
Materials Checklist
- Screwdrivers (Phillips and flathead)
- Cleaning cloths or sponges
- Gloves
- Vacuum cleaner (with attachments)
- Utility knife or razor blade (optional)
- Baking soda
- White vinegar
- Mild dish soap
- Water
- Safety glasses (optional, but recommended)
Tools and their Purposes
| Tool | Description |
|---|---|
| Screwdrivers (Phillips and Flathead) | Used for removing panels and accessing internal components. |
| Gloves | Protect hands from cleaning solutions. |
| Cleaning cloths/sponges | Wipe down surfaces and collect debris. |
| Vacuum cleaner (with attachments) | Remove dust and lint from hard-to-reach areas. |
| Utility knife/razor blade (optional) | Scrape away stubborn residue or cut through tangled lint. |
Cleaning the Dryer Drum
Keeping your dryer clean is crucial for optimal performance and preventing fire hazards. A clean drum ensures efficient drying, reduces the risk of clothes sticking together, and extends the life of your appliance. Proper drum cleaning is a vital part of a comprehensive dryer maintenance routine.The dryer drum, often the dirtiest part of the appliance, collects lint, fabric fibers, and other debris over time.
This buildup can hinder airflow, leading to uneven drying, longer drying times, and potentially damage to the dryer itself. Thorough cleaning is essential to restore proper function and prevent potential issues.
Drum Cleaning Methods
Various cleaning methods cater to different drum materials and the level of soiling. Understanding these methods will allow you to choose the most effective approach for your dryer. A manual approach may suffice for light soiling, but more substantial buildup might require a mechanical method.
Manual Cleaning Procedures
Manual cleaning methods are suitable for light to moderate soiling. They typically involve using a soft brush or cloth to remove loose lint and debris. A mixture of warm water and mild detergent can help loosen stubborn particles.
- First, unplug the dryer and ensure the drum is cool to the touch.
- Next, carefully inspect the drum interior for any significant buildup of lint or debris.
- Using a soft-bristled brush or a damp cloth, gently remove loose lint and particles.
- For stubborn stains or debris, create a mild solution of warm water and a few drops of dish soap.
- Using a clean, damp cloth or sponge, apply the solution to the affected areas and gently scrub.
- Rinse thoroughly with clean water and dry the drum completely with a clean towel.
Mechanical Drum Cleaning
Mechanical cleaning methods, such as using a dryer cleaning tool, are often necessary for heavy soiling or when manual cleaning is ineffective. These tools often have rotating brushes or other mechanisms to dislodge debris.
- Always unplug the dryer before starting any mechanical cleaning.
- Use a suitable dryer cleaning tool designed for drum cleaning.
- Follow the manufacturer’s instructions for using the tool carefully. These often involve rotating the tool in a specific pattern within the drum.
- Pay close attention to the tool’s operating instructions, particularly concerning its speed and duration.
- After using the tool, clean the drum thoroughly with a damp cloth and rinse.
- Allow the drum to dry completely before plugging the dryer back in.
Drum Material Considerations
The material of your dryer drum will influence the best cleaning approach. Stainless steel drums are generally easier to clean than drums made from other materials.
| Drum Material | Cleaning Method |
|---|---|
| Stainless Steel | Manual or mechanical cleaning methods are generally suitable. Mild detergents and warm water can be used. |
| Other Materials | Consult the manufacturer’s recommendations for specific cleaning instructions. Manual cleaning is often preferred, avoiding harsh chemicals or abrasive materials. |
Safe Access to the Drum
Safe access to the dryer drum is crucial. Ensure the dryer is unplugged before attempting any cleaning procedure. Carefully inspect the drum interior for any potential hazards or obstructions before beginning the cleaning process.
Cleaning the Dryer Vent
Keeping your dryer running smoothly and efficiently relies heavily on a clean vent system. A clogged dryer vent can lead to a number of problems, from decreased drying performance to fire hazards. This section will guide you through the essential steps for cleaning your dryer vent, ensuring your appliance operates safely and effectively.The dryer vent is a crucial component of your dryer, responsible for expelling hot air and moisture from the machine.
Over time, lint, dust, and debris can accumulate in the vent, obstructing airflow and causing a multitude of issues. Regular cleaning is vital to maintain optimal dryer performance and prevent potential dangers.
Importance of Dryer Vent Cleaning
A clean dryer vent is paramount for both safety and efficiency. Clogged vents restrict airflow, leading to longer drying times and increased energy consumption. Furthermore, the buildup of lint and debris creates a significant fire hazard. Hot air trapped within the vent system can ignite flammable materials, potentially causing a devastating fire. Regular cleaning minimizes this risk, safeguarding your home and belongings.
Accessing and Cleaning the Dryer Vent
To effectively clean your dryer vent, you first need to access it. The access point often varies depending on the dryer model, but it usually involves disconnecting the vent hose from the dryer and accessing the vent system’s interior. Locate the vent hose’s connection point and disconnect it carefully. Ensure you have the proper tools and follow the manufacturer’s instructions to avoid any damage to your appliance.
This often requires removing the back panel of the dryer or a similar accessible part.
Potential Hazards of a Clogged Dryer Vent
A clogged dryer vent poses several significant risks. The most critical concern is fire. The accumulation of lint and debris can create a pathway for ignition, resulting in a fire that can quickly spread throughout the home. Beyond fire hazards, a clogged vent also negatively impacts the dryer’s performance. Longer drying times, increased energy consumption, and uneven drying results are common consequences.
Frequency of Vent Cleaning
Regular cleaning is crucial for maintaining a safe and efficient dryer. The recommended frequency depends on the usage of your dryer and the surrounding environment. In homes with frequent dryer use, or those in dusty or dry climates, cleaning the vent system should be done at least every 6 months. Checking the vent periodically is always a good idea.
This preventive maintenance can significantly reduce the risk of dryer fires and other problems.
Steps to Clean the Vent System
This section details a comprehensive approach to cleaning the dryer vent system.
- Disassembly: Carefully disconnect the vent hose from the dryer and any other connections. Ensure you have the proper tools to do this safely and efficiently. Take detailed notes of the connections for reassembly.
- External Vent Cleaning: Inspect the external vent pipes for blockages and remove any lint or debris. Use a brush or vacuum to thoroughly clean the exterior.
- Internal Vent Cleaning: Use a brush or vacuum to clean the interior vent pipes. If the pipes are accessible, you can reach in and manually clean them. If not, use a long brush or vacuum attachment. Inspect the entire length of the vent pipe, including any elbows or turns.
- Inspection and Removal of Blockages: Thoroughly inspect the vent system for any blockages, such as lint accumulation or foreign objects. If any blockages are present, carefully remove them using tools like tongs or pliers.
- Reassembly: Reconnect the vent hose to the dryer, ensuring a secure connection. Reconnect all other parts to the system in the exact order they were removed. Double-check all connections to avoid any leaks.
Identifying and Addressing Common Vent Issues
Identifying common vent issues is critical for maintaining dryer safety and efficiency. Common problems include lint buildup, foreign objects lodged in the vent, or a kink in the vent hose. These issues can cause reduced airflow, resulting in longer drying times, higher energy consumption, and potentially dangerous fire risks. Always consult your dryer’s manual for specific instructions and recommendations.
Inspecting the vent for kinks and blockages and cleaning them will solve most issues.
Cleaning the Dryer Housing
Keeping your dryer looking its best is crucial for maintaining its performance and extending its lifespan. A clean exterior not only improves the aesthetic appeal of your laundry room but also helps prevent the buildup of dust, lint, and other debris that can affect the dryer’s efficiency. This section details the steps to effectively clean your dryer’s housing, considering various materials and components.Proper cleaning of the dryer housing is important to prevent the accumulation of lint, dust, and other debris, which can impact the dryer’s performance and lifespan.
Addressing these issues promptly through routine cleaning can help maintain a clean and efficient appliance.
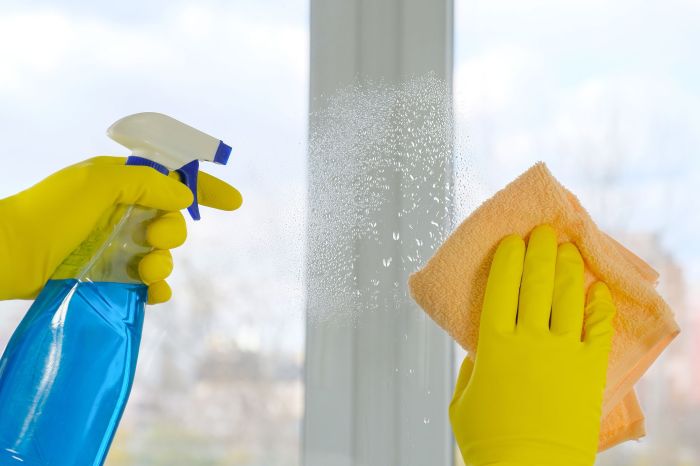
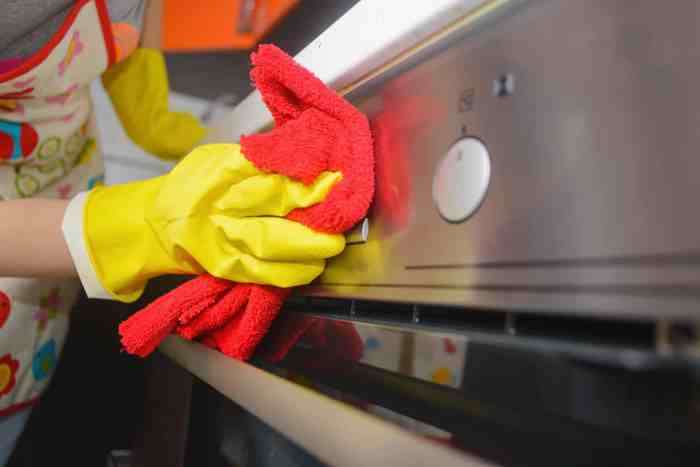
Cleaning the Dryer Exterior
Cleaning the dryer’s exterior involves removing dust, dirt, and any accumulated grime. The approach depends on the material of the dryer housing. Different materials require different cleaning solutions and techniques to avoid damage.
Keeping your dryer clean is crucial for efficiency and safety, but did you know that similar principles apply to preparing your plants for winter? Just like a clean dryer vent, you need to ensure your plants are properly cared for to thrive through the colder months. Consider researching how to overwinter plants how to overwinter plants to avoid damage.
A well-maintained dryer is a happy dryer, and that’s a great start to a smooth winter.
Cleaning Procedures for Different Housing Materials
- Stainless Steel: Stainless steel dryer housings are popular for their durability and easy-to-clean surface. Use a mild dish soap solution mixed with warm water. Apply the solution with a soft cloth or sponge, avoiding abrasive cleaners. Wipe the surface clean and dry thoroughly to prevent water spots.
- Painted Metal: Painted metal housings can be cleaned with a solution of mild dish soap and warm water. A soft cloth or sponge should be used to avoid scratching the paint. Ensure the surface is thoroughly dried to prevent rust or damage. For stubborn stains, consider a specialized paint cleaner, but always test it in an inconspicuous area first.
- Plastic: Plastic dryer housings are relatively easy to clean. Use a mild detergent and warm water solution. Avoid harsh chemicals that might damage the plastic surface. Use a soft cloth or sponge and wipe clean. Thoroughly dry the surface.
Cleaning Dryer Exterior Components
- Control Panel: The control panel often has buttons, knobs, or touchscreens. Carefully clean the control panel using a soft, damp cloth. Avoid using excessive water or harsh chemicals, as they can damage the electrical components. Use a microfiber cloth to dry thoroughly and remove any lingering moisture.
- Doors and Hinges: The dryer door and hinges can accumulate dust and debris. Use a damp cloth with a mild detergent solution to clean the door and hinge areas. Wipe the surfaces clean and dry them thoroughly.
- Ventilation Grilles: Inspect and clean the ventilation grilles around the dryer. Remove any visible lint or debris. A soft brush or vacuum attachment can be useful for this task.
Best Approach for Cleaning Exterior Surfaces
The best approach to cleaning your dryer’s exterior surfaces involves a combination of appropriate cleaning solutions and tools. Use a soft cloth or sponge, avoid abrasive materials. Use a mild detergent solution for most surfaces. Always test any cleaning solution in an inconspicuous area first to prevent unexpected damage.
Suitable Cleaning Solutions
- Mild Dish Soap and Warm Water: This is a versatile solution suitable for most dryer housing materials, including stainless steel, painted metal, and plastic.
- Specialized Paint Cleaners (for Painted Metal): For stubborn stains or marks on painted metal, use a specialized paint cleaner. Test in a hidden area first.
- Glass Cleaner (for Glass Components): Use glass cleaner on glass components, like tempered glass doors, to avoid streaks or residue. Apply and wipe with a microfiber cloth.
Proper Cleaning Procedure
Begin by unplugging the dryer. Wipe down the exterior surfaces with a soft cloth dampened with a mild detergent solution. Focus on removing any visible dirt, dust, or lint. Clean the control panel gently with a soft, damp cloth. Dry all surfaces thoroughly to prevent water spots or damage.
Ensure that the dryer is completely dry before plugging it back in.
Preventing Future Dryer Issues

Keeping your dryer running smoothly and efficiently depends significantly on regular maintenance and cleaning. Ignoring these aspects can lead to costly repairs and potential safety hazards. This section dives into strategies for preventing future issues, emphasizing the importance of proactive care.Proper dryer maintenance is more than just a good habit; it’s an investment in the longevity of your appliance.
A well-maintained dryer operates more reliably, uses less energy, and reduces the risk of breakdowns.
Regular Maintenance Schedule
Regular cleaning and maintenance are crucial for preventing future problems. A consistent schedule, much like a car’s scheduled servicing, ensures your dryer continues to function optimally. This includes routine checks and cleaning tasks.
- Inspect the dryer vent for blockages at least every three months. This is critical to avoid overheating and potential fires. Regular inspections can detect clogs early on, preventing damage.
- Clean the lint filter after each use. A clogged filter forces the dryer to work harder, increasing energy consumption and potentially causing overheating.
- Clean the dryer drum and housing at least twice a year. This helps prevent the buildup of lint and debris that can impede performance and create fire hazards.
- Check the dryer belt and other moving parts annually. Regular checks allow you to address issues early, avoiding major breakdowns.
Common Causes of Dryer Problems
Understanding the typical causes of dryer issues allows you to take preventive measures. Identifying these problems early can significantly extend the lifespan of your dryer.
- Overloading: Overloading the dryer can strain the motor and heating elements, potentially leading to malfunctions and reduced lifespan. Proper loading limits are crucial for efficiency and longevity.
- Clogged Vent System: A clogged vent system is a common cause of dryer issues. Lint buildup restricts airflow, leading to overheating, decreased drying time, and even fire hazards. Regular cleaning is crucial to maintain proper airflow.
- Inadequate Ventilation: Insufficient ventilation around the dryer can cause overheating and potential damage. Ensure proper ventilation space is maintained.
- Faulty Belt: A worn-out or damaged belt can lead to significant malfunctions and potential breakdowns. Regular inspection and replacement of the belt, if needed, is important for smooth operation.
Preventive Measures for Cleaning-Related Issues
Implementing proactive cleaning practices can prevent dryer issues related to buildup and neglect.
- Regular Lint Removal: Regular lint removal from the filter and vent is a crucial preventative measure. This simple step can prevent significant issues.
- Proper Dryer Loading: Ensure proper dryer loading to prevent over-straining the machine. Avoid overloading to ensure optimal drying performance and extend the dryer’s life.
- Vent Cleaning Frequency: The frequency of vent cleaning should depend on usage. Heavily used dryers might require more frequent cleaning to prevent clogs.
- Avoiding Foreign Objects: Ensure that no foreign objects, like small toys or debris, are present in the dryer drum. This will prevent malfunctions and potential damage.
Best Practices for Dryer Care and Maintenance
Following these best practices ensures your dryer functions optimally and lasts longer.
- Check the Dryer’s Manual: Refer to your dryer’s manual for specific maintenance instructions. The manual often provides detailed information regarding specific maintenance steps for your model.
- Use Appropriate Dryer Sheets: Using appropriate dryer sheets is essential for avoiding damage to the machine’s components. Check the product labels to ensure they are suitable for your dryer type.
- Maintain Proper Ventilation: Ensure adequate ventilation around the dryer to prevent overheating. Poor ventilation can lead to damage.
- Keep Dryer Clean: Maintain a clean environment around the dryer to prevent debris from entering the drum or vent.
Prolonging Dryer Lifespan Through Cleaning, How to clean dryer
Proper cleaning is directly correlated with the lifespan of your dryer. By consistently following a maintenance schedule and cleaning procedures, you can significantly prolong its operational life. This not only saves money but also reduces environmental impact by delaying the need for replacements.
Troubleshooting Common Dryer Problems: How To Clean Dryer
Keeping your clothes dry and your laundry room functional relies on a well-maintained dryer. Understanding common dryer issues and their solutions empowers you to address problems promptly, saving you time and money. This section will equip you with the knowledge to troubleshoot and repair common dryer malfunctions.Troubleshooting dryer problems involves a systematic approach. Identifying the problem, understanding potential causes, and applying the appropriate solutions are crucial for efficient repairs.
By following these steps, you can ensure your dryer operates reliably and efficiently.
Identifying Common Dryer Issues
Common dryer problems range from simple malfunctions to more complex issues. Recognizing these problems early can save you time and money in the long run. Knowing the signs of these issues allows for timely intervention.
- Clothes not drying properly: This is a frequently encountered issue, which may stem from various factors like inadequate airflow, clogged vents, or a malfunctioning heating element. Often, the clothes are left damp and require multiple drying cycles.
- Dryer not heating: A lack of heat output can indicate a problem with the heating element, a faulty thermostat, or a tripped circuit breaker. This issue often results in extended drying times and damp clothing.
- Dryer making unusual noises: Unusual noises, such as grinding, clicking, or rattling, can indicate issues with the drum, belt, or other moving parts. These noises often precede more serious malfunctions if not addressed.
- Dryer not turning on: A dryer that refuses to turn on might indicate a tripped circuit breaker, a faulty control panel, or a problem with the power cord or plug. Checking the power source is often the first step in troubleshooting.
- Dryer overflowing with lint: Excessive lint accumulation within the dryer drum can impede proper airflow and result in uneven drying or a complete lack of drying. This frequently occurs due to infrequent cleaning of the lint trap and dryer vent.
Potential Causes of Dryer Problems
A thorough understanding of potential causes is vital for effective troubleshooting. Pinpointing the root cause often leads to the appropriate solution.
- Clogged lint trap: A clogged lint trap is a common cause of improper drying, uneven heating, and potential fire hazards. This is a straightforward issue easily resolved.
- Clogged dryer vent: A clogged vent restricts airflow, leading to inefficient drying and potential overheating. This requires cleaning the vent system, often a more extensive task.
- Faulty heating element: A faulty heating element prevents the dryer from reaching the desired temperature, resulting in insufficient drying. This often requires professional repair.
- Electrical issues: Electrical problems, such as a tripped circuit breaker or a faulty wiring connection, can prevent the dryer from operating correctly. Checking the electrical system is often the first step in troubleshooting.
- Malfunctioning control panel: A malfunctioning control panel can prevent the dryer from functioning properly. This requires expert diagnosis and repair.
Troubleshooting Solutions
Implementing the correct solutions for each issue is critical for efficient repair. The right solution minimizes the time to restore the dryer’s functionality.
| Problem | Cause | Solution |
|---|---|---|
| Clothes not drying properly | Clogged lint trap, vent, or heating element | Clean lint trap, clean dryer vent, check heating element, ensure proper airflow. |
| Dryer not heating | Faulty heating element, thermostat, or tripped circuit breaker | Check circuit breaker, replace heating element if necessary, check thermostat. |
| Dryer making unusual noises | Loose or damaged parts (drum, belt, etc.) | Tighten loose parts, lubricate moving parts, check for damaged parts. |
| Dryer not turning on | Tripped circuit breaker, faulty control panel, or electrical issue | Check circuit breaker, reset control panel, check electrical connections. |
| Dryer overflowing with lint | Infrequent cleaning of lint trap or vent | Regularly clean lint trap, clean dryer vent. |
Troubleshooting Flowchart
A flowchart provides a visual guide for troubleshooting dryer problems. This helps users systematically diagnose and resolve issues.[Imagine a flowchart here, illustrating steps from identifying the problem to finding the solution. The flowchart should include branches for different problems, such as “Dryer not turning on,” “Dryer not heating,” “Clothes not drying properly,” and so on. Each branch would lead to specific checks and actions.]
Closure
Maintaining a clean dryer is a crucial aspect of home appliance upkeep. By following the steps Artikeld in this guide, you can significantly extend your dryer’s lifespan and ensure its safe and efficient operation. From cleaning the drum to the vent and housing, a well-maintained dryer is a valuable asset. This comprehensive guide will empower you to tackle any dryer cleaning task with confidence, leading to a cleaner, more efficient laundry room.