


When to cut back phlox is a crucial gardening decision, impacting the health and beauty of your phlox plants. This guide delves into the optimal timing for trimming your phlox, considering factors like local climate, growth cycle, and specific phlox varieties. We’ll explore the signs of overgrowth, methods for a successful cutback, and post-cutback care, ensuring your phlox thrives for years to come.
Understanding phlox growth habits is key to knowing when to cut back. Different types of phlox, from annual to perennial varieties, have varying blooming periods and growth rates. This article provides detailed descriptions of common phlox types, highlighting their expected growth duration and mature size. We’ll also show you how to identify overgrowth, offering clear examples and a table contrasting healthy phlox with signs of potential issues.
Understanding Phlox Growth Habits
Phlox, a beloved garden flower, comes in a surprising variety of types, each with its own unique growth characteristics. Understanding these differences is key to successful cultivation, enabling gardeners to choose the right phlox for their space and ensure healthy, vibrant blooms year after year. This exploration will delve into the distinct growth patterns, lifecycles, and expected mature sizes of various phlox types.Phlox display a range of growth habits, from the rapid growth of annual varieties to the more enduring nature of perennials.
The blooming periods, growth duration, and mature size of each type are significantly impacted by these differences in growth patterns. Understanding these variations empowers gardeners to select the phlox that best suits their needs and garden environment.
Types of Phlox and Their Growth Patterns
Different phlox types exhibit diverse growth patterns and lifecycles, influencing their blooming seasons and overall lifespan. Annual phlox, for instance, complete their life cycle within a single growing season, producing vibrant blooms and then dying back. Perennial phlox, conversely, live for multiple years, establishing themselves in the garden and returning with beautiful displays of flowers each season. Understanding these distinctions is essential for appropriate plant selection.
Annual Phlox Growth
Annual phlox typically exhibit rapid growth, reaching maturity within a single growing season. They often flower profusely during the summer months, offering a burst of color to the garden. These varieties are excellent choices for filling in empty spaces or adding a pop of color to flower beds.
Perennial Phlox Growth
Perennial phlox, on the other hand, display a more gradual growth pattern. These plants establish themselves over several years, producing flowers each growing season and becoming increasingly robust with age. They are often chosen for their long-lasting beauty and ability to provide a consistent display of color throughout the garden.
Blooming Periods and Expected Growth Duration
The blooming periods of phlox vary depending on the specific variety. Annual phlox typically bloom throughout the summer, whereas perennial varieties may bloom from spring through fall. The expected growth duration for annual phlox is limited to a single growing season, while perennial phlox can live for several years, with consistent bloomings. This difference is critical in selecting the right phlox for specific gardening goals.
Growth Rate Comparison
Annual phlox varieties generally have a much faster growth rate compared to their perennial counterparts. This rapid growth enables them to quickly fill garden spaces with color, making them ideal for quick beautification. Perennial phlox, however, often have a slower growth rate, developing a stronger root system and establishing themselves over several seasons.
Mature Size and Spread
The mature size and spread of phlox depend on the specific variety. Annual phlox generally mature to a smaller size, whereas perennial phlox can spread out and grow to a considerable size over time. This information is crucial for planning garden layouts and ensuring adequate space for the selected phlox.
Identifying Signs of Overgrowth

Phlox, with their vibrant blooms, are a delightful addition to any garden. However, like all plants, they can suffer from overgrowth if not properly managed. Recognizing the signs of overgrowth is crucial for maintaining their health and ensuring a spectacular display of flowers. Understanding these indicators will allow you to intervene proactively and prevent more serious issues.Overgrown phlox can lose their visual appeal and, more importantly, their vitality.
The following sections will guide you in identifying signs of overgrowth, from physical characteristics to impacts on their overall health. This knowledge is essential for maintaining your phlox in optimal condition, encouraging healthy growth, and maximizing their flowering potential.
Signs of Overgrown Stems
Overgrown phlox often exhibit weak stems that struggle to support the plant’s weight. These stems may lean or become tangled, compromising the plant’s structure. A healthy phlox displays strong, upright stems that can support the weight of foliage and blooms. This structural integrity is essential for the plant to thrive and withstand environmental stresses. Overgrown stems are more susceptible to breakage or damage from wind and rain.
Signs of Overgrown Leaves
Changes in leaf health can also indicate overgrowth. Healthy phlox boast vibrant green foliage. Conversely, overgrown phlox might show signs of yellowing, browning, or sparse leaf coverage. This reduced leaf density can impact the plant’s ability to photosynthesize, impacting overall health and flowering potential. Healthy leaf density is essential for sufficient photosynthesis.
Signs of Overgrown Flowers
Overcrowding directly impacts the flowering of phlox. Healthy plants display abundant blooms with vibrant colors. Conversely, overgrown phlox often exhibit fewer blooms or smaller flowers. This reduction in flowering can be a direct consequence of the plant’s struggle to allocate resources to support its increased size. The reduced flowering impacts the visual appeal of the plant and can signal a need for corrective action.
Signs of Stress or Decline
Besides the physical signs of overgrowth, look for signs of stress or decline. These signs might include a general lack of vigor, reduced growth rate, or unusual discoloration. These signs can be indicative of an underlying problem, such as nutrient deficiency, disease, or pest infestation. A thorough inspection can help pinpoint the exact cause of the issue.
Comparison Table: Healthy vs. Overgrown Phlox
| Feature | Healthy Phlox | Overgrown Phlox |
|---|---|---|
| Stems | Strong, upright | Weak, leaning, or tangled |
| Leaves | Vibrant green | Yellowing, browning, or sparse |
| Flowers | Abundant blooms | Fewer blooms, smaller flowers |
| Overall Appearance | Lush, full | Sparse, weak |
Timing the Cutback
Phlox, with their vibrant blooms and relatively easy care, reward diligent gardeners with beautiful displays. A crucial aspect of phlox care is knowing when to prune or cut them back. This timing directly impacts the plant’s health and subsequent flowering. Proper timing ensures the plant is rejuvenated and ready for the next growing season.Knowing the optimal time for cutting back phlox allows gardeners to maximize the plant’s health and encourage robust flowering in the coming seasons.
This is especially important for those living in climates with distinct growing seasons. This section will focus on the ideal timing for cutbacks, considering local climate and weather patterns, and the specific impact of spring versus fall cutbacks.
Optimal Cutback Periods
Understanding the best time to cut back phlox is essential for successful gardening. The timing is dictated by the plant’s growth cycle and your specific local climate. Choosing the right time ensures that the plant can heal and recover from the cutback, and not be exposed to harsh weather conditions.
- Local Climate Considerations: Consider your local climate zone when determining the best time for a cutback. Areas with harsh winters or extremely hot summers may necessitate different approaches compared to milder climates. For example, in areas with early frosts, fall cutbacks might be a better option to avoid damage.
- Timing Based on Growth Cycle: Phlox typically goes through a growth cycle influenced by the seasons. A crucial aspect of understanding this cycle is knowing when the plant is actively growing and when it’s entering a dormant period. Cutting back during active growth can lead to faster recovery and better flowering in the future. Conversely, cutting back during dormancy may not have as significant an impact, but it might be safer if harsh weather is imminent.
- Avoiding Frost and Extreme Heat: Avoid cutting back phlox when frost or extreme heat is predicted. Frost can damage the newly exposed stems, while extreme heat can stress the plant and make it more vulnerable to disease. The goal is to minimize any negative impacts on the plant.
Spring versus Fall Cutbacks, When to cut back phlox
The timing of the cutback can affect the plant’s subsequent growth and flowering. Understanding the impact of a spring cutback versus a fall cutback is crucial for optimizing your phlox’s health.
- Spring Cutbacks: Cutting back phlox in spring typically results in more immediate growth. This can be advantageous for plants that were damaged during winter. However, if the spring is unusually cold or rainy, this could delay growth. Early spring is best, as it allows the plant to recover before the heat of summer. This early intervention gives the plant time to establish new growth before the hottest part of summer.
- Fall Cutbacks: Fall cutbacks allow the plant to put energy into root development before the winter. This can lead to a stronger plant that is better equipped to handle the stresses of the next growing season. However, it’s important to avoid cutting back too late in the fall, as this may delay the plant’s recovery and make it more susceptible to winter damage.
Fall cutbacks are ideal for preparing the plant for winter dormancy. In regions with harsh winters, fall cutbacks are often the preferred choice.
Example Cutback Timeline (Zone 6)
A Zone 6 example highlights the impact of timing. In this zone, fall cutbacks are generally preferred. A good fall cutback timeframe would be mid-October to early November. Spring cutbacks are viable in early spring (April or May), providing the plant with time to recover from winter before the heat of summer arrives.
Phlox trimming is best done after the first frost, allowing the plant to recover before winter. Knowing when to cut back phlox is important for their health, but did you know that just because something is dishwasher safe doesn’t automatically mean it’s microwave safe? For more on this fascinating question, check out this helpful guide on does dishwasher safe mean microwave safe.
Ideally, you should cut back phlox just as the new growth starts emerging in the spring to promote healthy blooming later in the season.
Methods for Cutting Back Phlox
Phlox, with their vibrant blooms, can quickly become overgrown if not maintained. Proper cutting back is crucial for promoting healthy growth and preventing the plant from becoming unruly. Understanding the different methods available and selecting the right tools can significantly impact the success of your cutback.Effective pruning techniques, whether using sharp shears or a hedge trimmer, encourage new growth and maintain the desired shape and size of your phlox.
Choosing the Right Tools
Selecting the right tools is essential for a successful and safe phlox cutback. The type of tool you use depends on the size and shape of the phlox, and your personal preference. Different tools offer various levels of precision and control.
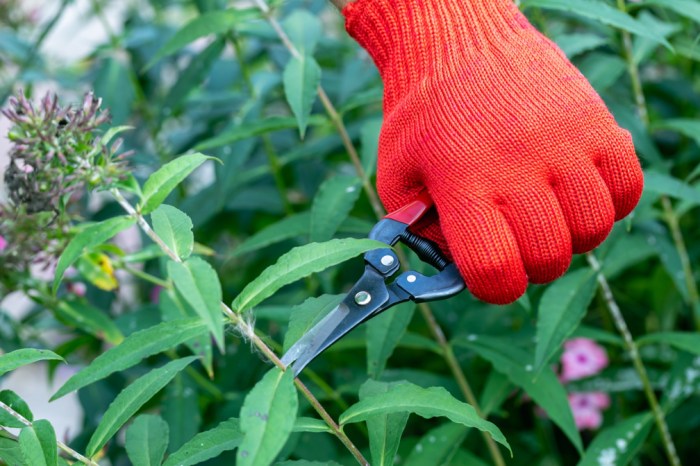
- Hand Pruners (or Secateurs): These are excellent for precise cuts on individual stems and branches, especially for smaller phlox plants or areas where a hedge trimmer might be too large or cumbersome. They provide excellent control for delicate work and are crucial for intricate shaping.
- Hedge Trimmers: For larger phlox bushes or those needing a more uniform shape, hedge trimmers are ideal. These tools are particularly useful for maintaining the overall size and shape of your phlox. Consider the size and type of hedge trimmer to match the size of your plant.
- Loppers: For thicker stems or branches that hand pruners can’t easily handle, loppers provide the necessary leverage. These are great for cutting back larger stems, often found in older or more mature phlox plants. Choose loppers with blades sharp enough to avoid damaging the stem and ensure clean cuts.
Step-by-Step Cutback Procedure
A systematic approach to cutting back phlox ensures a clean and healthy plant. This detailed procedure is critical for achieving optimal results.
- Assess the plant: Before beginning, carefully examine the phlox plant to identify areas that need pruning. Look for dead, diseased, or crossing branches. Also, assess the overall size and shape of the plant to determine how much you need to cut back.
- Gather your tools: Ensure you have the appropriate tools for the job, including hand pruners, hedge trimmers, or loppers, depending on the size of the plant. Sharpen the blades of your tools before beginning to maintain precision.
- Cut at the appropriate node: When pruning, always cut just above a healthy, outward-facing bud or node. This promotes new growth and prevents the formation of stubs, which can invite disease. Make clean, angled cuts to encourage rapid healing.
- Remove dead or diseased wood: Thoroughly inspect the phlox for any dead or diseased stems. Remove these stems completely, ensuring the entire diseased portion is removed. This prevents the spread of disease to the healthy plant.
- Shape the plant (optional): Depending on your preference, you can reshape the plant to maintain a specific form. This may involve trimming stems to maintain a certain height or spread. Avoid overly aggressive shaping, as it can stress the plant.
- Clean your tools: After completing the cutback, clean your tools thoroughly with a disinfectant solution to prevent the spread of diseases. This step is crucial for maintaining the health of future phlox plants.
Safety Precautions
Safe pruning practices minimize risks and maximize results. Adhering to these precautions is essential for both the health of your phlox and your well-being.
- Wear appropriate safety gear: Wear gloves to protect your hands and eye protection to shield your eyes from flying debris. This is crucial to prevent injury during the cutback process.
- Inspect tools: Before starting, inspect your tools to ensure they are in good working order. Damaged tools can cause injuries and reduce the precision of your cuts.
- Use caution when using hedge trimmers: Hedge trimmers can be hazardous. Use caution when operating them, especially around other plants and individuals.
- Take breaks: Maintain a safe working posture and take regular breaks to avoid fatigue and potential injuries. Rest periods are vital to prevent accidents.
Post-Cutback Care

Giving your phlox the best possible care after a cutback is crucial for a healthy and vibrant display next season. Proper watering, fertilization, and soil preparation will ensure your phlox recovers quickly and thrives. This stage sets the foundation for a beautiful and robust bloom.
Importance of Watering
Adequate watering after a cutback is vital for the phlox’s recovery. The cutback process removes the plant’s above-ground foliage, impacting its ability to absorb water from the environment. The roots, while still actively growing, require consistent moisture to support new growth and replenish the moisture lost during the cutback. Without adequate water, the plant may struggle to regrow, leading to stress and potential damage.
Watering Schedule
The frequency of watering depends on various factors, including the type of phlox, local climate, and soil conditions. For example, in hot, dry climates, you may need to water daily, especially during the first few weeks. Observe the soil; if it feels dry to the touch a few inches below the surface, it’s time to water. Ensure the water penetrates deeply to reach the roots.
So, when is the best time to trim back your phlox? Ideally, you should prune them after they’ve finished flowering. While you’re at it, consider how to keep your kitchenware gleaming. Learning how to clean a Dutch oven so it looks like new here can be a rewarding experience, and this fresh start will give your phlox a great head start for next season.
Cutting them back now will encourage a strong and healthy bloom next spring!
Fertilizing Practices
Proper fertilization is essential to stimulate new growth and enhance the overall health of your phlox. After the cutback, a balanced, slow-release fertilizer provides the necessary nutrients for healthy root development and subsequent flowering. Applying a fertilizer rich in phosphorus will encourage robust root growth, which is crucial for a strong and healthy plant. A general recommendation is to apply a slow-release fertilizer formulated for flowering plants, at the recommended rate as indicated on the product label.
Follow the manufacturer’s instructions carefully.
So, when’s the best time to prune those lovely phlox blooms? Generally, you want to cut them back after they’ve finished flowering. But, if you’re dealing with a stubborn wax spill on your carpet, you might need to prioritize a different task first, like figuring out how to get candle wax out of carpet. This helpful guide will walk you through the process.
Once that’s taken care of, you can confidently trim your phlox for a fresh start next spring.
Soil Preparation
Preparing the soil around the cutback phlox is important for optimal growth. Remove any dead or decaying plant material from the immediate vicinity of the roots. Loosen the soil around the base of the plant to allow for better water and nutrient absorption. Adding a layer of compost or well-rotted manure will enhance the soil’s fertility and drainage, promoting healthy root growth.
A well-prepared soil bed will provide the phlox with the optimal environment for new growth.
Mulch Application
Mulch plays a vital role in maintaining moisture and promoting healthy growth. Applying a layer of mulch around the base of the phlox helps retain moisture in the soil, reducing the frequency of watering. This is particularly beneficial in hot and dry climates. Furthermore, mulch helps suppress weeds, preventing competition for nutrients and water. A 2-3 inch layer of mulch is generally sufficient, ensuring the base of the plant is well-covered.
Examples of suitable mulch materials include wood chips, shredded bark, or straw.
Specific Considerations for Different Phlox Types
Phlox, with their vibrant blooms and varied growth habits, offer a diverse range of choices for gardeners. Understanding the specific needs of different phlox types, especially regarding pruning, is crucial for maintaining healthy and beautiful plants. Knowing whether a phlox is annual or perennial significantly impacts its care, including the timing and extent of its pruning.Different phlox varieties have varying responses to pruning.
Some benefit from aggressive pruning, while others thrive with a lighter touch. This section will delve into the specific pruning requirements for various phlox types, highlighting the distinctions between annual and perennial varieties and providing practical examples.
Annual Phlox Pruning
Annual phlox, often boasting a spectacular display of color, complete their life cycle within a single growing season. Their rapid growth and short lifespan necessitate a different approach to pruning compared to perennials. Generally, annual phlox benefit from light deadheading to encourage continuous blooming. Removing spent flowers allows the plant to channel its energy into producing more blooms, maximizing the enjoyment of their short season.
Avoid severe pruning as this can stress the plant and potentially reduce its flowering ability.
Perennial Phlox Pruning
Perennial phlox, with their ability to return year after year, require a more strategic approach to pruning. Perennial phlox benefit from regular deadheading, removing spent blooms to promote more flowers and prevent the plant from putting energy into seed production. A significant cutback, often a substantial portion of the plant, is usually performed in late winter or early spring.
This rejuvenation encourages robust growth and prevents overcrowding.
Comparing Annual and Perennial Phlox Pruning
| Characteristic | Annual Phlox | Perennial Phlox |
|---|---|---|
| Life Cycle | One growing season | Multiple growing seasons |
| Pruning Frequency | Light deadheading throughout the season | Deadheading throughout the season, major cutback in late winter/early spring |
| Pruning Goal | Encourage continuous flowering | Encourage vigorous growth and prevent overcrowding |
| Pruning Severity | Minimal | Moderate to significant |
Specific Examples and Procedures
- Trailing or groundcover phlox: These types of phlox often benefit from a more aggressive approach to pruning, including cutting back stems to the ground in late winter or early spring. This encourages bushier growth and more extensive coverage.
- Moss phlox: These low-growing phlox varieties benefit from minimal pruning. Occasional deadheading of spent flowers is sufficient to maintain their health and beauty. Severe pruning is not recommended, as it could damage the plant.
- Creeping phlox: Similar to moss phlox, these varieties need minimal pruning, primarily focused on deadheading spent flowers. The goal is to maintain their compact and spreading growth habit.
- Common Garden Phlox: These tall varieties require a more substantial cutback in the late winter or early spring. Cutting back stems to about 6 inches above the ground promotes strong new growth and prevents overcrowding.
Troubleshooting Cutback Issues: When To Cut Back Phlox
Giving your phlox a sharp trim can be a game-changer for its health and vigor, but sometimes, things don’t go exactly as planned. Understanding potential problems that may arise after a cutback is crucial for ensuring your phlox thrives. This section delves into common issues, their identification, and preventative measures to keep your phlox blooming beautifully.Post-cutback, phlox can be vulnerable to various issues, especially if the cutback is not performed correctly or if the plant is already stressed.
Proper care after the cutback is essential to mitigate risks and encourage healthy regrowth.
Potential Fungal Infections
Fungal diseases are a common concern after a cutback, particularly if the pruning wounds are not properly sealed. These infections can manifest as spots, discoloration, or soft rot on the stems or leaves. Damp, humid conditions often exacerbate the problem, especially if the cutback is done during periods of high moisture.
Identifying Signs of Fungal Infections
Signs of fungal infections can include brown or black spots on the stems or leaves, a fuzzy or powdery growth on the foliage, and a general decline in the plant’s vigor. In advanced cases, the infected parts may rot or die back, impacting the overall health and appearance of the plant. Prompt identification and treatment are vital for containing the spread of infection.
Managing Fungal Infections
To prevent fungal infections, ensure clean pruning tools are used. Thoroughly disinfect the tools before and after each cut to prevent spreading pathogens. Also, avoid overhead watering, which can promote fungal growth. Remove any affected plant parts promptly. Consider using a fungicide if the infection is severe or spreading rapidly.
Always follow the manufacturer’s instructions carefully when using any chemical treatments.
Pest Infestations
Pest infestations are another concern after a cutback, as weakened plants are often more susceptible to attack. Aphids, spider mites, and other insects can quickly colonize newly exposed areas. Identifying these pests early is essential for effective control.
Identifying Signs of Pest Infestations
Signs of pest infestations may include small insects on the leaves or stems, webbing or sticky residue on the foliage, or distorted or curled leaves. A thorough inspection of the foliage and stems is crucial in detecting pests early. Examine the undersides of leaves, as pests often hide there.
Managing Pest Infestations
Regular inspections are crucial to catching pest infestations early. Use insecticidal soap or horticultural oils for a more organic approach to pest control. Always check labels and follow instructions for safe and effective use. Consider introducing beneficial insects, such as ladybugs, to naturally control pest populations. In cases of severe infestations, consult with a local gardening expert or pest control professional for guidance.
Post-Cutback Care for Healthy Phlox
Proper post-cutback care is critical for preventing problems and ensuring successful regrowth.
- Watering: Water deeply and regularly to ensure the newly exposed roots have adequate moisture, but avoid overwatering to prevent fungal diseases.
- Fertilizing: A balanced fertilizer can promote healthy regrowth. Follow package instructions to avoid over-fertilizing.
- Monitoring: Regularly check your phlox for any signs of disease or pests. Early detection is key to successful treatment.
By understanding these potential problems and taking preventative measures, you can help your phlox flourish after its cutback and enjoy a beautiful display of blooms for seasons to come.
End of Discussion
In conclusion, knowing when to cut back phlox is a significant step toward maintaining healthy and beautiful blooms. By considering the unique characteristics of your phlox, local climate, and growth cycle, you can achieve optimal results. Remember to follow the guidelines for identifying overgrowth, selecting the right time for cutting back, and providing proper post-cutback care. This comprehensive guide equips you with the knowledge to effectively maintain your phlox, ensuring years of vibrant blooms.