


How to paint brick is a question many homeowners ask themselves when seeking to revamp their exterior or interior. Transforming your brick surfaces requires careful consideration of techniques, materials, and preparation. This guide dives deep into the world of brick painting, offering insights from choosing the right paint to achieving a stunning aesthetic, along with essential maintenance tips.
We’ll explore various brick painting techniques, from the essential surface preparation to the different types of paints suitable for brickwork, and the importance of proper maintenance. The detailed step-by-step instructions and helpful tables will guide you every step of the way, allowing you to confidently tackle this exciting home improvement project.
Introduction to Brick Painting
Brick painting offers a versatile way to transform the look of your home’s exterior or interior. From subtle enhancements to bold color statements, the possibilities are endless. Different techniques and paint types cater to various aesthetic preferences and the specific needs of your brickwork. Understanding these nuances ensures a successful and lasting painted brick finish.Brick painting involves more than just applying paint.
Careful surface preparation and the selection of appropriate paints are crucial for achieving a durable and visually appealing outcome. This process requires knowledge of the best practices for each stage, from cleaning and priming to the final coats of paint.
Brick Painting Techniques
Various brick painting techniques exist, each impacting the final appearance. A simple wash of color offers a subtle change, while more intricate techniques, like stenciling or layering, can create striking patterns and designs. Understanding the different methods allows you to choose the most suitable technique for your project. Techniques such as dry brushing, sponging, or using a textured roller can add depth and character to your brickwork.
Tools and Materials for Brick Painting
The necessary tools and materials vary depending on the chosen technique. For a simple wash, basic brushes and rollers suffice. More complex techniques may require stencils, specialized brushes, or textured rollers. High-quality paintbrushes and rollers are essential for achieving a smooth and even finish. Other materials, such as masking tape, drop cloths, and safety glasses, are also vital for efficient and safe execution.
Painting brick can be tricky, but the right prep work is key. Before you even think about grabbing the paint, you need to consider the overall condition of your home. For example, is your old house wiring safe enough to handle the new electrical needs of the painting project? If you’re unsure, checking out this resource on is my old house wiring safe might be a good idea.
Once you’ve got that sorted, you can focus on the brick itself, ensuring it’s properly cleaned and primed for the best results.
These tools will ensure an accurate application of the chosen technique.
Surface Preparation for Brick Painting
Proper surface preparation is paramount for achieving a durable and long-lasting paint job. Cleaning the brick thoroughly removes dirt, grime, and loose debris, creating a smooth and receptive surface for the paint. Repairing any damaged or deteriorated areas before painting ensures the paint adheres properly and prevents further deterioration. Inspecting the brick for cracks or holes is vital before painting.
Repairing or patching these areas with appropriate materials is critical to ensure a long-lasting result. Thorough preparation saves time and resources in the long run.
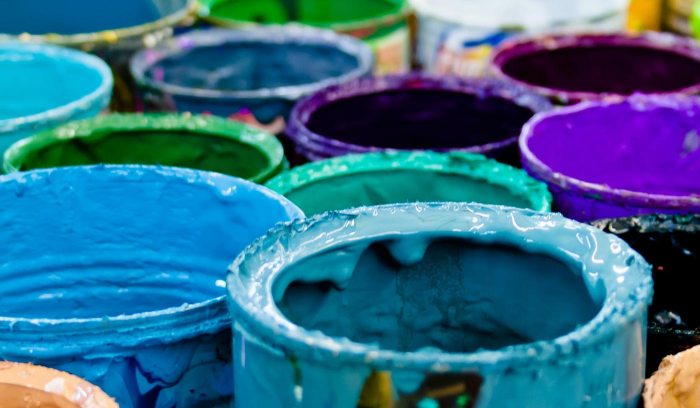
Paints Suitable for Brickwork
The selection of paint is crucial for a successful brick painting project. The table below Artikels the advantages and disadvantages of common paint types, helping you choose the best option for your specific needs.
| Paint Type | Advantages | Disadvantages | Suitable for |
|---|---|---|---|
| Acrylic | Easy to use, affordable, readily available | May not be as durable as latex paints, less water-resistant | Interior brickwork, where durability requirements are less stringent |
| Latex | Durable, water-resistant, excellent adhesion to brick | Can be more expensive than acrylic paints | Exterior brickwork, where protection from the elements is critical |
Preparing the Brick Surface
Getting your brick surface ready for painting is crucial for a long-lasting and beautiful finish. Proper preparation ensures the paint adheres well, preventing peeling and premature deterioration. This involves meticulous cleaning, removing any loose or damaged components, and priming the surface to create a strong foundation for your paint.A clean slate, literally and figuratively, is essential. Dirt, grime, and loose mortar can hinder paint adhesion, leading to a less than desirable outcome.
This section will guide you through the necessary steps to achieve a perfect, primed brick surface.
Painting brick can be tricky, but knowing how to prep the surface is key. Before you even think about picking up a brush, you need to ensure the brick is clean. Similar to prepping a surface for paint, sometimes you need to give your cozy blankets a good cleaning. Properly washing your blankets, like how to wash blankets , is crucial for a fresh, long-lasting look.
Once you’ve got the brick thoroughly cleaned, you can move on to the painting process with confidence.
Cleaning Methods for Brick Surfaces
Effective cleaning is the cornerstone of a successful paint job. Various methods exist, each with its own strengths and limitations. Choosing the right approach depends on the extent of the soiling and the condition of the brick.
Painting brick can be tricky, but a good primer is key. Thinking about how to get those stubborn stains out before you start painting is also important, just like pre-treating clothes before tossing them into the wash. For example, if you’re dealing with tough dirt or grime, you might consider a method like washing clothes in a bathtub, how to wash clothes in a bathtub , to really get the brick clean.
Then, a quality paint job is sure to last!
- Pressure Washing: This method uses high-pressure water jets to remove dirt and debris. It’s effective for large areas and can significantly speed up the cleaning process. However, excessive pressure can damage delicate bricks or mortar, especially if the brick is old or porous. Use caution and adjust the pressure accordingly to avoid causing harm.
- Scrubbing: Manual scrubbing with brushes is ideal for intricate areas, like corners and crevices, where a pressure washer might not reach. Different types of brushes, from stiff bristle brushes for heavy-duty cleaning to soft brushes for more delicate surfaces, can be used to effectively remove dirt and stains without causing damage. This method is time-consuming but often necessary for thorough cleaning.
- Scraping: For stubborn stains or accumulated layers of dirt, scraping with a suitable tool is necessary. Use a scraper designed for brick or mortar to remove loose debris without damaging the brickwork. This should be used cautiously and in areas where the mortar is loose or already cracked to avoid further damage to the structure.
Removing Loose or Damaged Mortar and Brick
Loose or damaged mortar and bricks are a significant concern, potentially causing paint failure. Addressing these issues is a crucial part of the preparation process.
- Inspection: Thoroughly inspect the brickwork for any loose or cracked mortar. This ensures you identify and address any potential problems before painting.
- Repair: Use appropriate mortar repair techniques to fix any loose or damaged mortar. This step prevents further deterioration and ensures a stable surface for paint adhesion. If necessary, consult with a professional mason for more complex repairs.
- Replacement: Damaged or broken bricks need to be replaced. Using matching bricks is crucial for maintaining the aesthetic integrity of the structure.
Priming Brick to Enhance Paint Adhesion
Priming the brick surface before painting is essential to improve paint adhesion and longevity. Primers create a uniform surface that allows the paint to bond better, reducing the risk of paint peeling or cracking.
- Types of Primers: Several types of primers are available, each designed for specific brick types and paint systems. For example, acrylic-latex primers are suitable for use on exterior brick, while oil-based primers are sometimes better for porous bricks. Choosing the right primer ensures optimal performance and longevity.
- Application: Follow the manufacturer’s instructions for applying the primer. Ensure proper coverage and drying time for optimal results. Apply in thin, even coats.
Comparison Table of Brick Cleaning Methods
| Method | Description | Pros | Cons |
|---|---|---|---|
| Pressure Washing | High-pressure water jet | Effective for removing dirt, fast | Can damage delicate bricks, requires careful pressure adjustment |
| Scrubbing | Manual cleaning with brushes | Suitable for intricate areas, less damaging to bricks | Time-consuming, requires physical effort |
| Scraping | Removing loose debris with tools | Effective for stubborn stains, removes loose material | Can damage the brick if not done carefully, may not remove all stains |
Choosing the Right Paint: How To Paint Brick
Selecting the right paint is crucial for achieving a beautiful and long-lasting brick finish. The wrong choice can lead to premature fading, peeling, or a less-than-desirable aesthetic. Careful consideration of factors like color, finish, and durability is paramount to ensure your project’s success. Different paint finishes offer unique properties, influencing how the paint interacts with the brick and the overall appearance.Choosing the right paint requires understanding the specific characteristics of various finishes.
Consider the desired look, the amount of sunlight exposure, and the level of maintenance you’re willing to provide. Brick paint, much like any other type of paint, is available in a wide array of colors and finishes, allowing for personalized aesthetics and practical considerations.
Factors to Consider When Choosing Brick Paint
Several key factors influence the selection of brick paint. These include the desired color, the desired finish, and the expected lifespan of the paint. The color choice, for example, can significantly alter the overall appearance of the brick, so it is important to carefully consider the shade and hue. Likewise, the finish of the paint, whether matte, satin, or semi-gloss, will affect how the light reflects off the brick surface, impacting the aesthetic and practical aspects of the painted area.
Durability is also a crucial aspect to consider, ensuring the paint can withstand the elements and maintain its appearance for an extended period.
Paint Finishes for Brick
Brick paint comes in various finishes, each offering distinct characteristics. Understanding these differences allows you to select the best finish for your specific needs. Matte, satin, and semi-gloss are common choices, each with its own set of advantages and disadvantages.
Matte Finish
A matte finish, also known as a flat finish, provides a smooth, even surface that effectively conceals imperfections in the brickwork. This finish minimizes the reflection of light, creating a subtle, subdued appearance. It is generally considered low-maintenance due to its ability to hide minor dirt and scuffs. However, due to its lack of sheen, it may show dirt more readily than higher-sheen finishes.
Satin Finish
A satin finish provides a balance between the flatness of a matte finish and the shine of a semi-gloss finish. It offers a subtle sheen, making the brick appear slightly more reflective than matte. This finish effectively hides minor imperfections while being slightly more resistant to showing dirt compared to matte. Satin finishes are often a good compromise between appearance and durability.
Semi-Gloss Finish
Semi-gloss finishes create a high degree of reflectivity, giving the brick a brighter, more vibrant appearance. This finish can make the brick surface seem more uniform and polished. However, it also highlights any imperfections, so a very smooth and uniform brick surface is a must. Semi-gloss finishes are generally more resistant to moisture and dirt compared to matte and satin finishes.
This makes it suitable for high-traffic areas or areas exposed to harsh weather.
Comparison of Paint Finishes
| Finish | Description | Pros | Cons |
|---|---|---|---|
| Matte | Flat finish, minimizes light reflection, hides imperfections well. | Hides imperfections, low-maintenance (to some extent), subtle appearance. | May show dirt more easily, less reflective. |
| Satin | Offers a subtle sheen, good balance between hiding imperfections and resisting dirt. | Good balance of hiding imperfections and resisting dirt, moderate reflectivity. | May not provide the same high-impact visual appeal as semi-gloss. |
| Semi-Gloss | High reflectivity, bright and vibrant appearance. | High reflectivity, more resistant to moisture and dirt, good for high-traffic areas. | Highlights imperfections, requires a smoother brick surface. |
Painting Techniques

Choosing the right technique for applying paint to brick significantly impacts the final look and longevity of your painted surface. Different techniques offer varying levels of control, detail, and coverage. Understanding these nuances will allow you to select the most appropriate method for your project.Proper application techniques are crucial for achieving a professional finish and ensuring the paint adheres well to the brick.
Factors like the size and texture of the brick, the desired level of detail, and the type of paint you’re using will all influence the best approach. This section explores various techniques, providing step-by-step instructions and considerations for each.
Brush Techniques
Brush application offers exceptional control and allows for intricate designs and detailed work. Different brush types cater to various needs. For instance, a smaller, stiffer brush is ideal for fine details, while a larger, softer brush works well for broader areas.
To achieve a smooth and even finish, start by applying the paint in thin, even coats. Avoid applying too much paint at once, as this can lead to drips and unevenness. Work in small sections, overlapping slightly to avoid visible seams. Allow each coat to dry completely before applying the next.
Step-by-Step Guide: Painting Brick with a Brush
- Preparation: Ensure the brick surface is clean, dry, and free of debris. Apply a primer if necessary to improve paint adhesion.
- First Coat: Using a brush, apply a thin coat of paint to a small section of the brick. Work in overlapping strokes to avoid visible lines.
- Subsequent Coats: Allow the first coat to dry completely before applying subsequent coats. Continue in the same manner, ensuring each coat is thin and even.
- Drying Time: Allow each coat to dry thoroughly between applications. Follow the manufacturer’s recommendations for drying times, as these vary depending on the type of paint.
- Finishing Touches: Once all coats are dry, inspect the painted surface for any imperfections. Touch up any areas as needed, ensuring a uniform finish.
Painting Tools and Their Applications
The appropriate choice of painting tools directly affects the quality of the final product. A proper understanding of each tool and its optimal use cases can enhance your painting experience.
| Tool | Description | Best Use Case |
|---|---|---|
| Brush | Traditional painting tool with bristles attached to a handle. | Detailed work, intricate designs, tight corners, and smaller areas. |
| Roller | A cylinder-shaped tool covered in a fabric or foam. | Large areas, achieving a smooth and even finish. |
| Sprayer | A tool that atomizes paint into a fine mist for large-scale applications. | Large surfaces, fast coverage, achieving even coats. |
Achieving a Desired Aesthetic

Transforming your brick facade from ordinary to extraordinary involves more than just a fresh coat of paint. The possibilities for creative expression are vast, allowing you to personalize your home’s exterior and create a truly unique look. This section delves into diverse color combinations, design ideas, and techniques for achieving distinct textures and styles.Choosing the right color palette and design is crucial to achieving the desired aesthetic.
A well-considered approach will ensure your painted brick stands out, enhancing the overall appeal of your property. By understanding different techniques, you can transform a simple brick exterior into a statement piece.
Color Combinations and Design Ideas
Various color combinations can dramatically alter the look and feel of your brick. A monochromatic palette, using different shades of a single color, can create a sophisticated and calming effect. Alternatively, a vibrant color scheme can add a bold touch, making a statement and drawing attention. Consider the surrounding architecture and landscape when choosing your colors; they should complement the environment.
Color Palettes Suitable for Brick
Choosing a color palette involves careful consideration of the brick’s natural tone and the surrounding environment. A muted palette, featuring earthy tones like terracotta, taupe, and cream, can create a warm and inviting atmosphere. A more contemporary feel can be achieved with a cool color scheme, using shades of gray, blue, or green. Bold colors like deep reds, oranges, or blues can be used sparingly to create focal points or add personality.
The key is to balance the color choices with the surrounding environment and architectural style.
| Color Palette | Description | Suitable for |
|---|---|---|
| Earthy Tones | Muted, natural hues like terracotta, taupe, and cream | Traditional or rustic homes |
| Cool Colors | Shades of gray, blue, or green | Modern or contemporary homes |
| Bold Colors | Deep reds, oranges, or blues | Homes with a strong architectural style or to create a focal point |
Creating Textures and Patterns
Adding textures and patterns to your painted brick can elevate its visual appeal. A subtle texture, such as a slightly roughened finish, can enhance the natural beauty of the brick. More pronounced textures, like a stucco-like finish, can add depth and complexity. Geometric patterns, such as stripes or tiles, can create a unique and visually engaging effect.
Creating a Weathered or Distressed Look
Achieving a weathered or distressed look involves techniques that mimic the effects of time and exposure. Applying a light wash of paint in a complementary color can create the appearance of aging. Using a variety of shades of a single color can achieve a similar effect. Alternatively, strategically applying a dark color in certain areas can emphasize the texture and give a distressed look.
Painting Brick in Shades of Gray
Painting brick in shades of gray offers a versatile and sophisticated option. Start by selecting a base gray that complements the existing brick color. Use a slightly darker shade to emphasize the brick’s texture, particularly in the crevices and corners. A lighter shade can be used to highlight specific architectural details or create a sense of depth.
The use of different gray tones can create a captivating and visually interesting result.
Maintaining Painted Brick
Keeping your painted brick looking its best involves a combination of regular maintenance and prompt action for any damage. Proper care prevents premature deterioration and ensures your investment in painted brick lasts for years. A well-maintained painted brick surface not only enhances the aesthetic appeal of your property but also protects the underlying material from weathering and decay.
Cleaning Painted Brick
Regular cleaning is crucial for maintaining the pristine appearance of painted brick. The frequency of cleaning depends on the paint type, the environment, and the level of exposure to dirt and debris. Different paints react differently to cleaning solutions. Using harsh chemicals or abrasive tools can damage the paint finish.
- Mild Detergents are often the best choice for painted brick. A mixture of mild dish soap and water is usually sufficient for everyday cleaning. For tougher stains, a solution of baking soda and water can be effective. Avoid using harsh chemicals, such as bleach or strong acids, as they can damage the paint finish.
- Soft-bristled brushes or sponges are recommended for cleaning. Avoid using stiff brushes or abrasive pads that could scratch the paint surface. A soft cloth or sponge should be used for rinsing and drying.
- Pressure washing should be used cautiously and only if the paint is specifically labeled as pressure-washer safe. High-pressure water jets can potentially damage the paint, especially if the paint is a delicate type. If using a pressure washer, always use the lowest pressure setting possible and keep the nozzle at a safe distance from the brick surface.
Addressing Damage and Imperfections
Damage to painted brick, whether from weather, impact, or other factors, requires prompt attention. Ignoring damage can lead to further deterioration and aesthetic problems. Early intervention can save you from more extensive repairs.
- Minor chips or scratches can often be touched up with a suitable paint. Match the color of the paint as closely as possible to the existing paint. Use a small brush or a touch-up pen to apply the paint in thin layers. Allow each layer to dry completely before applying the next.
- For larger areas of damage, consider consulting a professional painter. They have the experience and tools to repair the damage effectively, ensuring a seamless match to the existing paint job.
- Water damage can cause significant issues. If water intrusion is a concern, promptly address the source of the leak. Consult a professional for proper repairs, as ignoring the source can lead to more substantial issues.
Touch-Up Methods
Touch-up methods should be carefully chosen based on the extent of the damage and the type of paint used. Using the right technique ensures the touch-up blends seamlessly with the existing paint job.
- Using a matching paint color is critical. Choosing the correct shade prevents noticeable differences between the repaired area and the surrounding painted brick.
- A small brush or touch-up pen is generally suitable for minor imperfections. A spray can might be suitable for larger areas, depending on the paint type. Apply the paint in thin layers and allow each layer to dry before applying the next. This helps prevent unevenness in the touch-up.
- Ensure proper surface preparation before applying the touch-up. Clean the damaged area thoroughly to remove any loose paint, debris, or dirt. Lightly sanding the area can help improve adhesion.
Frequency of Cleaning and Maintenance, How to paint brick
The frequency of cleaning and maintenance depends on several factors, including the paint type, the surrounding environment, and the level of exposure to dirt and debris. The goal is to maintain a clean and attractive painted brick surface.
- Exterior painted brick in a low-traffic area might only need cleaning a few times a year. In high-traffic areas or environments with heavy dust, cleaning may need to be more frequent. Consider the climate and the amount of rainfall in your area. High rainfall may require more frequent cleaning.
- Different types of paint have different tolerances for cleaning solutions. Some paints may be more susceptible to damage from harsh chemicals or abrasive cleaning methods. Always refer to the paint manufacturer’s instructions for the appropriate cleaning solutions and methods.
Closing Notes
In conclusion, painting brick can significantly enhance the look and feel of your home. By understanding the various steps, from preparing the surface to choosing the right paint, and finally maintaining the painted brick, you can achieve a beautiful and durable finish. This comprehensive guide equips you with the knowledge to confidently embark on your brick painting project and create the perfect aesthetic for your home.