


How to refinish the tub? This guide dives deep into the process, from initial prep to final touches. Transforming a dated tub into a sparkling, modern feature is easier than you think. We’ll explore different materials, methods, and essential steps to achieve a beautiful, long-lasting result. Get ready to tackle that bathroom makeover!
This comprehensive guide covers everything from assessing your tub’s condition and choosing the right refinishing method to safely executing the project and maintaining your newly renovated tub. Whether you’re a DIY enthusiast or prefer to hire a professional, this resource will equip you with the knowledge and insights needed to make an informed decision.
Introduction to Tub Refinishing

Tub refinishing is a popular home improvement project for revitalizing dated or damaged bathtubs. It offers a cost-effective alternative to replacing the entire tub, often saving homeowners significant money. The process involves applying a new surface layer over the existing tub material, typically improving its appearance and often increasing its durability. However, refinishing isn’t always the perfect solution, and there are potential drawbacks to consider.The process of tub refinishing involves replacing the tub’s existing surface with a new material.
This new surface is often more resistant to stains, scratches, and moisture, potentially extending the life of the tub. Understanding the different materials used in refinishing is crucial for making an informed decision. Different materials offer varying degrees of protection and aesthetic options.
Types of Tub Refinishing Materials
Various materials are used for tub refinishing, each with unique characteristics. Common options include epoxy, acrylic, and urethane-based coatings. These materials differ in their chemical composition, durability, and application methods.
Comparison of Refinishing Methods
Different tub refinishing methods offer distinct advantages and disadvantages. A comparison of these methods is crucial for selecting the most suitable approach for your needs.
| Method | Pros | Cons | Cost |
|---|---|---|---|
| Epoxy | Strong adhesion, resists stains and scratches well, often available in various colors and finishes. | Can be more difficult to apply than acrylic, potentially requiring more skill and experience. May not be as durable in high-moisture environments. | Generally mid-range, depending on the specific epoxy used and the complexity of the job. |
| Acrylic | Easy to apply, wide variety of colors and finishes, relatively durable. | May not be as resistant to scratches and stains as epoxy, can be affected by certain chemicals. | Generally lower than epoxy, depending on the specific acrylic and the complexity of the job. |
| Urethane | Good adhesion, moderate durability, typically less expensive than epoxy or acrylic. | May not offer the same level of stain resistance as epoxy, less scratch-resistant compared to epoxy. | Usually the most affordable option among the three. |
Steps Involved in a Tub Refinishing Project
A typical tub refinishing project involves several key steps, from preparation to final finishing. Understanding these steps can help you better manage the project and ensure a successful outcome. Proper preparation is paramount for a long-lasting and aesthetically pleasing refinishing job.
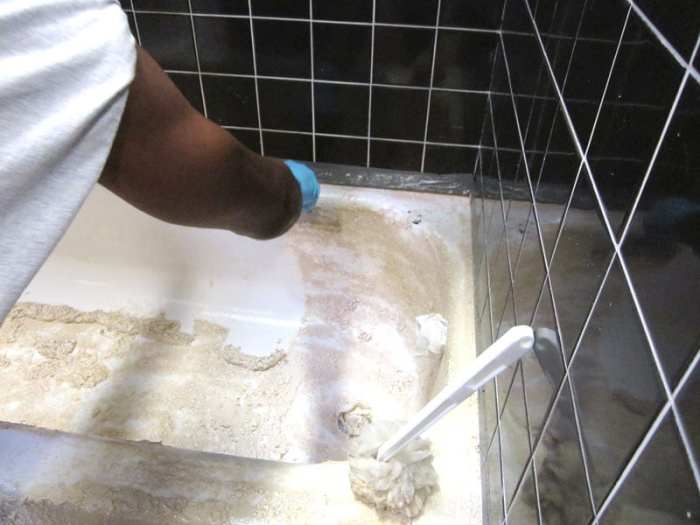
- Surface Preparation: Thorough cleaning and surface preparation are essential to ensure proper adhesion of the new coating. This step involves removing old caulk, soap scum, and any loose or damaged material from the tub surface. This process ensures a clean, smooth, and consistent surface for the new coating to adhere to. Proper surface preparation often significantly impacts the long-term success of the refinishing project.
- Application of Primer: Applying a primer is crucial for providing a suitable base for the topcoat. The primer ensures better adhesion and helps prevent any imperfections in the final coat. This step is essential for ensuring a durable and visually appealing result.
- Application of Topcoat: Applying the chosen coating (epoxy, acrylic, or urethane) involves careful and even spreading. Multiple thin coats are often needed to achieve a smooth and consistent finish. This step ensures the final look of the refinished tub.
- Curing and Finishing: Allowing the coating to cure properly is critical for achieving maximum durability. Following the manufacturer’s instructions regarding curing time is essential. This ensures the longevity of the refinished tub.
Preparation for Tub Refinishing
Getting your tub ready for refinishing is crucial for a successful and long-lasting result. A thorough preparation phase ensures the new finish adheres properly and lasts for years to come. Skipping steps can lead to bubbling, peeling, or other issues that require costly rework. This section details the essential steps, from meticulous cleaning to targeted repairs, to set you up for a beautiful and durable refinishing job.
Cleaning the Tub
Thorough cleaning is the foundation of a successful refinishing project. A clean tub surface provides a smooth, even base for the new coating to bond with. A dirty tub can lead to uneven adhesion, causing the finish to chip, peel, or bubble over time. This step ensures a consistent, reliable surface for the refinishing process to take hold.
- Inspect the tub for debris: Remove any visible dirt, grime, soap scum, mildew, or hair. This initial inspection will help you prioritize cleaning efforts. Often, you can identify problem areas and focus your cleaning efforts on those spots.
- Use a non-abrasive cleaner: Apply a non-abrasive cleaner specifically designed for tubs and tile. This will loosen stubborn stains and buildup without scratching the surface. Follow the product instructions carefully for optimal results.
- Scrub the tub thoroughly: Use a soft-bristled brush or a sponge to scrub the tub surface, paying special attention to hard-to-reach areas. This step ensures the cleaner effectively removes all traces of buildup.
- Rinse the tub completely: Rinse the tub thoroughly with clean water to remove all traces of cleaner. Ensure the tub is spotless and completely free of any residue.
- Dry the tub thoroughly: Wipe the tub down with a clean towel to ensure a completely dry surface. Moisture can interfere with the adhesion of the refinishing material. A dry surface is essential for a good bond.
Repairing Issues
Identifying and addressing any existing issues before refinishing is crucial for a successful outcome. Problems like cracks, chips, or significant damage can compromise the integrity of the refinishing job.
- Check for cracks and chips: Inspect the tub carefully for cracks, chips, or significant damage. These issues can weaken the surface and potentially compromise the new finish. Small cracks or chips can be filled, while significant damage might require more extensive repair or replacement.
- Fill small cracks and chips: Use a suitable patching compound to fill minor cracks and chips. Apply the patching compound smoothly, allowing it to dry completely before proceeding. Properly filling these small imperfections ensures the new finish will adhere properly.
- Address significant damage: For substantial damage, consult with a professional. Significant damage might require replacing the damaged area or employing specific repair techniques. This ensures the structural integrity of the tub is preserved and supports a long-lasting finish.
Surface Preparation
Preparing the tub’s surface is vital for achieving a long-lasting and aesthetically pleasing refinishing result. A properly prepared surface ensures the new coating adheres effectively and provides a durable finish. Improper surface preparation can lead to premature peeling, bubbling, or other issues.
- Remove old, loose, or flaking finish: Carefully remove any old, loose, or flaking finish. This step is crucial to ensure a clean and smooth surface for the new coating to adhere to. Use appropriate tools and methods to prevent damage to the underlying material.
- Sand the tub surface: Lightly sand the tub surface to create a slightly roughened texture, improving the adhesion of the new finish. Use fine-grit sandpaper to avoid scratching the tub. A properly roughened surface allows for a better bond with the refinishing material.
- Clean the surface again: Thoroughly clean the tub surface again to remove any dust or debris from the sanding process. A clean surface will help ensure a smooth and even application of the new finish.
| Step | Tools | Materials | Procedure |
|---|---|---|---|
| Cleaning | Soft-bristled brush, sponge, non-abrasive cleaner, bucket, clean cloths, water | Non-abrasive tub cleaner | Inspect the tub for debris, apply cleaner, scrub thoroughly, rinse completely, dry thoroughly. |
| Repairing | Utility knife, patching compound, putty knife, sandpaper | Patching compound, primer (if needed) | Inspect for cracks, fill minor cracks with compound, allow to dry, sand if needed. |
| Surface Preparation | Fine-grit sandpaper, sanding block, dust mask, cleaning solution | Sandpaper, cleaner | Remove old finish, lightly sand surface, clean thoroughly. |
Refinishing Methods and Materials
Choosing the right refinishing method and materials is crucial for a successful tub restoration project. Different methods offer varying levels of durability, aesthetics, and ease of application. Careful consideration of your needs and budget will help you make an informed decision. Factors like the tub’s existing condition, desired finish, and your DIY skills will all play a role in the selection process.Understanding the strengths and weaknesses of each method will help you select the best approach for your situation.
This section will detail various refinishing methods, including epoxy, acrylic, and others, along with their application processes. It will also compare their pros and cons to assist in your decision-making.
Epoxy Tub Refinishing
Epoxy tub refinishing is a popular choice for its durability and ability to create a smooth, hard surface. It’s often a good option for tubs with significant damage or those requiring a high-gloss finish. The epoxy resin forms a strong, long-lasting coating that can resist stains and scratches.
| Step | Description | Materials | Tools |
|---|---|---|---|
| 1. Preparation | Thoroughly clean the tub, removing all dirt, mildew, and old caulk. Repair any cracks or holes. | Cleaning agents, caulk, patching compounds | Scrub brushes, putty knives, caulk gun |
| 2. Surface Primer Application | Apply a specialized primer to the tub surface to ensure proper adhesion and enhance the epoxy’s bonding. | Primer, stirring stick | Paint roller, paint tray, brush |
| 3. Epoxy Application | Carefully apply the epoxy resin in thin, even coats, following the manufacturer’s instructions. Allow each coat to cure before applying the next. | Epoxy resin, hardener | Paint stir sticks, paint tray, roller |
| 4. Cure Time and Finishing | Allow the epoxy to cure completely according to the manufacturer’s recommendations. Once cured, the surface may require sanding and polishing for a smooth finish. | Sandpaper, polishing compounds | Sandpaper, buffer, polishing cloths |
Acrylic Tub Refinishing
Acrylic refinishing provides a smooth, non-porous surface that is easy to clean and maintain. It’s an excellent choice for tubs with minor damage or those requiring a simple update. Acrylic coatings are generally less durable than epoxy but can offer a more affordable solution.
Other Refinishing Methods
Other methods exist, each with its own set of advantages and disadvantages. For example, some coatings use fiberglass as a base, providing strength but potentially requiring more expertise for application.
Refinishing a tub can be tricky, but the process is surprisingly rewarding. Before you dive into the tub refinishing project, you might want to brush up on how to clean a bean bag chair – similar techniques often apply. How to clean a bean bag chair often involves careful spot cleaning and specialized cleaning agents. Once you’ve got the cleaning methods down, you can confidently tackle the tub refinishing project, ensuring a sparkling, refreshed bathroom.
Refinishing Project Execution: How To Refinish The Tub
Transforming your old, tired tub into a sparkling new fixture is a rewarding project, but meticulous attention to safety and precision is key. This phase delves into the practical aspects of tub refinishing, from crucial safety measures to the step-by-step process, potential pitfalls, and essential tools. A well-executed project yields a beautiful, long-lasting result.Proper execution is paramount to achieving a professional-looking finish.
Careless handling of materials or shortcuts in the process can lead to uneven application, damage, and a final product that fails to meet expectations. Understanding the nuances of each step and anticipating potential challenges is crucial for a successful outcome.
Safety Precautions and Considerations, How to refinish the tub
Prioritizing safety is paramount in any DIY project. Refinishing a tub involves handling chemicals, potentially causing skin irritation or respiratory issues. Protective gear, including gloves, eye protection, and a respirator, is absolutely essential. Ventilation is crucial to minimize exposure to fumes. Ensure the work area is well-ventilated, and if possible, work outdoors or in a garage with good ventilation.
Proper disposal of waste materials is equally important. Follow manufacturer instructions for safe handling and disposal of all chemicals and materials.
Refinishing your tub can be a rewarding DIY project, but choosing the right materials is key. For a quick and easy update, consider using some top-notch peel-and-stick tiles like best peel and stick tiles. They’re surprisingly durable and come in a vast array of styles, making them a fantastic alternative to more involved renovation methods. Once you’ve got your tiles sorted, you can easily finish your tub makeover and enjoy a refreshed bathroom!
Steps in the Refinishing Process
The refinishing process involves several key steps, each requiring meticulous attention to detail. Begin by thoroughly cleaning and preparing the tub surface. This involves removing any existing contaminants, mildew, or soap scum. This preparatory step is crucial for achieving a smooth and even application of the refinishing product. Next, apply the chosen refinishing material according to the manufacturer’s instructions, ensuring even coverage and avoiding runs or drips.
Allow the material to cure completely according to the manufacturer’s specifications. Finally, inspect the tub for any imperfections and touch up any areas as needed. Following these steps meticulously will contribute to a successful outcome.
Refinishing your tub can be a surprisingly rewarding DIY project. A fresh coat of enamel can completely transform the look of your bathroom. To ensure a warm, inviting space, consider investing in the best electric heaters for your home, especially if you live in a colder climate. Best electric heaters for your home will not only keep you toasty while you work but also maintain a comfortable temperature in the bathroom, making the refinishing process more enjoyable.
Proper preparation, including thorough cleaning and priming, is key for a long-lasting, beautiful finish.
Potential Issues and Solutions
Unexpected problems can arise during the refinishing process. Uneven application, for example, might require additional coats or a complete rework of the affected area. Uneven surfaces or imperfections in the tub’s existing finish might need more preparation steps to ensure a smooth finish. Bubbles or drips can be carefully addressed by using a razor scraper or similar tools to remove the imperfections before the product fully cures.
Thorough preparation and adherence to manufacturer instructions can significantly reduce the likelihood of encountering these issues.
Tools and Materials Needed
- Cleaning Supplies: A solution to clean the tub (e.g., a degreaser) will be necessary for thorough cleaning. A sponge, scrub brush, and/or a stiff bristle brush will be helpful to thoroughly remove all contaminants. Proper disposal of cleaning materials is necessary.
- Protective Gear: Gloves, eye protection, and a respirator will protect you from exposure to chemicals. Always prioritize safety.
- Refinishing Materials: The refinishing product (e.g., epoxy, acrylic), along with any necessary primers or sealants, will depend on the specific product chosen. Carefully follow manufacturer instructions for best results.
- Application Tools: A putty knife, a paint roller, or a spray gun will assist in applying the refinishing material. Different tools will produce different finishes.
- Cleanup Materials: A cleaning solution for removing any excess refinishing material and rags or towels for wiping down the tub are essential for a clean workspace. Appropriate disposal of waste materials is crucial.
Ensuring a Smooth and Even Finish
Achieving a smooth and even finish depends on meticulous attention to detail at every step. Ensure the tub is completely dry before starting the refinishing process. Proper mixing of the refinishing material, following the manufacturer’s instructions precisely, and consistent application are key to avoiding inconsistencies. Multiple thin coats are often better than a single thick coat. Allowing each coat to cure completely before applying the next will minimize the chance of imperfections.
Thorough inspection and touch-ups after each coat will prevent issues from becoming more difficult to resolve.
Post-Refinishing Considerations

Congratulations on completing your tub refinishing project! Now that the hard work is done, it’s time to focus on ensuring your beautiful, newly refinished tub lasts for years to come. Proper maintenance is key to preserving the quality and longevity of your investment.Maintaining a refinished tub involves a few key strategies, and understanding potential issues will help you avoid costly repairs down the road.
This section provides actionable advice to help you keep your tub looking its best.
Maintenance Tips for a Long-Lasting Finish
Proper care is essential to preserving the refinished tub’s beauty and functionality. Regular cleaning and preventative measures will significantly extend the lifespan of your investment.Regular cleaning with mild, non-abrasive cleaners is crucial. Harsh chemicals or abrasive scrubbing can damage the finish. Avoid using scouring pads, steel wool, or anything that might scratch the surface. Instead, opt for gentle cleaners like mild dish soap or a tub and tile cleaner specifically formulated for refinished surfaces.
For stubborn stains, consider a paste made from baking soda and water.
Addressing Potential Issues
While refinishing is a durable process, some issues might arise. Knowing how to address these promptly can prevent more significant problems.Water spots, particularly in areas exposed to hard water, are a common occurrence. Regular cleaning can help prevent their buildup. If spots persist, consider using a dedicated water spot remover or a solution of white vinegar and water.
A gentle scrub with a soft cloth should resolve the issue.
Best Practices for Refinishing Care
Implementing good practices will minimize the risk of damage to the refinished tub. Maintaining a well-ventilated bathroom is important, especially during and after cleaning. Avoid placing heavy objects directly on the tub surface, as this can cause stress and potential damage to the coating. When possible, use a non-abrasive mat or pad under objects to protect the tub’s surface.
Preventing Damage
To keep your refinished tub in pristine condition, preventing damage is crucial. Avoid using harsh chemicals or abrasive cleaning agents. Always use a non-abrasive sponge or cloth for cleaning. Do not place hot items directly on the surface of the tub. These practices will help ensure your refinished tub maintains its beauty and performance for many years.
Maintenance Schedule
Following a consistent maintenance schedule will help maintain the tub’s condition.
| Frequency | Task | Materials |
|---|---|---|
| Weekly | Gentle cleaning with mild dish soap or a tub and tile cleaner. Wipe down the entire surface to remove any soap scum or residue. | Mild dish soap, non-abrasive sponge or cloth, tub and tile cleaner (optional) |
| Monthly | Deep clean, focusing on any areas with stubborn stains or water spots. Consider using a paste of baking soda and water for particularly tough stains. | Baking soda, water, non-abrasive sponge or cloth, water spot remover (optional) |
End of Discussion
So, there you have it—a complete walkthrough on how to refinish your tub. From preparing the surface to selecting the right materials, to ensuring a flawless finish and post-project maintenance, we’ve covered it all. Armed with this knowledge, you can confidently embark on your tub refinishing project, knowing you’re well-prepared for every step. Remember, proper preparation and attention to detail are key to a successful outcome.
Now go forth and create your dream bathroom!