


Sod cutting tool for new seeding is crucial for preparing the ground before planting new grass. This guide dives deep into the world of various sod cutters, explaining their roles and comparing their strengths and weaknesses. We’ll cover everything from choosing the right tool for your specific needs to mastering the cutting techniques for optimal results. Whether you’re a seasoned landscaper or a DIY enthusiast, this guide provides a complete walkthrough.
This article explores different types of sod cutting tools, including rotary cutters, box cutters, and others. It will also Artikel the crucial steps in choosing the right tool based on soil type, turf condition, and budget. Furthermore, it will detail the preparation and maintenance of the tool to ensure its longevity, along with safety precautions. Detailed techniques and a step-by-step guide for cutting sod will also be included.
Finally, post-cutting procedures, including seed selection and spreading methods, will be covered.
Introduction to Sod Cutting Tools for New Seeding

Sod cutting tools are essential for preparing land for new seeding. They effectively remove the existing sod layer, exposing the soil and creating a suitable environment for the new plants to take root. Proper sod cutting ensures a clean, even surface for seed placement, promoting better germination and growth. This process also helps to remove any stubborn weeds or grass that might hinder the growth of the new planting.
Getting ready for new seeding? A sharp sod cutting tool is essential for a perfect start. While you’re prepping, consider using dryer sheets around the house for various cleaning tasks, like use dryer sheets around the house. This simple tip can save you time and effort, making the whole process more efficient. Ultimately, a good sod cutting tool will ensure a healthy and beautiful new lawn.
Different Types of Sod Cutting Tools
Various types of sod cutting tools are available, each with its own set of characteristics. Understanding the different types and their capabilities will help you choose the most suitable tool for your specific needs.
Rotary Cutters
Rotary cutters are a common choice for sod cutting. They use rotating blades to slice through the sod, effectively removing the existing vegetation. These tools are generally more powerful and faster than other types, making them suitable for larger areas. Their design allows for efficient removal of thick sod layers.
Box Cutters
Box cutters are another option, often preferred for smaller areas or for situations where a more precise cut is required. These tools use a box-shaped cutting blade to slice through the sod. Their design allows for a cleaner cut, which can be beneficial for ensuring uniform seed distribution.
Comparison of Sod Cutting Tools
| Tool Type | Features | Advantages | Disadvantages |
|---|---|---|---|
| Rotary Cutter | Rotating blades, high power, typically larger size | Efficient for large areas, capable of handling thick sod layers, faster operation | Can be more expensive, may require more maintenance, potentially more difficult to maneuver in tight spaces |
| Box Cutter | Box-shaped blade, often smaller size, higher precision | Suitable for smaller areas, allows for precise cutting, easier maneuverability | Less powerful than rotary cutters, not ideal for thick sod, slower operation compared to rotary cutters |
Choosing the Right Sod Cutting Tool
Selecting the appropriate sod cutting tool for new seeding is crucial for a successful project. The right tool ensures a clean, even cut, minimizing damage to the existing sod and maximizing the chances of healthy new growth. Careful consideration of soil type, turf condition, budget, and desired outcome are vital for optimal results.A well-chosen sod cutter not only facilitates efficient installation but also paves the way for a thriving lawn.
Factors like blade sharpness, tool maintenance, and careful assessment of the existing sod’s condition are paramount in ensuring the process is as smooth and effective as possible.
Factors Influencing Tool Selection
Understanding the key variables affecting the tool selection process helps ensure optimal results. Soil type, turf condition, and budget considerations all play critical roles.
- Soil Type: Different soil types present varying challenges for sod cutting. Clay soils, for example, are often more difficult to cut cleanly than sandy soils. The tool’s design and blade characteristics should align with the soil’s inherent properties. Heavy-duty tools with robust blades might be necessary for clay soils to prevent clogging and ensure a smooth cut.
Conversely, a lighter-weight tool with sharper blades may suffice for sandy soils.
- Turf Condition: The health and density of the existing turf influence tool choice. Thick, established turf may require a more powerful and durable sod cutter to achieve a clean cut without tearing or damaging the surrounding grass. Conversely, lighter tools are suitable for less established lawns or those with thinner sod.
- Budgetary Constraints: Sod cutting tools vary significantly in price. Budget-conscious individuals might consider less expensive, yet still effective, models for smaller projects. However, for large-scale projects or those requiring heavy-duty cutting, a more expensive tool might be necessary for the best results.
Comparing Sod Cutting Tools
Different types of sod cutters cater to various needs and budgets. Understanding their respective strengths and weaknesses is key to making an informed decision.
| Tool Type | Description | Suitability | Pros | Cons |
|---|---|---|---|---|
| Rotary Cutter | Features rotating blades for a fast, efficient cut. | Good for various soil types, including clay, but may damage thicker turf. | Fast cutting speed, good for larger areas. | Can be noisy, may require more maintenance. |
| Box Cutter | A box-like frame with blades that slice through the sod. | Ideal for thick sod and diverse soil types. | Durable and effective for tough conditions. | Can be heavy, may not be as efficient as rotary cutters for large areas. |
| Hand-operated Knife | Simple, manual tool with a sharp blade. | Best for smaller areas and less challenging soil types. | Budget-friendly, easy to maneuver. | Slow cutting speed, not suitable for larger projects or thick sod. |
Assessing Sod Condition for Tool Selection
Proper assessment of the existing sod is crucial for optimal tool selection. Visual inspection is the first step, followed by tactile evaluation.
- Visual Inspection: Examine the existing sod for thickness, density, and signs of damage. A thick, dense sod will require a more robust tool than a thinner, less established lawn.
- Tactile Evaluation: Attempt to lift small sections of the sod to gauge its firmness and resistance to tearing. This helps determine the tool’s required power and blade design.
Blade Sharpness and Maintenance
Maintaining sharp blades is paramount for efficient sod cutting. Blunt blades can lead to tearing, uneven cuts, and increased effort.
“Sharp blades significantly reduce the force needed to cut sod, leading to improved efficiency and reduced risk of damage.”
Regular sharpening and blade maintenance extend the tool’s lifespan and ensure consistent, high-quality cuts. Proper lubrication and storage also contribute to longevity.
Preparation and Maintenance

Proper preparation and maintenance are crucial for maximizing the effectiveness and lifespan of your sod cutting tool. A well-maintained tool ensures a clean, efficient cut, minimizing damage to the soil and maximizing the success of your new seeding project. Neglecting these steps can lead to reduced performance, potential injuries, and increased maintenance costs in the long run.
Preparing the Area for Sod Cutting
Thorough preparation of the area is essential for a successful sod cutting operation. This involves clearing the designated area of any obstructions, such as rocks, roots, or debris. Removing these obstacles ensures a smooth cutting process and prevents damage to the cutting tool. Ensure the area is level and free of uneven terrain to maintain consistent cutting depth.
Getting ready for new seeding? A sharp sod cutting tool is essential, but before you get started, consider adding an electrical outlet in the middle of the run, like in this guide on add electrical outlet middle of run. This will make the job easier, preventing constant trips back to the power source. A well-placed outlet is just as important for a smooth sod cutting process as a good quality tool.
If necessary, use landscaping tools to level the ground before proceeding. This preparation step significantly reduces the risk of operator injury and tool damage.
Maintaining and Storing Sod Cutting Tools
Regular maintenance is key to prolonging the life of your sod cutting tool. After each use, thoroughly clean the tool, removing any soil, debris, or grass clippings. Allow the tool to air dry completely before storing. Proper storage prevents rust and corrosion, which can significantly reduce the tool’s lifespan. Store the tool in a dry, sheltered location, away from moisture and extreme temperatures.
Periodic lubrication of moving parts, if applicable, will help maintain smooth operation and reduce wear.
Safety Precautions
Safety is paramount when using sod cutting tools. Always wear appropriate personal protective equipment (PPE), including safety glasses, gloves, and sturdy footwear. Ensure the area is clear of any bystanders or pets before starting the operation. Never operate the tool while tired or under the influence of alcohol or drugs. Follow the manufacturer’s instructions carefully, and be aware of potential hazards, such as sharp blades and moving parts.
Understand the potential risks and take the necessary precautions to ensure a safe and efficient operation.
Sharpening or Replacing Blades
Regularly checking and maintaining the blades is crucial for optimal performance. Inspect the blades for any signs of damage, such as nicks, bends, or dullness. Dull blades can lead to uneven cuts and increased effort during operation. Follow the manufacturer’s instructions for sharpening techniques. If the blades are beyond repair, replace them with new ones.
The use of properly sharpened or replaced blades ensures clean cuts and minimizes damage to the soil.
Optimizing the Cutting Process for Various Soil Types
The type of soil significantly impacts the cutting process. Clay soils, for example, may require a different approach than sandy soils. For clay soils, a slightly deeper cut may be necessary to achieve a clean separation of the sod. Sandy soils may require a lighter pressure to prevent the tool from digging in excessively. Understanding the soil’s properties and adjusting the cutting technique accordingly will result in a better cutting process.
Consider the soil moisture content as well. Wet soil may require more pressure and time to cut, while dry soil may require a more cautious approach to prevent the tool from becoming stuck.
Sod Cutting Techniques: Sod Cutting Tool For New Seeding
Mastering sod cutting techniques is crucial for successful new seeding. Proper methods ensure a clean, even cut, promoting healthy root growth and minimizing damage to the existing turf. This, in turn, leads to a quicker establishment of the new grass. Effective techniques also reduce the likelihood of weed growth and disease, ultimately resulting in a vibrant and thriving lawn.
Optimal Sod Cutting Depth
The ideal cutting depth for sod depends on the type of grass and the desired outcome. A general guideline is to cut no deeper than 1/2 inch to 3/4 inch, depending on the sod’s thickness. Cutting too deep can damage the root system, making it difficult for the sod to establish itself. Conversely, cutting too shallow won’t remove the sod effectively, potentially leading to unevenness in the new seeding.
For example, fine fescues may require a shallower cut than a thicker, more robust bluegrass. Consider the local growing conditions and soil type when determining the appropriate cutting depth.
Direction and Overlap for a Smooth Cut, Sod cutting tool for new seeding
Maintaining a consistent direction and ensuring proper overlap are key aspects of achieving a clean cut. Cutting in a consistent direction prevents the sod from becoming torn or uneven. Typically, cutting in a straight, parallel line is best. Proper overlap is essential for a seamless transition between cuts. A common practice is to overlap previous cuts by about 1/3 to 1/2 of the blade width.
This ensures that there are no gaps or missed areas, allowing for a uniform, well-prepared surface.
Sod Cutting Procedure – Step-by-Step Guide
This table Artikels a step-by-step procedure for cutting sod, providing clarity and ensuring optimal results.
| Step | Description | Image Description |
|---|---|---|
| 1 | Prepare the area: Clear the designated area of any obstacles, rocks, or debris. Ensure the ground is level and well-prepared for the sod installation. This might involve tilling or smoothing the soil to ensure an even surface. | A person using a rake to clear the area of debris, followed by a hand-held leveling tool to ensure the ground is smooth. |
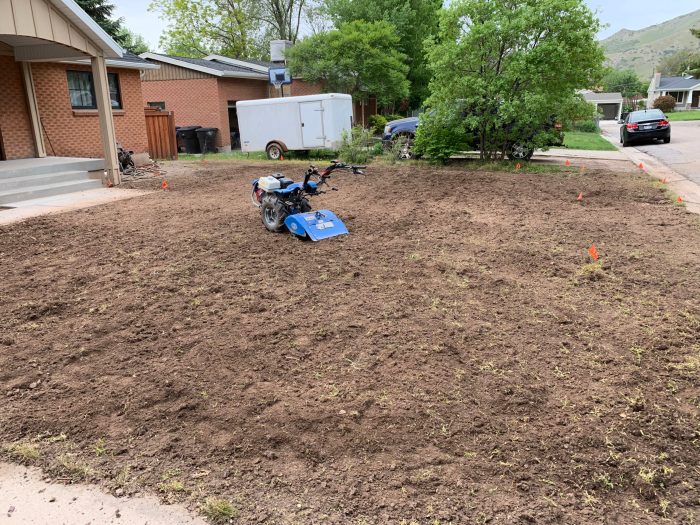
| 2 | Select the appropriate sod cutting tool: Choose the right tool for the size of the area and the type of sod. Consider the maneuverability and cutting capacity of the equipment. Ensure the tool is sharp and in good working order to avoid tearing the sod. | A person examining and adjusting a sod cutter to ensure its readiness for use. |
| 3 | Establish the cutting path: Lay out the cutting path, ensuring consistent direction and a predetermined overlap. This step involves marking the area to be cut, with straight lines and adequate overlap for a smooth transition between sections. | A person using string or chalk to mark the cutting path on the ground, ensuring proper direction and overlap. |
| 4 | Cut the sod: Follow the established path, maintaining a consistent depth and overlap. Avoid rushing the process to maintain a clean cut. | A person operating a sod cutter along the marked path, ensuring a consistent depth and overlap. |
| 5 | Inspect the cut sod: Check for any irregularities or tears. If necessary, trim any damaged areas to ensure a seamless installation. | A person examining the freshly cut sod for any tears or irregularities, followed by a close-up view of trimming a damaged area. |
Potential Challenges and Solutions
Several challenges can arise during sod cutting. Uneven ground can lead to inconsistent cuts. Solutions include using leveling tools to prepare the ground before cutting. Sod that’s too thick might require multiple passes to cut cleanly. Use appropriate cutting tools and a proper depth setting.
If the sod cutter is dull, it can cause tearing. Sharpening or replacing the blade is the solution. Weather conditions, like rain, can affect the quality of the cut. Adjusting the cutting time to avoid cutting when the sod is too wet or frozen is essential.
Post-Cutting Procedures
Once you’ve successfully cut the sod, the work isn’t over. Proper post-cutting procedures are crucial for a successful new seeding project. These steps ensure the health of the soil and the success of your new lawn. A well-executed post-cutting phase sets the stage for a thriving and resilient lawn.Following the sod cutting process, several crucial steps ensure a smooth transition for your new lawn.
The quality of your post-cutting efforts directly impacts the success of your seeding. Careful removal, proper disposal, and meticulous soil preparation are key.
Removing the Cut Sod
Proper sod removal is essential for successful new seeding. The method of removal impacts soil disturbance and subsequent seeding. Carefully roll up the sod in sections, minimizing tearing. This minimizes soil disruption and allows for easier handling. Avoid excessive force, which can damage the underlying soil.
Disposing of the Cut Sod
Proper disposal of cut sod is essential for environmental protection and prevents potential issues. Dispose of the sod according to local regulations. Check with your local waste management authority for specific instructions and disposal sites. Some jurisdictions might have composting facilities for sod disposal, reducing landfill waste. Avoid dumping cut sod in waterways or public spaces.
Covering and Protecting the Soil
Covering the soil after sod removal helps retain moisture, control weeds, and regulate soil temperature. A layer of organic mulch, such as straw or wood chips, provides excellent insulation and aids in suppressing weeds. The thickness of the mulch layer will vary based on local climate conditions and the type of seeding material. Maintaining a consistent moisture level in the soil is vital during the initial stages of seeding.
Soil Preparation for New Seeding
Thorough soil preparation is fundamental to the success of any new seeding project. The quality of the soil directly affects seed germination and root development. A well-prepared seedbed ensures even seed distribution, optimal moisture retention, and adequate aeration. Use a rake or tiller to break up compacted soil, removing clods and ensuring a consistent texture. Adding organic matter such as compost or well-rotted manure improves soil structure, fertility, and water retention.
Incorporating these elements enhances the germination process and overall lawn health. This preparation is crucial for establishing a strong root system. A study published in the Journal of Horticultural Science and Biotechnology demonstrated that soil preparation with organic matter significantly increased germination rates in new seeding projects.
Tools and Equipment Considerations
Proper preparation is crucial for successful sod cutting and new seeding. Beyond the sod cutter itself, a comprehensive toolkit and essential safety gear are vital for a safe and efficient process. This section details the necessary equipment, highlighting their importance and how they contribute to the overall success of your project.The following sections will Artikel the essential safety gear, and other supporting tools necessary for sod cutting and seeding.
A well-equipped toolkit minimizes risks and ensures a smooth, successful outcome.
Essential Safety Gear
Safety should be paramount when working with any equipment. The right safety gear significantly reduces the risk of injury during the sod cutting process.
- Protective eyewear (safety glasses or goggles): Protecting your eyes from flying debris, dirt, or potential sod fragments is critical. Goggles offer a full face shield, providing more protection than safety glasses, which are best for less vigorous tasks.
- Work gloves: Protect your hands from cuts and abrasions. Tough, leather or reinforced nitrile gloves are ideal for handling sod and other materials. The right gloves offer the necessary dexterity and protection for the task.
- Hearing protection (earplugs or earmuffs): Many sod cutters produce loud noises, which can damage hearing over time. Proper hearing protection minimizes the risk of hearing loss.
- Work boots: Sturdy, closed-toe work boots provide foot protection from potential hazards. They help prevent injuries and ensure stability while working.
The importance of using appropriate safety gear cannot be overstated. Adhering to safety protocols safeguards your health and well-being, preventing potentially serious injuries during the sod cutting process.
Supporting Tools
Beyond safety gear, various supporting tools aid in the preparation and execution of sod cutting and seeding.
- Rakes: Rakes are indispensable for smoothing the soil after sod removal. Different types of rakes cater to various needs; a wide-toothed rake can help break up clumps of soil, while a narrow-toothed rake can level the surface for even seeding.
- Shovels: Shovels are essential for digging, moving soil, and creating trenches. A variety of shovels, including hand shovels, and even larger garden shovels, are necessary for different aspects of the project.
- Sod Cutter: The most crucial tool, the sod cutter, ensures that the sod is cut effectively and efficiently, minimizing the effort required.
- Measuring tools: Measuring tools, such as measuring tapes and rulers, are helpful for marking out areas and determining dimensions. Accurate measurements are essential to ensure the area is prepared correctly for the new seeding.
The right supporting tools can greatly enhance the efficiency and safety of the entire process, making sod cutting and new seeding much more manageable.
Tools Needed for Various Tasks
A well-organized toolkit tailored to specific tasks streamlines the sod cutting and seeding process.
A sharp sod cutting tool is crucial for successful new seeding. Proper preparation is key, and like creating a productive study space, careful planning is essential. For instance, checking out expert tips for creating a study space expert tips for creating a study space can highlight the importance of a dedicated, organized environment. Ultimately, a well-maintained area, just like a neatly cut sod, ensures a smooth and successful seeding process.
| Task | Tools | Description |
|---|---|---|
| Sod Cutting | Sod Cutter, Gloves, Safety Glasses | The sod cutter is used to cut the sod, while gloves and safety glasses provide protection. |
| Soil Preparation | Rakes, Shovels, Hand Trowel | Rakes level the soil, shovels move and dig soil, and hand trowels are used for fine adjustments. |
| Seeding | Seeding spreader, Rake, Measuring tools | The spreader distributes seeds evenly, the rake helps level the seedbed, and measuring tools ensure accurate seeding amounts. |
| Post-Cutting Clean-up | Rakes, Broom, Garden Cart | Rakes level the soil, a broom removes debris, and a garden cart can transport materials efficiently. |
Careful consideration of the tools required for each task ensures the process is smooth and efficient, reducing the possibility of errors and maximizing the chances of a successful outcome.
Seeding Methods
Choosing the right seeding method after sod cutting is crucial for a successful new lawn establishment. Different seeding methods cater to various soil conditions, seed types, and personal preferences. Understanding these methods, along with the preparation required, ensures optimal germination and growth.The selection of a seeding method should consider factors like seed type, soil conditions, and desired lawn density.
Effective seeding techniques maximize seed-to-soil contact and promote healthy root development, leading to a robust and vibrant lawn.
Seed Selection and Suitability
Different types of grass seed react differently to various soil conditions and sunlight exposures. Choosing the right seed variety is vital for a thriving lawn. Kentucky bluegrass, for example, thrives in well-drained, moist soils with full sun exposure, while ryegrass is more tolerant of shade and wet conditions. Consider your local climate and soil conditions when making your seed selection.
- Cool-season grasses, like Kentucky bluegrass and perennial ryegrass, are generally better suited for cooler climates and tolerate shade better.
- Warm-season grasses, such as Bermuda grass and zoysia grass, perform best in warmer climates and full sun.
- Consider the desired appearance of the lawn. Some grasses have a finer texture than others, influencing the overall aesthetic.
- Seed quality is important. Look for seeds that are free of debris and have a high germination rate. Check the package for specific germination instructions.
Even Seed Spreading
Uniform seed distribution ensures a healthy and even lawn growth. Improper seed spreading can lead to patchy areas or uneven density. Using a seed spreader is recommended for consistent coverage. Adjust the spreader settings to ensure the desired seed rate for the area.
- Use a seed spreader designed for the type of seed being used. Different spreaders have different settings for varying seed sizes.
- Calibrate the spreader before use to ensure accurate seed distribution. Refer to the spreader’s instructions for calibration procedures.
- Walk in a consistent pattern, maintaining a steady pace and avoiding overlaps or gaps. Ensure even coverage across the entire area.
Soil Preparation for Seeding
Proper soil preparation is essential for seed germination and root development. The soil should be well-drained, loose, and free of debris.
- Remove any rocks, debris, or clumps of soil that might impede seed germination. A rake is helpful for this.
- Loosen compacted soil to improve drainage and aeration. A tiller or cultivator can be used, but be careful not to damage the sod that was cut.
- Amend the soil with organic matter such as compost or peat moss. This improves soil structure, water retention, and nutrient availability.
Covering Seed After Spreading
Proper seed covering ensures adequate moisture and protection from birds and other elements.
- Use a light layer of topsoil or compost to cover the seed. The depth of coverage should be determined by the type of seed and the soil conditions. Generally, a thin layer is sufficient.
- Avoid excessive coverage, which can hinder germination. The soil should be just enough to cover the seeds without burying them deeply.
- Lightly water the seedbed after covering to settle the soil and provide moisture for germination. Avoid overwatering.
Last Word
In conclusion, this comprehensive guide provides a detailed understanding of sod cutting tools for new seeding. By carefully considering the different tools, preparation methods, cutting techniques, and post-cutting procedures, you can ensure a successful and healthy new lawn. Remember, proper preparation and maintenance are key to maximizing the effectiveness of your chosen sod cutting tool. From initial site preparation to post-seeding care, this guide empowers you to achieve a beautiful and thriving lawn.