


How to solder wires effectively is crucial for countless electronic projects. This guide dives deep into the entire soldering process, from the basics of heat and solder to safety precautions and troubleshooting. We’ll explore various techniques, prepping your wires, and mastering the soldering process step-by-step, ensuring a strong and reliable connection every time.
This comprehensive guide covers everything you need to know about soldering wires, from essential tools and techniques to troubleshooting common issues. Whether you’re a seasoned electronics enthusiast or just starting out, this guide will equip you with the knowledge and skills to tackle any soldering project confidently.
Introduction to Soldering Wires

Soldering is a crucial technique in electronics and various other fields for permanently joining metal components, particularly wires. It involves melting a filler metal, called solder, to create a strong and reliable connection between two or more pieces of metal. This process is fundamental for creating circuits, assembling electronic devices, and connecting electrical systems in a wide array of applications.The fundamental principle behind soldering is the use of heat to melt the solder.
This molten solder flows into the joint between the pieces of metal, solidifying when it cools. The solder acts as a bridge, ensuring a low-resistance electrical path and a mechanical bond. Proper soldering techniques are essential to ensure a strong, reliable, and safe connection.
Safety Precautions
Adhering to safety precautions is paramount when working with soldering equipment. Improper handling can lead to burns, electrical shocks, or inhalation of harmful fumes. Always wear appropriate personal protective equipment (PPE), including safety glasses, a respirator, and heat-resistant gloves. Work in a well-ventilated area to mitigate the risk of inhaling fumes. Ensure that the soldering iron is properly insulated and grounded to prevent electric shocks.
Never leave a soldering iron unattended.
History of Soldering Techniques
Soldering techniques have evolved over centuries. Early civilizations utilized rudimentary soldering methods, often employing natural materials like tin and lead alloys. The development of more sophisticated techniques and specialized tools, including the soldering iron, contributed significantly to the advancement of various industries. Today, advanced soldering techniques and equipment continue to improve the quality and reliability of soldered joints.
Essential Tools for Soldering Wires
Understanding the tools required for soldering is crucial for successful and safe work. The following table Artikels the essential tools needed for soldering wires.
| Tool Name | Description | Image Description |
|---|---|---|
| Soldering Iron | A heated tool used to melt the solder. Different wattage irons are suited for various tasks. | A handheld tool with a metal tip that is heated electrically. The tip’s size and shape vary. |
| Solder | A metal alloy, typically tin-lead or lead-free alternatives, used to create the joint. | A wire or paste-like material, usually in a coil or small container. Colors and compositions vary. |
| Solder Flux | A substance that removes oxides from the metal surfaces, improving the soldering process. | A liquid or paste that helps to clean and prepare the surfaces for soldering. |
| Wire Strippers | Used to remove the insulation from the wires. Precision is essential to prevent damage to the wires. | Small pliers with cutting blades to strip the insulation from wires. The design can vary based on wire thickness. |
| Wire Cutters | For cutting wires to the desired length. Ensure a clean cut to prevent damage to the wire. | Small pliers with sharp blades to cut wires cleanly. |
| Tweezers | For holding small components and wires during soldering. | Small, metal tools with pointed ends for manipulating small objects. |
| Desoldering Pump | Used for removing solder from existing joints. | A tool that sucks up solder using vacuum pressure. Often has a nozzle for precision. |
Types of Soldering Techniques
Soldering, a fundamental technique in electronics and metalworking, involves joining two or more metal components using a molten filler metal. Different soldering methods cater to various needs, from delicate repairs to large-scale assembly projects. Choosing the right method is crucial for achieving a strong, reliable, and aesthetically pleasing connection.
Comparing Soldering Iron, Soldering Gun, and Other Methods
Various tools and techniques facilitate soldering, each with its own set of advantages and disadvantages. A soldering iron, a hand-held tool with a heated tip, is a common choice for precise work. Soldering guns, often featuring higher wattage and more controlled heat output, are suitable for larger projects or applications requiring faster heating. Other methods, like induction soldering and wave soldering, are used in industrial settings for high-volume production.
Understanding these methods helps in selecting the most efficient technique for a particular task.
Soldering Iron
Soldering irons are widely used for their versatility and precision. They are suitable for a broad range of applications, from small-scale repairs to circuit board assembly. The controlled heat output allows for precise melting of solder and joining of components. A disadvantage of soldering irons is the potential for overheating, damaging components if not used carefully. They also require more operator skill and experience compared to other methods like soldering guns.
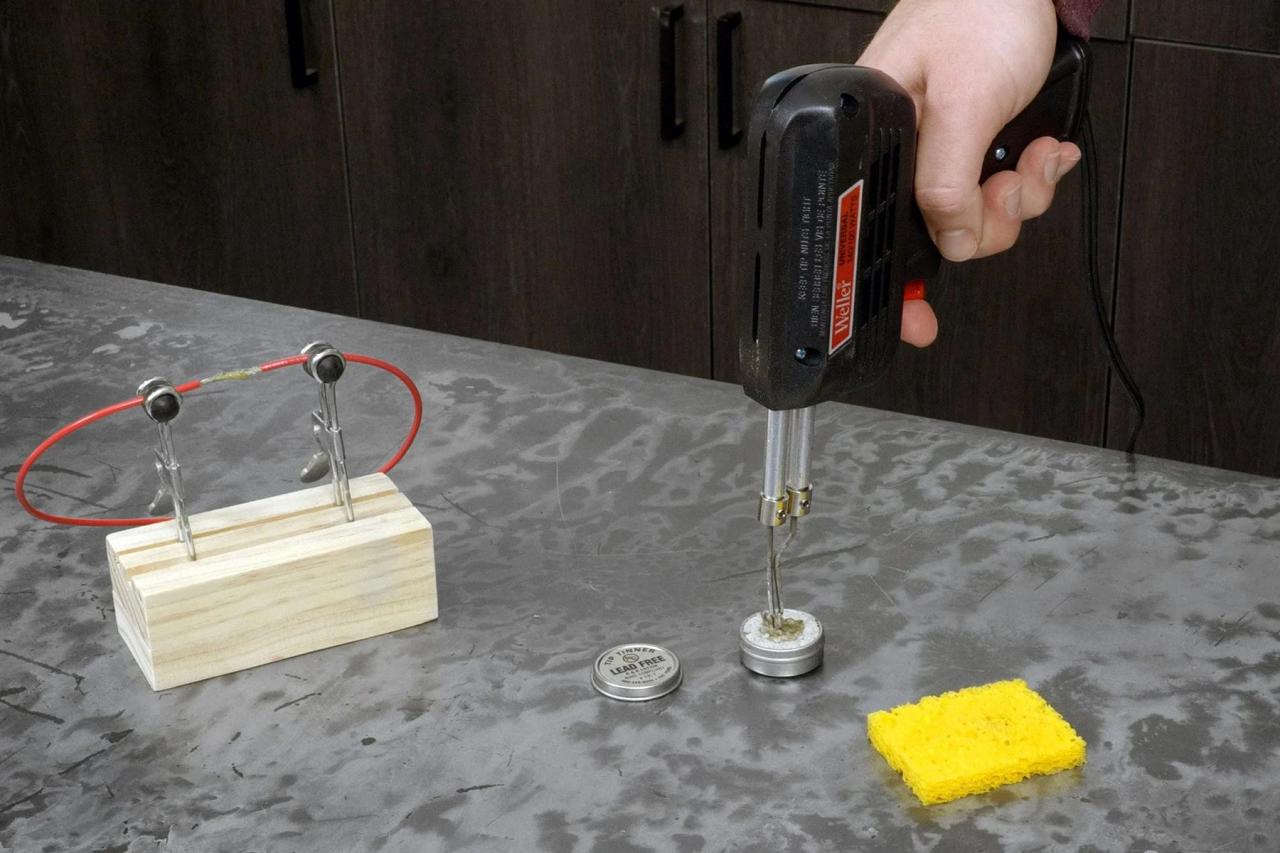
Soldering Gun
Soldering guns are designed for faster heating and larger work areas, often employed in mass production and larger projects. The high wattage of a soldering gun allows for rapid heating, reducing the time required for soldering. However, the higher heat output can potentially damage components more easily than a soldering iron. Furthermore, precise control over heat may be less than with a soldering iron, making fine details challenging.
Other Soldering Methods
Other techniques, such as induction soldering and wave soldering, play significant roles in various industries. Induction soldering uses electromagnetic fields to heat the components, offering precise control and speed. This method is common in high-volume manufacturing. Wave soldering, using a wave of molten solder, is automated and ideal for large-scale assembly of printed circuit boards (PCBs). The automated nature of wave soldering allows for rapid throughput, but it’s not suitable for smaller or more delicate work.
Choosing the Right Technique
The selection of the appropriate soldering technique depends heavily on the specific application and requirements. Wire gauge and material properties are also critical factors. Thicker wires might benefit from a soldering gun for efficient heating, while thinner wires or delicate components are better suited to a soldering iron’s precise control. Understanding the material’s melting point is essential to prevent damage.
Learning how to solder wires is a super useful skill, but sometimes the toughest part is getting the right tools. And sometimes, you find a creative solution to a completely different problem that actually helps with soldering! Like when I stumbled upon this weird pool noodle hack helped me fix my biggest laundry ick. Turns out, the concept of using unconventional tools for a precise grip can also apply to getting those wires soldered perfectly.
Just gotta find the right noodle, I guess!
Different materials might require different soldering alloys, each with its unique melting point and properties. The table below provides a summary of the pros and cons of each soldering method.
| Method Name | Advantages | Disadvantages | Suitable Applications |
|---|---|---|---|
| Soldering Iron | Precise control, suitable for small components, relatively inexpensive | Slower heating, requires more operator skill | Circuit board repairs, small electronic assemblies, delicate work |
| Soldering Gun | Faster heating, suitable for larger components, good for mass production | Less precise control, potential for component damage | Large electronic assemblies, high-volume production, repairs requiring speed |
| Induction Soldering | Precise control, high speed, minimal thermal stress | Requires specialized equipment, higher initial cost | High-volume production, specialized applications |
| Wave Soldering | High throughput, automated process, ideal for large PCBs | Less precise control, not suitable for small components | Mass production of PCBs, large-scale electronic assemblies |
Step-by-Step Procedure: Using a Soldering Iron
This procedure Artikels the fundamental steps for using a soldering iron.
- Prepare the Work Area: Ensure a clean and well-ventilated area. Gather all necessary tools, including the soldering iron, solder, flux, and the components to be joined.
- Heat the Iron: Plug in the soldering iron and allow it to heat up completely. This time will vary based on the iron’s specifications. Check the manufacturer’s guidelines for correct temperature settings.
- Apply Flux: Apply flux to the areas to be joined. Flux removes oxidation, allowing for a better solder connection.
- Apply Solder: Position the tip of the heated soldering iron on the component to be joined, and bring the solder to the area.
- Cool Down and Clean Up: Allow the solder to cool and solidify. Clean the soldering iron tip and any excess solder.
Preparing the Wires for Soldering
Getting your wires ready for soldering is a crucial step. A clean, properly stripped wire ensures a strong and reliable solder joint, which is vital for any electronic project. A poorly prepared wire can lead to weak connections, overheating, and even component failure. This section details the essential steps in preparing wire ends for soldering, including techniques for various wire gauges.
Learning to solder wires is a surprisingly useful skill, especially when tackling DIY projects around the house. It’s a great way to save money and get creative, and it can even help with some fun backyard projects like building a new bird feeder or a cool little lighting system. Check out some fantastic budget-friendly backyard ideas at backyard ideas on a budget for inspiration.
So, whether you’re aiming for a low-cost project or just want to learn a handy new skill, mastering the art of soldering wires is a worthwhile endeavor.
Stripping Wire Insulation
Properly stripping the insulation from wires is essential for successful soldering. The insulation must be removed completely and cleanly, exposing the bare copper wire without damaging it. The amount of insulation to remove should be sufficient for a good solder joint but not so much that you remove too much copper wire. This ensures a strong bond. Different wire gauges require different stripping methods to prevent damage.
Wire Gauge and Stripping Techniques
| Wire Gauge | Stripping Method | Tool Suggestions |
|---|---|---|
| 22-20 AWG | Using a wire stripper or a sharp utility knife | Wire stripper, small-bladed knife |
| 18-16 AWG | Using a wire stripper or a sharp utility knife. Be careful not to damage the copper wire | Wire stripper, small-bladed knife, or a pair of wire cutters (with a stripping feature) |
| 14-12 AWG | Using a wire stripper or a sharp utility knife. Be extra careful not to nick the copper wire. | Wire stripper, utility knife, or a pair of wire cutters (with a stripping feature) |
| 10-8 AWG | Using a wire stripper designed for larger gauges. Consider using pliers to help guide the wire | Wire stripper designed for larger gauges, wire cutters with stripping feature |
This table provides a general guideline. Always check the specific instructions for your wire stripper if needed. The best method is the one that provides the cleanest and most efficient removal of the insulation without damaging the wire. Adjust your technique based on the wire gauge to ensure accuracy.
Wire Cleanliness
Wire cleanliness is paramount for achieving a strong solder joint. Any dirt, oxidation, or other contaminants on the wire surface can prevent the solder from properly adhering. This will result in a poor electrical connection. Cleanliness is directly related to the strength and reliability of the solder joint.
Cleaning Wire Ends
A clean wire is a strong wire. This section Artikels a procedure for cleaning the wire ends before soldering:
- Preparation: Gather your tools and materials: a wire brush, sandpaper (fine grit), and a soldering iron.
- Wire brushing: Gently brush the stripped wire ends with a wire brush to remove any loose particles or oxidation. Use firm but gentle strokes.
- Sanding (optional): If the wire shows any significant oxidation or residue, lightly sand the wire ends with fine-grit sandpaper. Take care not to damage the copper wire.
- Inspection: Visually inspect the wire ends to ensure they are clean and shiny. Any remaining oxidation should be removed. Any imperfections can be re-cleaned.
By following these steps, you can ensure that your wire ends are properly prepared for soldering, leading to a stronger and more reliable electrical connection. A well-maintained soldering station is critical for ensuring the integrity of the connections made.
The Soldering Process
Mastering the soldering process is crucial for achieving strong and reliable electrical connections. This involves careful application of heat and solder, ensuring a consistent and controlled outcome. Understanding the steps and potential pitfalls is essential for achieving professional-quality results.Applying heat is the first critical step. The heat source, typically a soldering iron, must be applied to the metal components, heating them to the optimal temperature for the solder to flow.
Crucially, the heat should be concentrated on the specific points requiring connection, not the surrounding area, to prevent damage or unwanted melting.
Applying Heat to Wires and Solder
Proper heating is vital for successful soldering. Use a soldering iron with a tip appropriate for the wire gauge and the joint’s size. The tip should be clean and tinned (coated with solder) for optimal heat transfer and to ensure a smooth solder flow. Apply the iron to the joint for a short, controlled period. The time varies based on the materials and the size of the joint, but it is generally best to use the minimum necessary time to heat the joint without overheating the surrounding components.
Proper Solder Application
Applying solder correctly is essential for creating a strong joint. Once the joint is adequately heated, carefully apply solder to the joint. The solder should flow easily and evenly, filling the gap between the wires. Ensure that the solder completely wets the metal surfaces, creating a strong, continuous connection. Excess solder can be detrimental, so use a small amount at a time and remove any excess with a solder wick or a clean, sharp tool.
Learning to solder wires involves precision and heat control. You need to understand the different temperatures involved, just like you need to understand the interplay of warm and cool colors in design. For example, understanding warm and cool colors can help you pick the right shade for your next project, much like using the right temperature will make your solder job successful.
understanding warm and cool colors This knowledge will help you get the right temperature for your soldering iron, ensuring a strong and lasting connection. Mastering soldering techniques takes practice, but understanding these fundamentals will improve your results.
Maintaining Consistent Temperature During Soldering
Maintaining a consistent temperature is paramount to successful soldering. Fluctuations in temperature can lead to poor solder flow, weak joints, or even damage to the components. A good soldering iron should have a stable temperature setting. Regularly check the temperature and adjust as needed. Ensure the iron tip is kept clean and well-maintained, as a dirty tip can hinder the heat transfer and lead to temperature variations.
Using a temperature-controlled soldering station can also assist in maintaining consistent temperatures.
Potential Soldering Errors and Their Impact
Several errors can occur during the soldering process, compromising the integrity of the electrical connection. These errors include insufficient heating, improper solder application, or overheating, which can lead to weak joints, short circuits, or even component damage. Understanding these potential problems is key to preventing them and ensuring high-quality solder joints.
Common Soldering Errors
| Error | Cause | Prevention Methods |
|---|---|---|
| Insufficient Heating | The joint wasn’t heated enough to melt the solder effectively. | Ensure the iron tip is hot enough. Apply heat to the joint for the appropriate amount of time, depending on the size and materials. |
| Poor Solder Flow | The solder doesn’t wet the metal surfaces, creating an uneven or discontinuous connection. | Use the correct type of solder for the metals. Ensure the joint is clean and free of contaminants. Apply solder in small amounts to prevent excessive flow. |
| Overheating | The components or wires are heated beyond their permissible temperature limit, causing damage. | Use a lower wattage soldering iron, if necessary. Apply heat for short bursts. Allow the iron to cool between applications. |
| Excess Solder | Too much solder is applied to the joint. | Use a small amount of solder at a time. Use a solder wick or a clean tool to remove excess solder. |
| Contaminated Joint | Foreign materials (e.g., oxides, grease) on the joint prevent the solder from bonding properly. | Clean the joint thoroughly with a suitable cleaning agent before soldering. |
Cooling and Finishing the Joint

Cooling and finishing the solder joint are crucial steps in achieving a strong and reliable electrical connection. Proper cooling allows the solder to solidify and the heat to dissipate, preventing defects and ensuring a secure bond. Finishing techniques ensure a professional-looking joint that is resistant to stress and environmental factors. This section will detail the importance of proper cooling and methods for achieving a high-quality solder joint finish.Cooling is essential to allow the solder to solidify and the heat to dissipate.
Improper cooling can lead to weak joints, potentially resulting in intermittent connections or complete failure. Rapid cooling can trap heat and prevent the solder from solidifying completely, creating porosity or other imperfections in the solder joint.
Cooling Process and Importance
Cooling the solder joint allows the solder to solidify properly. The heat from the soldering iron is transferred to the joint, causing the solder to melt and flow. As the joint cools, the solder solidifies, creating a strong mechanical bond. The rate of cooling is crucial; too rapid a cooling rate can lead to inadequate solidification, whereas too slow a cooling rate can allow for solder bridging or other defects.
Allowing sufficient time for the solder to cool evenly ensures a strong and reliable joint. This also prevents stress on the solder, which can lead to cracking or detachment over time.
Ensuring a Smooth and Even Solder Joint
A smooth and even solder joint is crucial for both electrical conductivity and mechanical strength. Using a controlled and consistent heat source is important to ensure the solder flows evenly over the joint. Proper technique and appropriate soldering iron settings are critical in preventing uneven solder flow. Excess solder can create solder bridges, impacting the electrical conductivity of the joint.
Controlled heating and appropriate solder application are essential in achieving a uniform joint, minimizing defects.
Finishing the Solder Joint
Properly finishing the solder joint involves a few crucial steps. First, ensure the excess solder is removed. Using appropriate tools, such as solder wick or a desoldering braid, removes excess solder and improves the joint’s appearance. Removing excess solder is essential to prevent solder bridging, which can short out the circuit. Furthermore, ensuring the solder joint is smooth and even is vital for preventing stress points.
Cleanliness is key; a clean joint contributes to a better connection.
Importance of Proper Cooling for Preventing Issues
Proper cooling prevents various issues, including solder bridging, where solder flows across undesired areas. This can lead to short circuits and damage to the circuit board. Slow cooling can lead to the solder not solidifying completely, creating voids or porosity in the joint. These defects compromise the electrical conductivity and mechanical strength of the connection. Fast cooling can create uneven solidification, leading to weak points in the joint.
These problems can be avoided by controlling the cooling process and ensuring that the joint is allowed to cool sufficiently and evenly.
Finishing Techniques
| Technique | Steps | Tools |
|---|---|---|
| Solder Wick Removal |
|
Solder Wick, soldering iron |
| File/Sandpaper Finishing |
|
Fine-grit file or sandpaper, isopropyl alcohol |
Properly removing excess solder is critical to ensuring a high-quality connection. Choosing the appropriate technique depends on the specific application and the desired outcome. The methods detailed here will provide a clear path to achieve a strong and reliable connection.
Troubleshooting and Maintenance: How To Solder Wires
Soldering, while a fundamental skill, can sometimes lead to frustrating issues. Understanding common problems and their solutions is crucial for achieving reliable and professional-quality connections. This section details troubleshooting techniques, equipment maintenance, and various solder types, empowering you to maintain your soldering setup and produce consistent results.
Common Soldering Problems and Solutions
Identifying and resolving issues like cold solder joints, bridging, and poor solder connections is vital for successful soldering. These problems can stem from inadequate technique, improper material selection, or equipment malfunctions.
- Cold Solder Joints: These joints appear visually similar to properly soldered connections but lack the necessary strength and conductivity. They often result from insufficient heat, inadequate solder application, or insufficient contact time between the heated solder and the components. To rectify this, ensure proper heating of the joint, apply more solder, and use the correct solder type for the application.
Increase the time the soldering iron spends at the joint to allow for proper penetration and bonding.
- Bridging: This happens when solder flows across unintended areas, shorting components or disrupting circuitry. Bridging often arises from excessive solder application, improper flux application, or overheating. Carefully control solder application, ensure adequate flux application, and maintain a controlled heat source to prevent bridging.
- Poor Solder Connections: Weak or unreliable solder connections frequently stem from inadequate solder application or inconsistent heating. These issues can result in intermittent circuit behavior or outright failure. Verify proper contact between the components and the solder, ensuring the heating process is consistent and adequate for the specific components.
Soldering Equipment Maintenance, How to solder wires
Regular maintenance of your soldering equipment is essential for optimal performance and longevity. Cleanliness and proper temperature control are key factors.
- Cleaning the Soldering Iron Tip: Regularly clean the soldering iron tip to remove any oxides or residues that can interfere with proper heat transfer. Using a dedicated tip cleaner or fine steel wool can effectively remove contaminants. A properly maintained tip is essential for efficient heat transfer and reliable solder joints.
- Temperature Calibration: Periodically calibrate the soldering iron’s temperature setting to ensure accurate heat output. Use a temperature probe to verify that the set temperature matches the actual temperature. This will help ensure consistency in the soldering process and prevent problems with cold joints.
- Inspection and Replacement of Components: Inspect the soldering iron’s power cord and the power supply for any signs of damage. Replace any damaged components promptly to prevent electrical hazards and ensure continued safe operation. Inspecting the components of your equipment is a crucial step in preventative maintenance.
Solder Types and Properties
Various solder types exist, each with specific properties tailored to different applications. The choice of solder depends on the specific demands of the project.
| Type | Properties | Applications |
|---|---|---|
| Lead-free solder | Environmentally friendly, higher melting point, often more difficult to work with than traditional solder. | Electronic components, printed circuit boards, and applications requiring environmental friendliness. |
| Lead-based solder | Lower melting point, easier to work with, creates strong joints. | Electrical wiring, general electronic repairs, and applications where lower cost is a priority. |
| Rose’s Solder | A specific alloy with a high tin content. | Applications requiring a very fine solder joint, such as those in delicate or small-scale electronics. |
Safety Considerations
Soldering, while a fundamental skill in electronics, carries inherent risks if proper precautions aren’t taken. Ignoring safety guidelines can lead to burns, electrical shocks, and inhalation of harmful fumes. This section emphasizes the critical importance of safety measures to ensure a safe and productive soldering experience.Soldering involves working with heat, potentially hazardous chemicals, and electrical components. Failure to adhere to safety protocols can lead to significant accidents, ranging from minor injuries to severe ones.
Therefore, understanding and consistently practicing safety measures is paramount to a safe soldering practice.
Potential Hazards
Soldering activities pose several hazards. These include burns from the soldering iron, electrical shocks from energized circuits, and inhalation of fumes released during the soldering process. Understanding these hazards and their potential impact is crucial to implementing effective preventative measures.
Safety Gear and Protective Measures
Implementing appropriate safety gear is vital. This includes wearing safety glasses to shield your eyes from flying debris and sparks generated during the soldering process. Using heat-resistant gloves protects your hands from the soldering iron’s high temperature. Furthermore, a fire-resistant apron is an excellent protective layer. A face shield or a full-face respirator, depending on the intensity of fumes, is recommended when working with lead-free solders or soldering materials that may release toxic fumes.
A fire blanket should be readily available in case of a fire.
Ventilation and Lighting
Adequate ventilation is critical. Working in a well-ventilated area reduces the inhalation of fumes, minimizing potential respiratory issues. These fumes can contain harmful chemicals, especially when soldering materials that are not lead-free. The fumes can lead to health issues such as respiratory problems or eye irritation. Proper ventilation prevents these issues.
A well-lit area is equally important for clear visibility and precise work, reducing the risk of errors and accidents. Sufficient light reduces eye strain and improves concentration.
Disposal of Soldering Materials
Proper disposal of soldering materials is essential for environmental protection. Used solder, flux, and other soldering materials should be disposed of according to local regulations. Hazardous materials should be segregated from regular waste. Lead-based solder, for example, requires specific disposal methods. Contact local authorities or waste management companies for detailed guidelines on disposal procedures.
Always consult local regulations and guidelines for proper waste disposal.
Epilogue
In conclusion, mastering how to solder wires involves a blend of technique, precision, and safety. By following the steps Artikeld in this guide, you’ll be well-equipped to create reliable solder joints. Remember, practice makes perfect! With patience and attention to detail, you can achieve professional-quality results. The key takeaway is to prioritize safety, use the right tools, and understand the process.
This thorough approach ensures you’re confident and capable in any future soldering endeavor.